This was a HARD challenge for me because I’ve never had much interest in decorative stitches. My previous machine had maybe 12 different stitches, just the basics really. The newer machine I bought a couple years ago has something like 300 stitches but since I’ve never needed them before, I haven’t touched them. I usually start any kind of challenge by flipping through a potential project list I keep with inspiration photos to see if anything jumps out at me and I stumbled on this photo with a note: “Anything with fagoting”
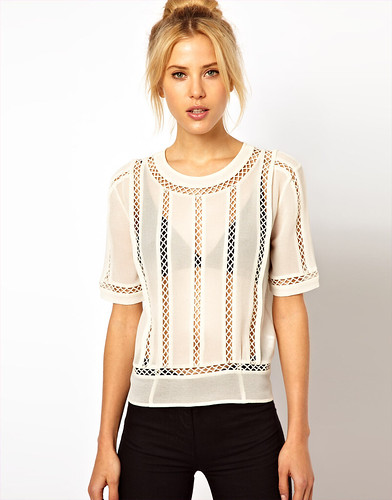
The essence of a fagoted seam, as I understand it, is that instead of joining two pieces of fabric directly together, you finish the edges somehow, then join the pieces together using a stitch that zig zags between them. Did my machine have any fagoting stitches? Why yes, it did! And here’s what I made…

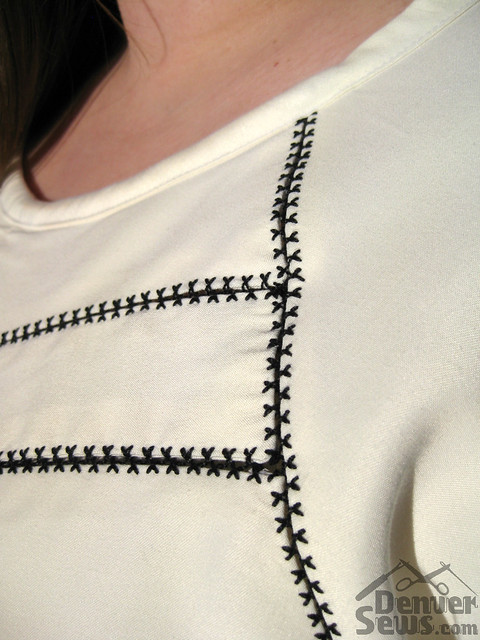
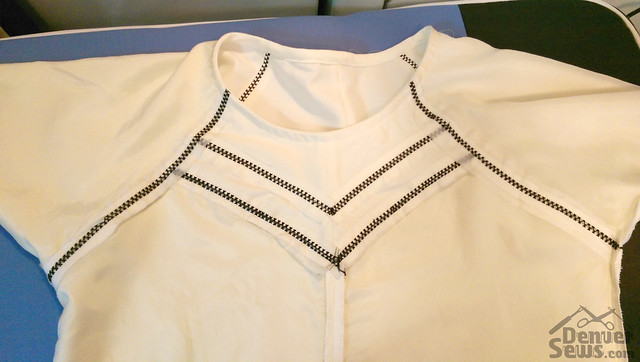
Obviously this is nothing like the inspiration photo, but the inspiration was more about the seam finish… I didn’t really want to wear anything that see-though! The pattern I used is the Papercut Clover Dress. I chose it because I thought it had interesting seams that I could highlight with fagoting, and the seams were also in a place where I wouldn’t be revealing anything through the gaps. In the finished garment from a distance you can’t even really tell there are gaps. Ideally I think I would prefer more space between the pieces to highlight the seam finish – a lot of work went into it! However, for all of the decorative stitches on my machine I played with that could be used for fagoting, there was only one fixed width for every stitch. It was 7mm in this case and I think that is the maximum stitch width of my machine. Here’s a closeup of the fagoting:
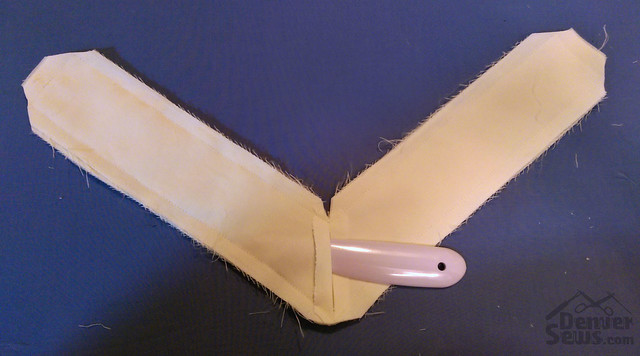
The challenge for me was figuring out how to finish the seams that were joined by the fagoting. For most of the seams like the raglan sleeves and the lower part of the main body I serged the edge of the piece and just folded over at the seam allowance. However with the top pieces I was worried about having corners showing so I decided to cut two of the pieces and fully enclose them. It was kind of a puzzle to figure out how to do this with the V insert since it had fagoting on all four sides (really it’s just free floating!), but I settled on leaving a gap in the center seam on the back side and turning it though that, then slip stitching it shut.
I did the same treatment on the piece above and them laid them together to do the fagoting between them and discovered this…
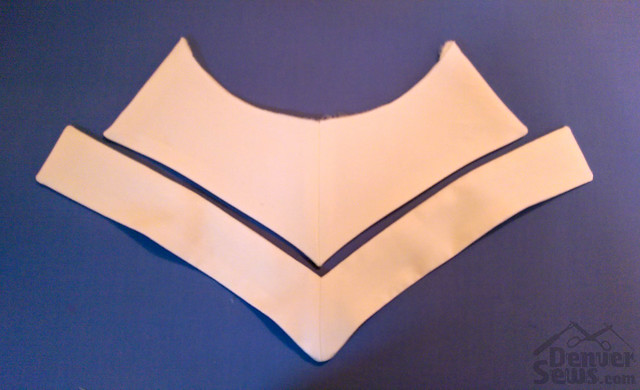
The V insert piece is an inch longer the the piece above! Laying the pattern pieces together I could see that the pattern was the same way. (I was worried maybe I stretched something.)

I’m not sure what the intent of the pattern is here. The lower edge of the top piece is on the bias and the bust insert is on the straight grain, so maybe they intended you to stretch the bias to ease them together? The pattern instructions didn’t say. I emailed the pattern company (Papercut Patterns) to ask, but I haven’t heard back from them after about a week. Disappointing. Anyways… the lesson here is that if you are going to add fagoting to something, walk your seams first! You can’t do any easing with a fagoted seam so the edges need to be the same length. I ended up ripping out my seams on the bust insert, cutting down by an inch, then re-sewing it. Ouch. Here’s what it looked like once I had it all assembled. You can see I used interfacing behind the fagoted seams – it was dissovable so I threw it in the was right after this and all that disappeared.
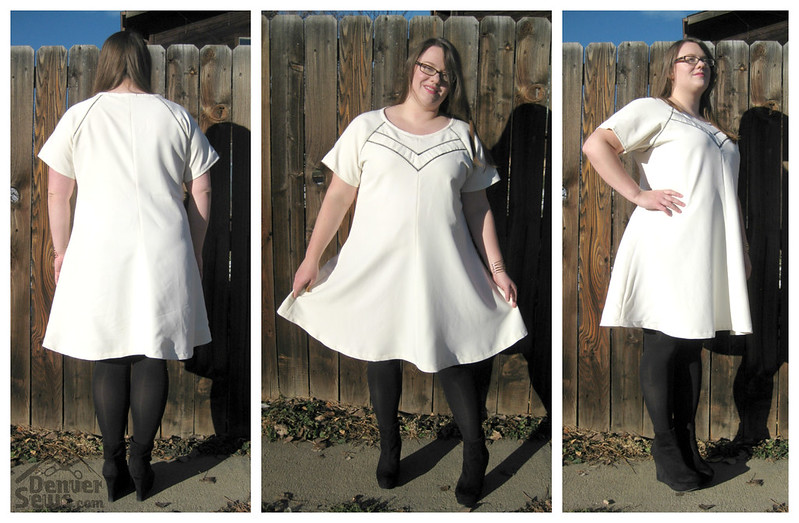
Difficulties aside, I’m happy with the resulting garment. I really like the cut of this pattern and plan on making the top version in a thinner fabric as I think was intended. The cut of the front is great – the pieces on either side of the bust insert are curved in a way that makes it hug the top of the bust in a very flattering way. I also like that the four gore construction allows it to curve in at the waist nicely. It’s not fitted per-say – there’s enough ease that you don’t need a zipper – but the amount of volume isn’t overwhelming either.
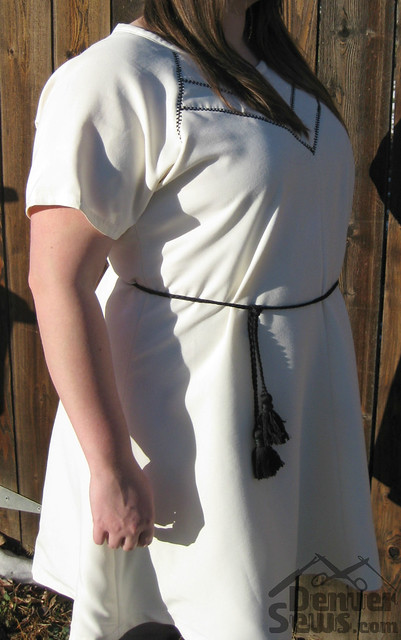
The pattern also contained instructions for creating a tassel belt from embroidery floss. I really liked it in the product photos and decided to make it but it turned out too short for my tastes. (See below.) I was amazed at how simple it is to create a tassel from a 40 cent pack of embroidery floss. Basically you just fold it in half, wrap a bit around the top, and then give it a haircut which is fun! One beef with the instructions… They said to measure how long you wanted the belt to be, add 1″, then braid the strands. I figured braiding would shorten it by more than 1″ so I added 5″… it still turned out at least 6″ shorter than what my intended length was! I suppose how tightly you braid something could affect it, but this wasn’t braided particularly tight.
A couple other minor nitpicks about the pattern for anyone who wants to make it:
- The instructions said to hem the sleeve by 1″ but the sleeve tapered all the way to the edge making that difficult. I ended up having to split my seam under the arm to hem it.
- I didn’t like the way the hem in the product photo looked like it went up in a “V” shape in front. (See the product photo below.) It looks like a circle skirt hem on the pattern pieces but I think the way the gores add fullness to the front makes it hang differently than a circle skirt would. My hem hung the same way so I marked it and chopped it to make it move even.

That might sound like a lot of issues but they were pretty minor – I’m still glad I bought the pattern. As for using my machine to do the fagoting… I’m not sure. I would have liked to allow more spacing between the seams. And for this particular look I had to pivot at the “V” in front which looks a little sloppy up close. If I did it again I’d probably hand stitch the fagoting to be able to control all of these things better. But I still think there are other applications where I’d like machine fagoting and I’m more open minded now about those fancy stitches above #12!

I love this! I can’t remember where I read it now, but just in the past couple weeks I saw a post about hand sewing fagoting…by pinning the two pieces to a piece of paper to keep the stitching even and then sewing them together with the fagoting stitch. I thought it was a great idea.
LikeLike
Very nice! That is a challenge that will be added to my list of new techniques to experience. The dress is really cute on you.
LikeLike
Love your little bundles of sticks!
LikeLike
OMG your dress turned out amazing! I’ve always wanted to try faggoting, but I could never figure out a modern way to use it – you managed it beautifully! You look great in the dress – I want this pattern!
LikeLike
Seriously, you did a great job! And placing it on the yoke and raglan seams was adds to the design.
LikeLike
What a great dress! I’d never heard of fagotting before, looks lovely.
LikeLike
You look great in the dress, and the the fagotting is beautiful! The “featherstitch” is another candidate to use for fagotting, if your machine has it.
LikeLike
Thanks! I think I know the stitch you’re talking about. My machine had a handful that could be used for this.
LikeLike
Fascinating! I didn’t even think of fagoting as something I could try. We might have to have this challenge again 🙂 Very nicely done, Jamie.
LikeLike
No do overs! LOL. When I saw your post I thought… d’oh! I could have just sewn this stitch on top of a regular seam and it probably would have looked the same from a couple feet away. If you’re machine does wider stitches I’d like to see what this stitch looks like on yours. Maybe Sunday?
LikeLike