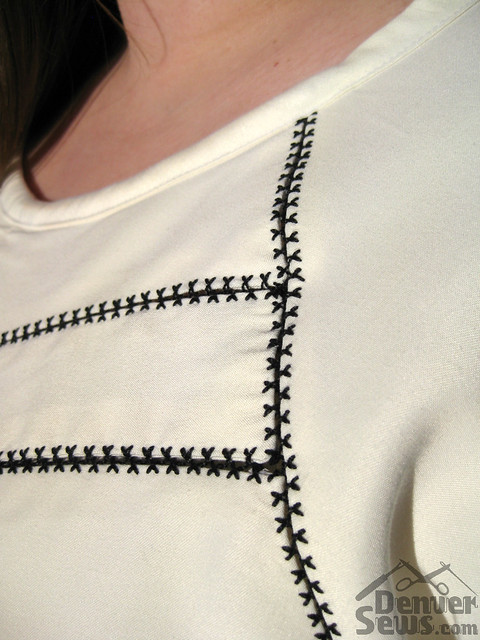
I made a bunch of test swatches before sewing up the fagoted dress I posted on Friday, so I thought I’d share a tutorial with you… The first step was to sew a line of the stitch I wanted on some stabilized fabric. (I just put paper behind my fabric here – this is just to keep the stitch from bunching up and giving you a wrong measurement.) Get out a ruler and measure how wide you want the gap between your fabrics to be. In this case, I measured between the points of the ‘>’ shapes and got 1/8″.

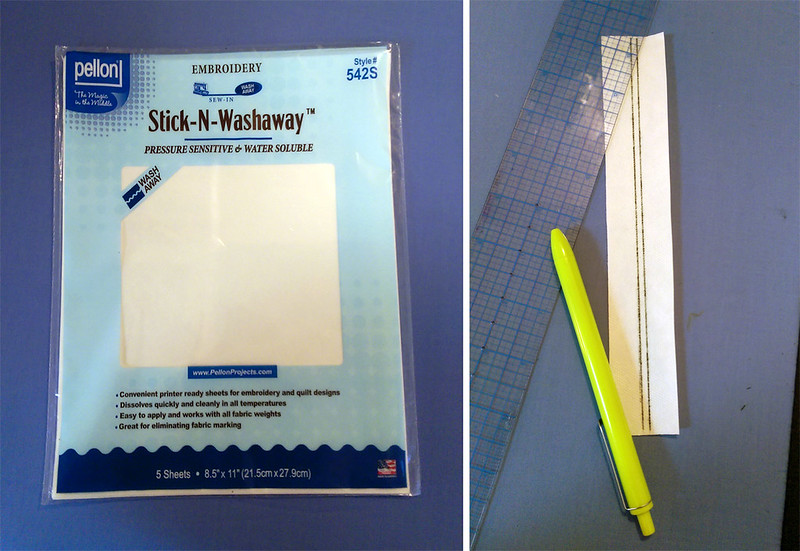
I did some internet research and read several different ways to do this stitch. One was sticking a coffee stirrer between the pieces of fabrics to keep them space evenly.. I tried it but apparently I’m not that skilled! To keep it easy I bought this “Stick-N-Washaway stabilizer from JoAnn’s. Draw two lines on the stabilizer spaced at your measurement from above. Note: In this picture I used a pen, but then I realized that pen might stain my white dress fabric when washed so I switched to pencil.
Stick your fabrics so the seam edges are along the lines you drew. Before this step (on a garment) you’ll have to do something to prevent the seam edges from unraveling. On my white dress I had a lining for some pieces and others I just serged and folded over. You could also run a stitch along the fold as I did below.

Choose a fagoting stitch on your machine and stitch, keeping the gap centered in your foot. Here I used an edge stitch foot just so I had a nice line at the center to look at. You can use a regular foot or any foot with a wide hole.

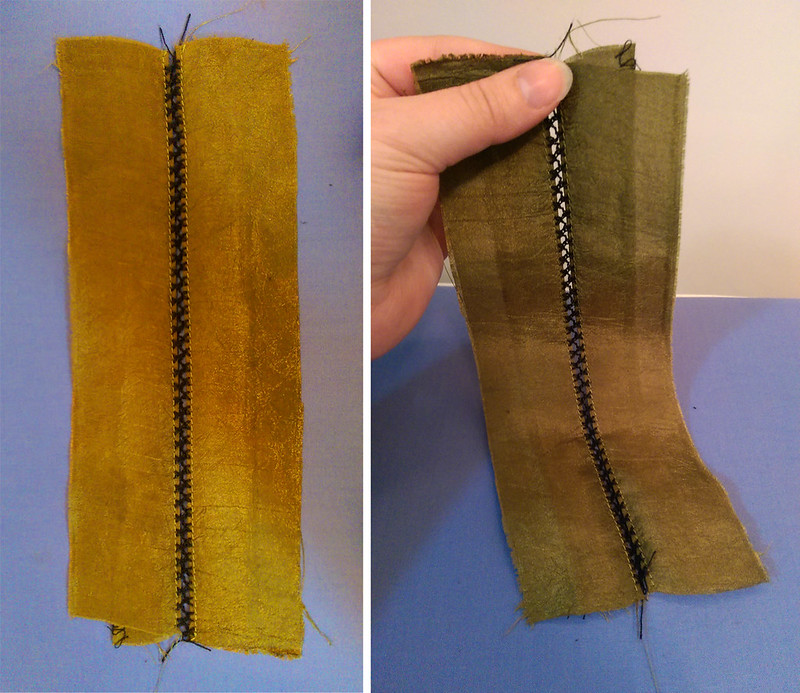
Here’s what it looks like after stitching.

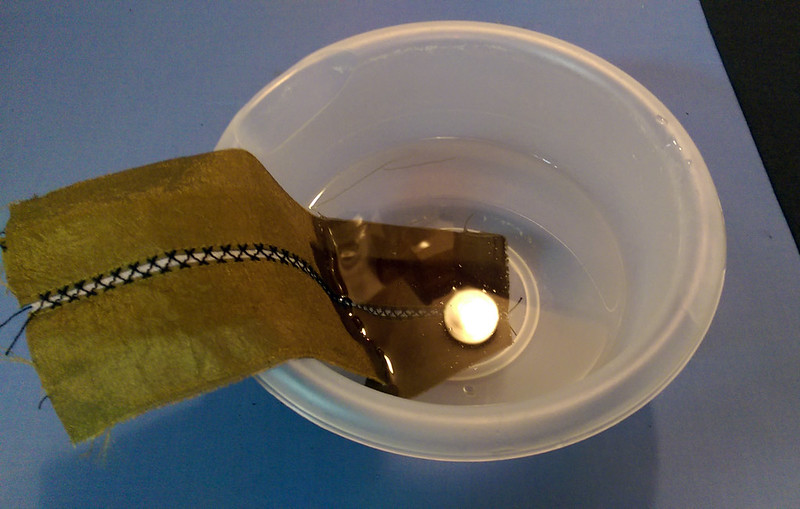
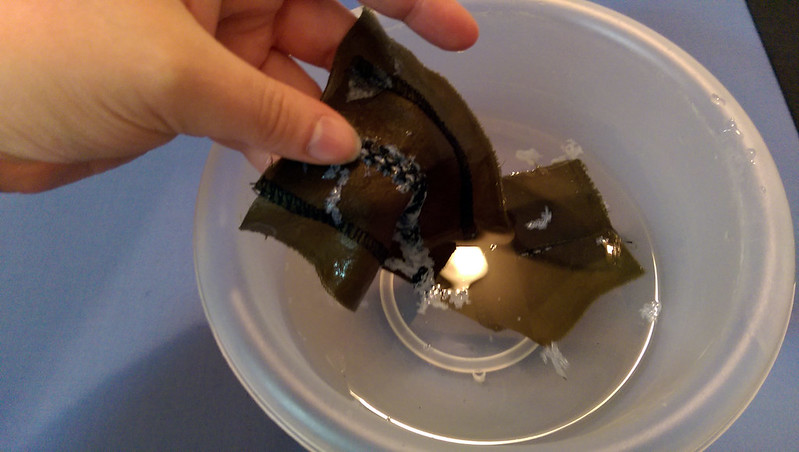
Now the fun part – wash out the stabilizer! For a garment you can do all the seams and then throw it in the wash.
Here’s what it looks like with the stabilizer removed.
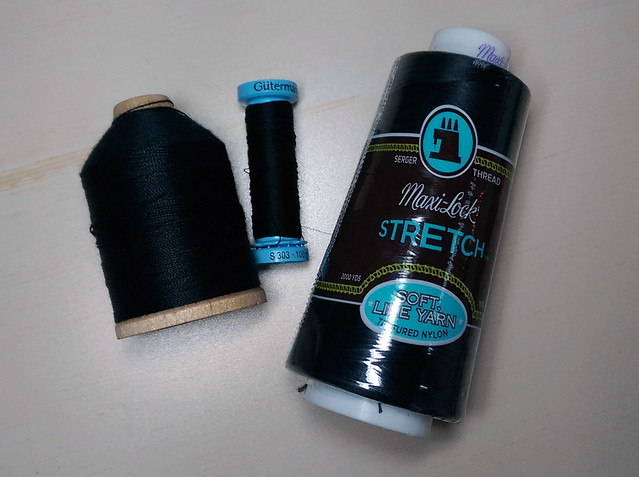
I can’t stress enough that if you’re going to play around with new decorative stitches, you need to test first to get the look you want. One of the tests I did before sewing up the Clover dress was to try out different threads. I wanted the thread to be thicker than standard thread so the fagoting would stand out. Below are the threads I tried. From left to right: jeans topstitching thread from Wawak, Gutermann silk thread, and Maxi-Lock Stretch which is a wooly nylon (it fluffs up – usually it’s used in the looper in sergers).
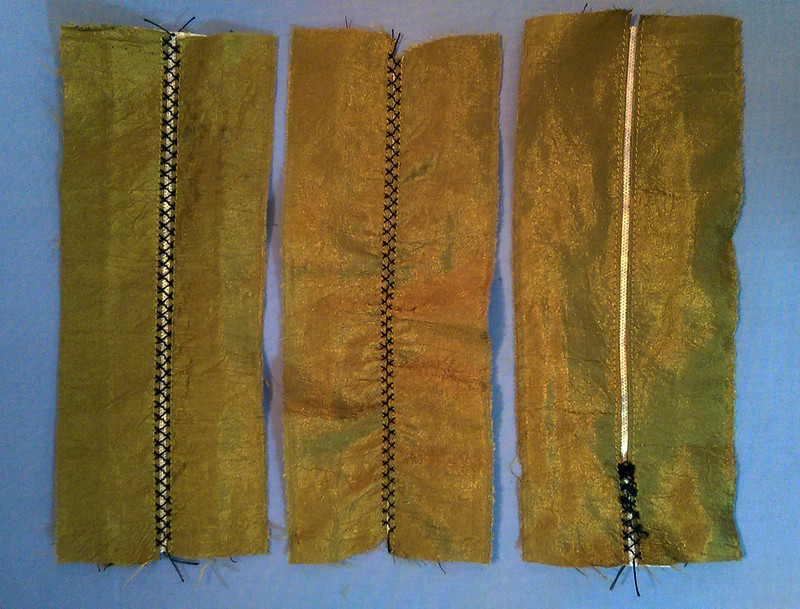
Initially I thought I would like the silk because it was soft but strong. But look at the results… On the left the jeans topstitching thread looks fine. The silk looked similar until I gave my swatch a press… then it shrunk like crazy! Glad I tested pressing it! The wooly nylon got knotted in a huge tangle.
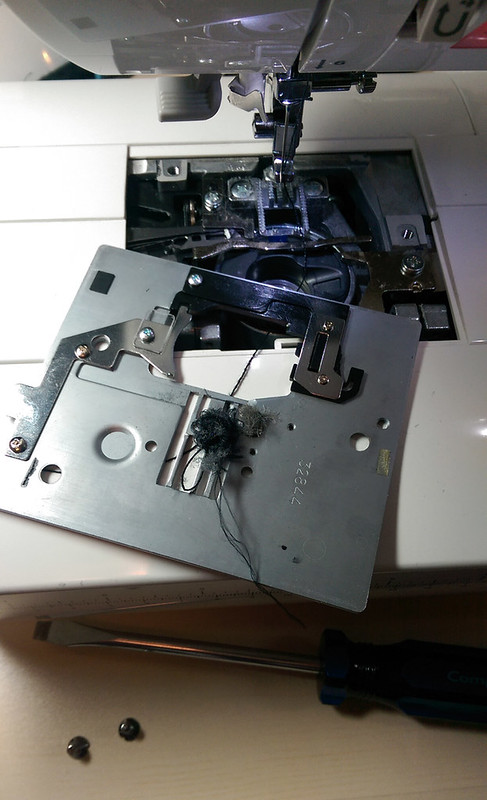
I tried to pull the tangle of wooly nylon out with a tweezers but couldn’t get it out, so I ended up taking my throat plate off. No wonder I couldn’t pull that through the slot! Note to self: NEVER use wooly nylon in a sewing machine! (Someone smarter than me is probably reading this right now and saying DUH.)
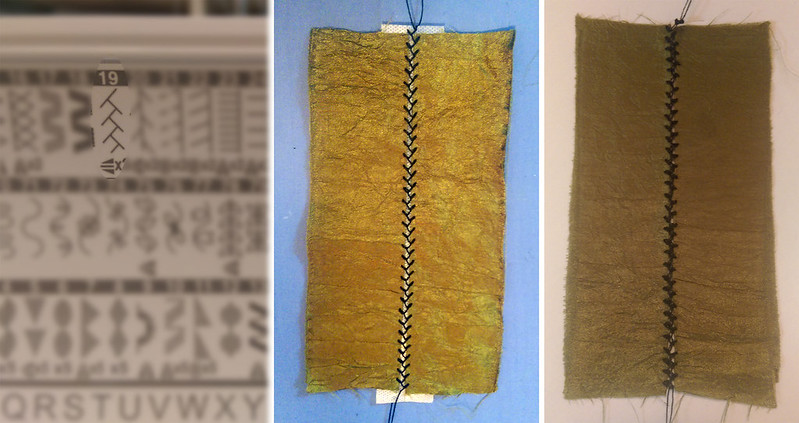
Just for fun, after finishing my dress I played around with a few other stitches on my machine to see if they could be used for fagoting as well. This one was labeled for fagoting or patchwork. I really liked it with the stabilizer, but when I washed the stabilizer out I noticed it had a tendency to collapse more if you didn’t get both of the stitches on the tips of the branches on the fabric.
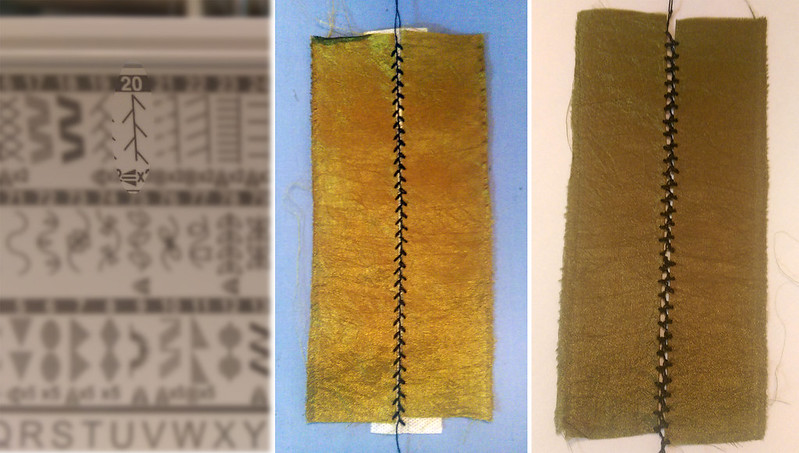
This patchwork stitch looked similar to the above, but you can see how it collapses when you wash out the stabilizer. For fagoting, I think your stitch needs to form straight lines across the gap or the shape of it will deform.
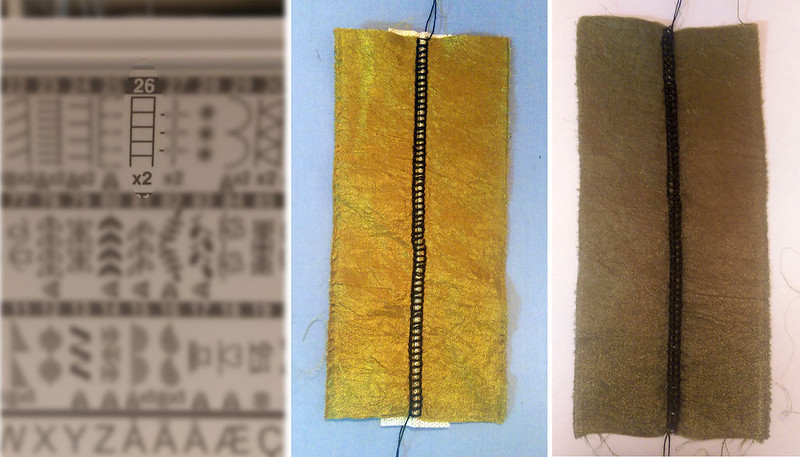
I thought this one would be perfect, but there’s so much thread you can hardly see through the gap. The machine stitches twice across the gap for every line so there are four threads (two top, two bottom). This one might be better with a thinner thread. I also read later that the “x2” beneath some of the stitches means that you can stretch the length of the stitch so it is twice as long. That might also help create some gaps between the stitches.
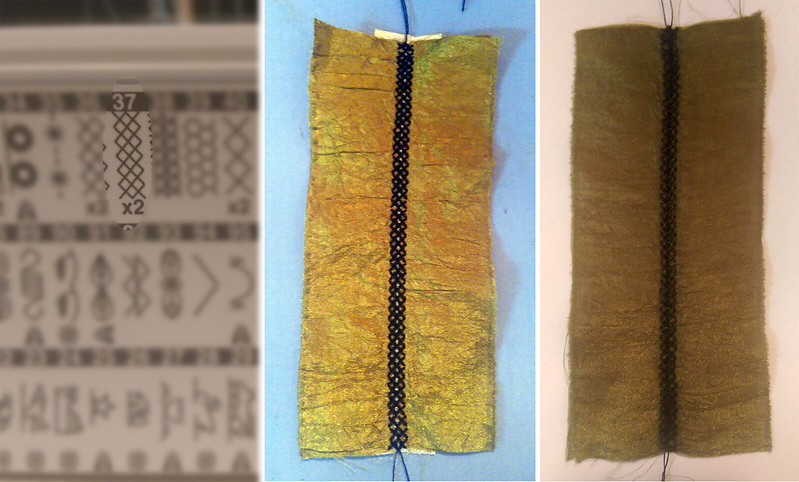
This is a pretty stitch, but way too dense for fagoting! If you had a machine that could make it wider and longer it might look really nice.
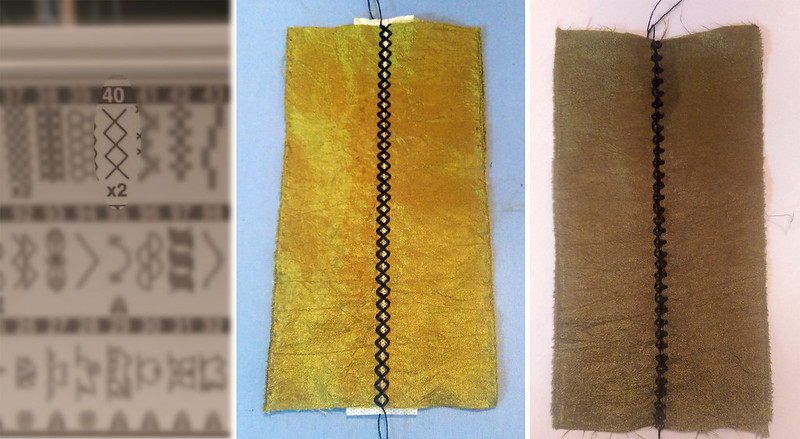
This diamond stitch was so similar to the one above, but had larger gaps so I thought it would work great. NOT! I’m not exactly sure why it looks so terrible without the stabilizer, but I think it has something to do with the order the machine stitches it. Instead of stitching in a diagonal line from left to right, it stitched down to the bottom of the diamond, then back up to the right, and so on.
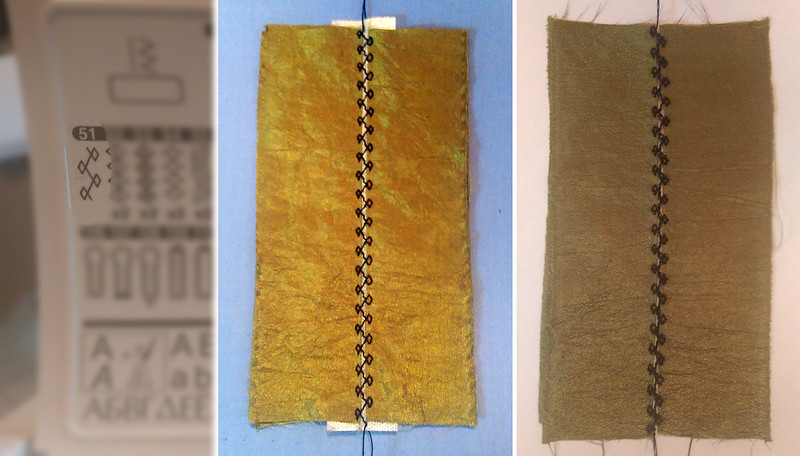
This one looks like a fagoting stitch and indeed it works great. By the way, my machine had stitches 21-100 labeled in the manual as “functional and decorative stitches” so it doesn’t really tell you what you can use for fagoting and what you can’t. Another reason to experiment!

Excellent tutorial. Just what I needed. Thanks.
LikeLike
Good tutorial! Thanks!
LikeLiked by 1 person
I love this tutorial, THANK YOU! Now I must look at what else you’ve got 🙂
LikeLike
This was a very well done tutorial!
Thank you!
LikeLike
Great tutorial! You’ve also given a few “don’t use stitches” to help us save time and frustration. Thank you for your dedication and determination 😇
LikeLike
Thanks for the tutorial, Jamie. I meant to tell you on Sunday what a beautiful effect your faggotting stitching added to your dress. You did a great job!
LikeLike
Thanks for showing us why we need to test, including removing the stabilizer and pressing, before choosing which stitch to use!
LikeLike
I’ve made so many screw ups by not testing things out first. This IS how you should do it to get awsome results.
LikeLike
Wow that’s fascinating! Good thing you did all those tests before choosing your final stitching. I had no idea it was so complicated. Thanks so much for sharing all those experiments, Jamie.
LikeLike
Great tutorial, I must give this a try.
LikeLike
Nice effect! I love seeing your process steps. I am such a ‘process person’ (vs a product person). I think we learn so much by testing and playing. Good job and thanks for sharing this with us.
LikeLike
Lovely presentation! The trial and error parts were great! I’m sure you have saved several people from hours of “Oh No!”s! You did a great job!! Thank you so much for sharing!
LikeLiked by 1 person