
Quite some time ago Lynne and I (Kitty) split two different fabrics between us. The fabric Lynne shared with me became a top for each of us. The results of that fabric challenge can be found here. Now it’s time for the second shared fabric swap results to be revealed! The fabric I split with Lynne was a more difficult one to work with than her lovely floral knit. Mine was a bold print in a fairly stiff linen blend. The fabric had no drape whatsoever and so it had limited uses. But I was determined to make something fast and easy from it. Okay, to me nothing says fast and easy like a skirt, so a skirt it was!
I pulled out Butterick 4399, a skirt pattern I’d sewn before. I love 4399 because it doesn’t have a waistband, and can be made in many different lengths. I’m never comfortable wearing a waistband, but I felt without one the skirt needed a belt to add interest. I looked everywhere for reddish brown fabric to match the print color but I couldn’t find any! Finally I stumbled across quilt binding in oxblood, which was a pretty close color match, so I sewed it to the top of the skirt as sort of a faux tie belt.
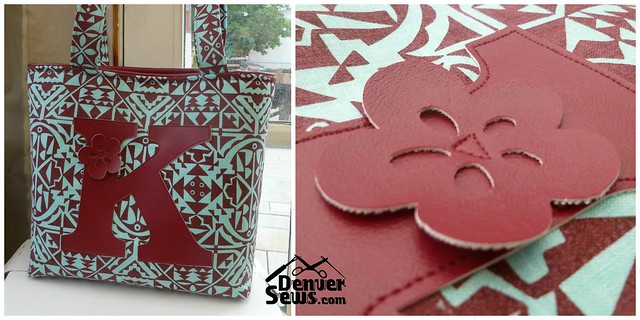
As you can see, by the time I finished this skirt Lynne had already gifted me (!) the fabulous bag she made from her portion of the fabric. I can’t describe how fantastic this bag turned out. It’s absolutely beautiful and so perfect – the print design matches on EVERY seam! As much as this bag makes me aware of how far I still have to go in improving my sewing, (it never occurred to me to match the fabric print on the skirt seams) it also really touches my heart. Lynne is the best of friends, she used her time and her skills to create something for me! And I know how long it must have taken to find that matching reddish-brown color! Lynne is the best, and boy can she sew!
Lynne’s Project
I (Lynne) spent a long, long time trying to decide what to do with this challenging fabric. I thought it was a little too stiff to be used in a garment. So in my mind that left hats and craft items. I decided to let serendipity be my guide.
I went to the fabric store to find anything that would coordinate. The only reddish-brown I found that matched was in a marine vinyl! Fortunately it was on sale and I purchased 2 ft.
Marine vinyl is used for things like covering boat seats. It has a tiny bit of two-way stretch, but not enough to worry about. It looks a lot like a nice fake leather. So my choice was to integrate it into my favorite craft standby, the tote bag.
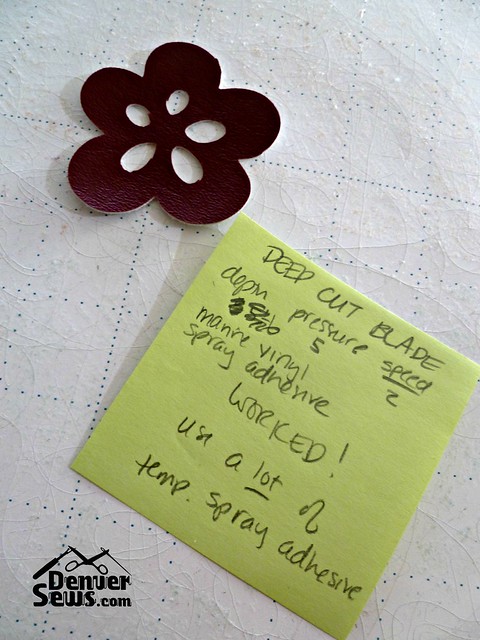
Embellishment I decided to embellish the bag with something cut out of the marine vinyl. I got out my handy Brother ScanNCut and proceeded to do some experiments. I used one of the built-in designs to test cut the vinyl. The key to success with the ScanNCut is to get your fabric or paper to stick to the cutting mat and to keep it sticking throughout the cutting process. For this test, I used temporary spray adhesive and a lot of it. I used the deep cut blade and the following settings: DEEP CUT BLADE DEPTH 6, PRESSURE 5, and SPEED 2. I found the correct depth by using test cuts, starting at 5.
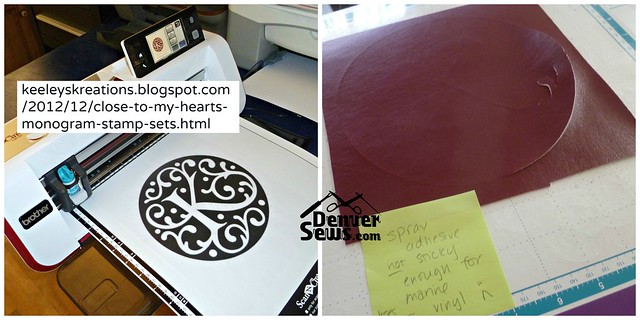
I thought I would try something ambitious and I scanned the beautiful monogram shown below from Keeley’s Kreations. The ScanNCut had no problem scanning the image and converting it into cut data. But when I tried to actually cut the monogram out of the marine vinyl, the vinyl would not stay stuck on the mat even with copious amounts of spray adhesive and I had to stop the cutting. That’s okay, though. The design would have been too elaborate anyway.
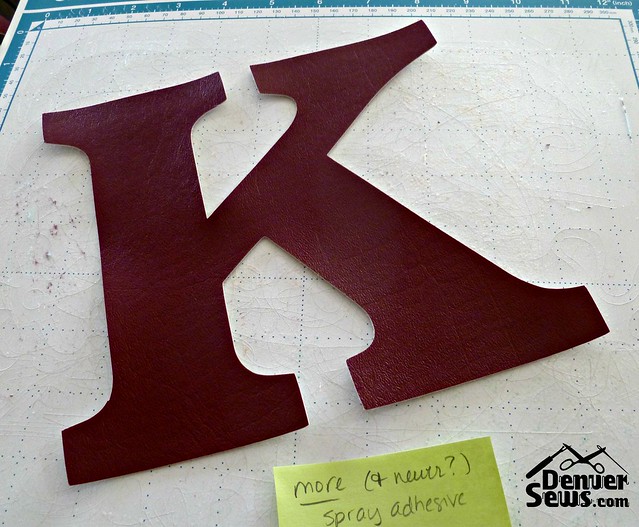
Instead, I used a built-in alphabet on the ScanNCut and enlarged the letter K until it was about 8″ x 8″. Because this was a much faster and less intricate cut, it actually came out perfectly with copious amounts of spray adhesive.
When I was done with the ScanNCut, I cleaned the cutting mat with a fragrance free baby wipe to remove the temporary spray adhesive.
Tote Bag The rest of the project was straightforward. I made my usual 12″ x 12″ x 5″ tote bag. I used Pellon thermolan fusible fleece with the print fabric. I top stitched the letter K onto the front of the bag and added the flower.
The right side of the marine vinyl does tend to stick to the presser foot so I had to help feed the fabric by tugging on it a bit from behind and increasing the stitch length. I could have tried a teflon foot or a roller foot, but I really needed to see where I was stitching so I could follow the edge of the “K”. My regular presser foot has clear plastic in front of the needle so I really needed to stick with that foot. I used a size 70 Universal needle and regular multi-purpose polyester sewing thread.
Normally I would leave the bag turning hole in the bottom of the lining “bag”, but because the vinyl was so thick, I left the hole in the lighter exterior fabric and carefully hand-stitched it closed afterwards.
I love the way this bag turned out and I love the marine vinyl. I loved it so much I made a second pouch just for fun based on the Dresden bag I reviewed here. The challenge fabric was used as the lining. I hope that the vinyl holds up well over time. Perhaps Kitty can let us know in a few months’ time!

Addendum: I completed this project BEFORE I took ScanNCut Class #2. If I were to do this again, I would try cutting the marine vinyl on the more sticky fabric support sheet. Perhaps it would have worked better.

Oh…just oh…I’m so in love with that bag, and with that skirt, it’s a KNOCKOUT outfit. Stunning, ladies!
LikeLiked by 1 person
Both projects are just beautiful. The fabric challenge produced marvelous results for both seamstresses, who used the material creatively to make something useful as well as beautiful.
LikeLiked by 1 person