
Dyeing synthetic fabrics is a lot easier than I thought it would be. I am working with a blend of cotton and polyester which will result in subtle shades.

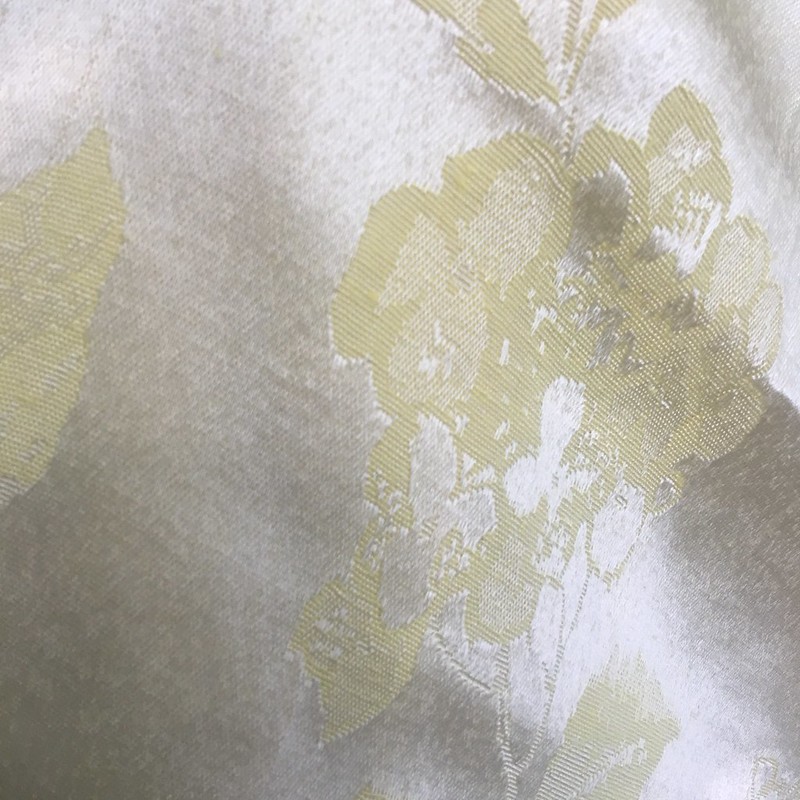
I’ve wanted to dye fabric for a long time and had the opportunity this week. I have two table coverings that are around 50% cotton and 50% polyester. There are from my mother’s best friend who was an antique dealer. The colors for these table coverings are pale yellow and pale green. I know I’ll never use them for entertaining and I knew I would most likely never wear those colors. Perfect opportunity to dye them.
I used RIT DyeMore that is dye made specifically for synthetic fabrics. I followed the how-to exactly so there’s no need for me to go through a step-by-step. There’s also a YouTube video that goes over the instructions and has helpful comments in the comment section.
However, I did learn a lot for my next time around and I think you’ll find these tips useful for dyeing synthetic fabrics.
The color I used is Midnight Navy. Since my fabric is a blend the color will not be a supersaturated bold/bright color. On the RIT website they show you different fabrics and how the dye turns out, unfortunately, they don’t tell you what the fabric content is for their samples. – CLICK to enlarge any photo –  Set-Up
- For stovetop dyeing, I would recommend three pots. One to hold the dye project, one for the color keeper, and one to transfer the fabric from pot to pot to sink.
- The pots I used are aluminum and worked fine.
- Once you use dye in the aluminum pot you cannot use it for food use. A RIT Admin on the YT page said using aluminum pots was fine for synthetic fabrics.
- You’ll notice that my range hood is very low, this makes stirring and transferring the fabric a bit difficult.
- Make note of your burner size. The shorter pot I had to use two burners and it took longer to heat up.
- I also used hot tap water which reduced the time for the pots to come to a simmer.
- I used a thermometer to test the water. It hovered around 190°. I don’t think I ever got to 200°.
- My first project was the yellow table cloth which weighed in at just under a pound (54″x80″). The green fabric is almost 2 pounds (65″x80″).
- I did this on a rare cool summer day.
 Dyeing
- I used two containers of dye for one project.
- I kept the yellow table cloth in for over an hour.
- Stirred constantly for the first 10 minutes. With the size of my project, I’m glad I used the taller pot and the color is very consistent because the fabric had room to move.
- My tongs were a bit short as was my spoon. For deeper pots, I’d use longer utensils.
 Rinsing
- It’s not required by I did use the Color Style Dye Fixative. This fixative will keep the color on the fabric and can be used on natural or synthetic fabrics. I think it’s worth the extra step.
- If using the fixative on synthetics you will need to use the stovetop method.
- Dyeing takes A LOT of water. The rinsing seemed to go on forever. With every dump of water, I thought of the Australian Outback. Crafter’s Guilt.
- I used the smaller black pot to rinse which seemed to do fine.
Clean Up
- At first, I used an old sheet as a drop cloth but when the dye would splash on the floor it would soak through and on to the floor. I placed old picnic table cloths down instead. But, be careful not to get it near a burner or hot pot, it will melt. I think next time I’d use old towels under a sheet or the picnic table cloths.
- I did end up with dye on the countertops and wood floors.
- I was not able to move the pots to the sink (too heavy).
- I used an old two-cup measuring vessel to transfer the dye water to the black pot and then dumped the dye water in the sink. Repeated until the big pots were at a manageable weight.
- Rinsed the sink out every time I dumped dye water in it. I didn’t want to have a blue sink!

Supply List (beyond what RIT has)
- 3 pots sized according to fabric size and/or poundage
- Long tongs and spoon
- Apron ( I used a raincoat)
- Thermometer
- Heavy-duty rubber gloves
- Paper towels or wipes
- Potholders
- Scale
- Large measuring cup or bowl to transfer water from one pot to another (if you can’t lift the pot and dump into the sink yourself).
I am definitely going to do the green cloth and use the graphite dye. This will result in a soft to medium gray. I won’t be able to get a dark black which is okay. I would like to see if anyone else wants to dye as well. I’ll feel less guilty about the water usage!
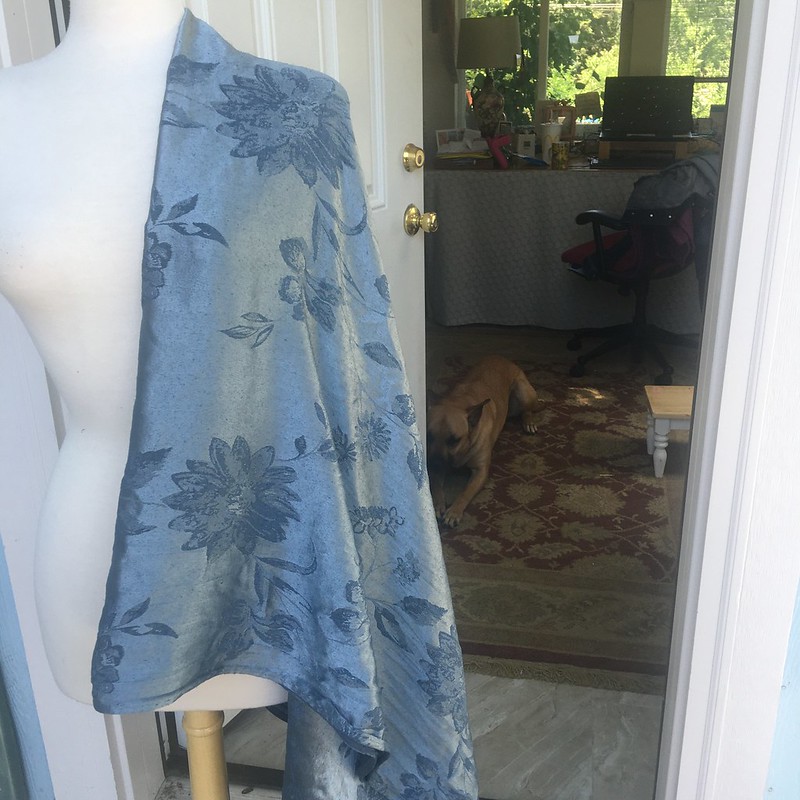
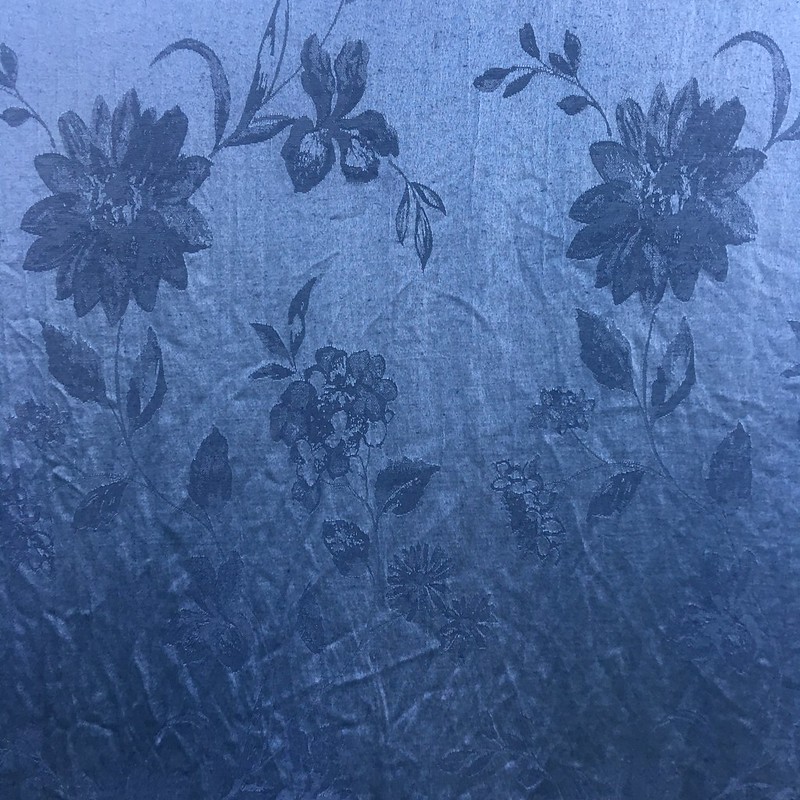
Have you tried dyeing fabrics of any kind? It’s labor-intensive but I think worth it in the end. Now on to sewing something beautiful with my new fabric!
Best wishes and warmest regards!

I love it. It turned out great. Let us know what you make with it.
Peggy
LikeLike
That fabric is really pretty – you should reconsider whether you might use it for a garment!
LikeLiked by 1 person
Thank you! I’m quite surprised/happy with my first dye job! Also, I didn’t know you had a blog! If you ever need any help with set up, let me know! I’m building a friends site currently, and if you ever need help I’m a Zoom a way!
LikeLike
Your blue fabric (formerly yellow) turned out lovely! I’ve done a lot of dyeing but with Procion dyes, and a bit of natural dyeing. Hope to return to it soon.
LikeLike
Thank you! I think I am really going to like dyeing fabric! I was going to take a Procion dye class in my area and I was the only one who signed up! Needless to say it was cancelled. I was very bummed. It’s on my list, whenever we get back to ‘normal’.
LikeLike