
I used to think that applying appliques with fusible web was cheating. But at the same time, I am too impatient to ever apply appliques by hand. Hence, I would drool over those cute designs I’d see and wish that I could figure out a way to try them out without “cheating”. Well, I’ve had a change of heart and decided that fusible web is the way to go. How much fun would it be to be able to simply scan an applique design from a book and cut out all of the pieces you need without any tracing or cutting with scissors?
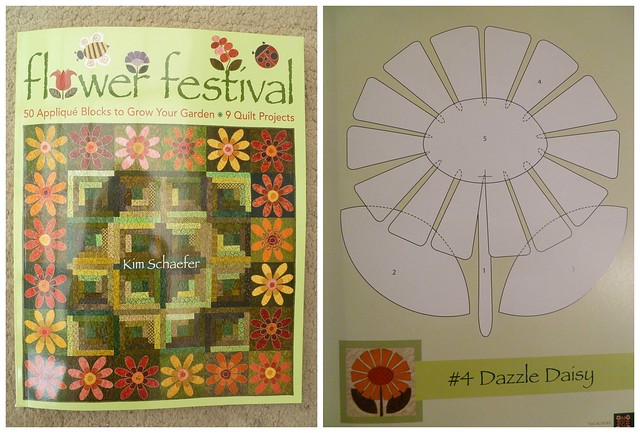
I thought I’d give it a go with my Brother ScanNCut. I have this wonderful book called “Flower Festival: 50 Applique Blocks to Grow Your Garden” by Kim Schaefer. It is filled with fairly simple flowers to applique onto 8″ blocks. I tried a couple different flowers.
First, a quick word about how the ScanNCut would work for this process. The ScanNCut can be used to cut designs out of a variety of materials. I’ve only tried cardstock and fabric with fusible web so far. You can use built-in cut patterns, patterns stored in a flash drive (I haven’t tried this option) or in internal memory, or patterns that you scan into the machine. We’ll be scanning in our applique patterns and storing them in the machine’s internal memory.
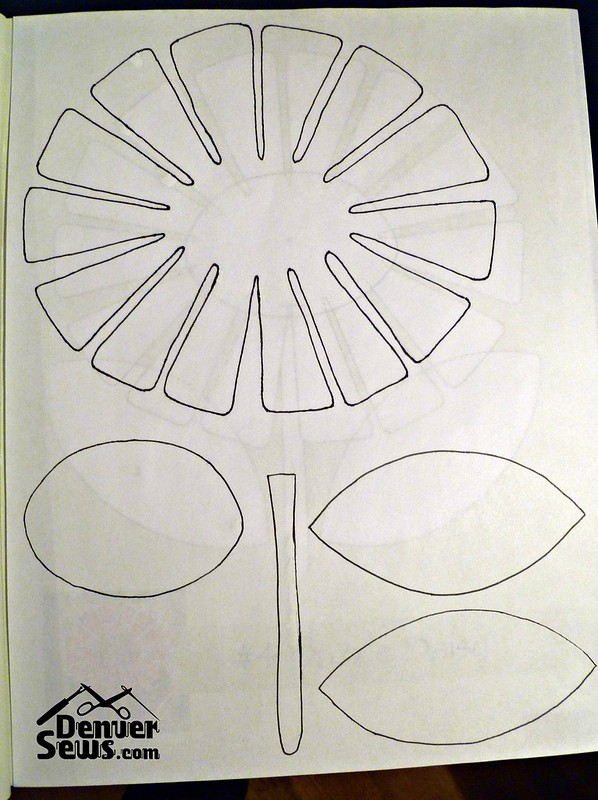
Because some of the pieces overlap, I traced each piece separately onto some fairly thin paper. I tried to get all of the pieces onto one piece of paper so that I only had to scan it once.
Scanning
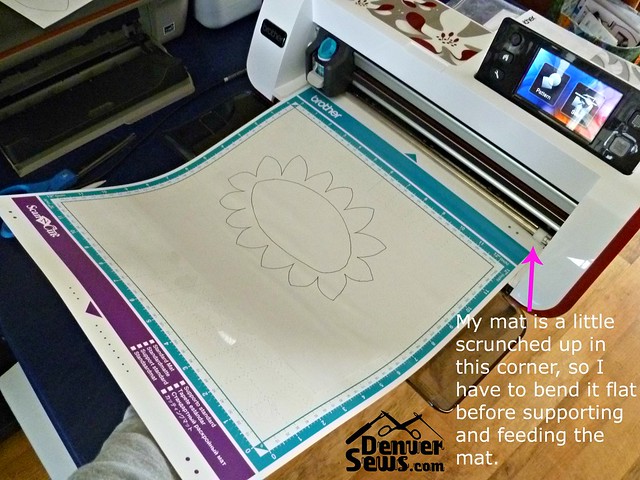
Note that I have managed to mangle my ScanNCut mat by not supporting it during the loading process. If it is not supported properly, it will pull the left side of the mat in but not the right. The front edge furthest to the right has turned up a tad and has a nice little trough on the bottom side. If I remember to try and straighten out this little turned up edge before loading AND remember to support the mat, I usually have success loading the mat.
After you scan the mat, you need to select just the portion containing the lines you want to use for cut lines. If you grab some spurious lines, don’t worry as you can clean up the whole thing later.
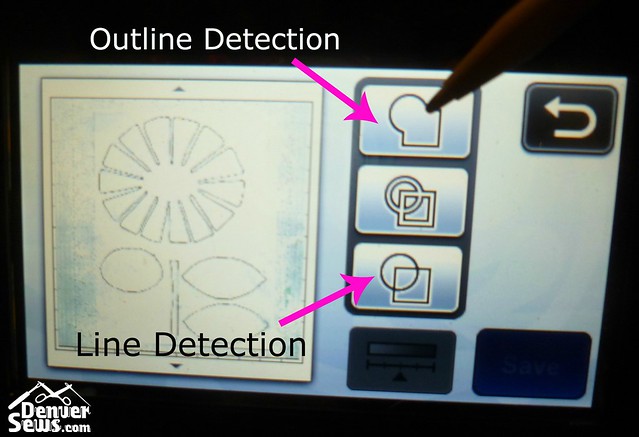
Let the machine process what it has scanned. I use the either the Outline Detection option or the Line Detection option. Save the results in internal memory. Do this for each item you want to save in a separate file.
Cleaning up the Design
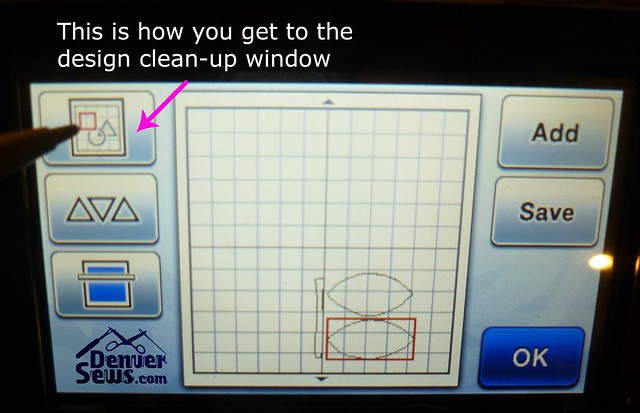
Let’s clean up the design now. Select the design from internal memory. You can edit the design by clicking on the upper left button shown below.
Notice that you can use the arrow keys to move through each cut line in your design. Delete the ones you don’t want to keep by clicking on the trash can.
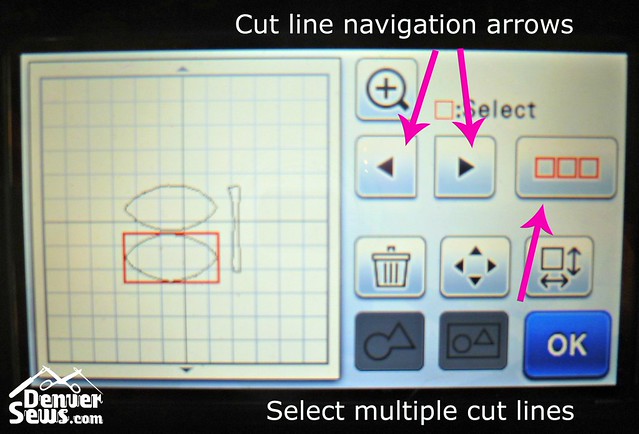
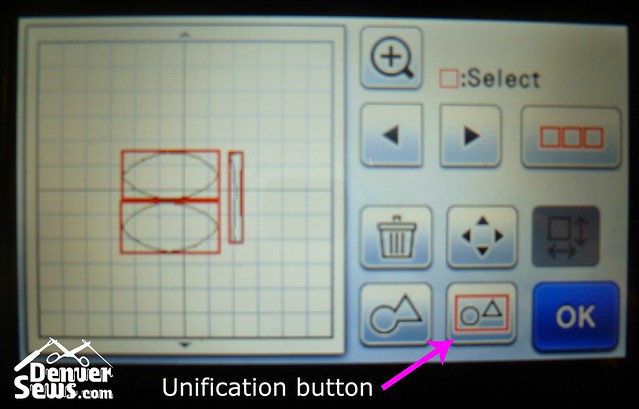
Now if you want to group the whole thing as one block, first select the button with the 3 red squares (see photo above) and then click on the button shown below.

Go back to the previous screen, and press the button shown below to “unify” all of the cut lines. Don’t forget to save the design again. You can overwrite the original design or create a new file.
Fusible Webs
Well I made a big mess of my scanning mat whilst playing around with fusible webs. If you want to cut to the chase, Brother provides a nice list of what fusible webs to use (besides their own) on their website here. Here is their suggested list:
Steam a Seam 2
Heat N Bond Lite
Pellon Wonder Under
Misty Fuse
Note that Steam a Seam products (made by The Warm Company) are either in short supply or no supply due to production issues. You can read about it here.
In all my messing around, I learned the following:
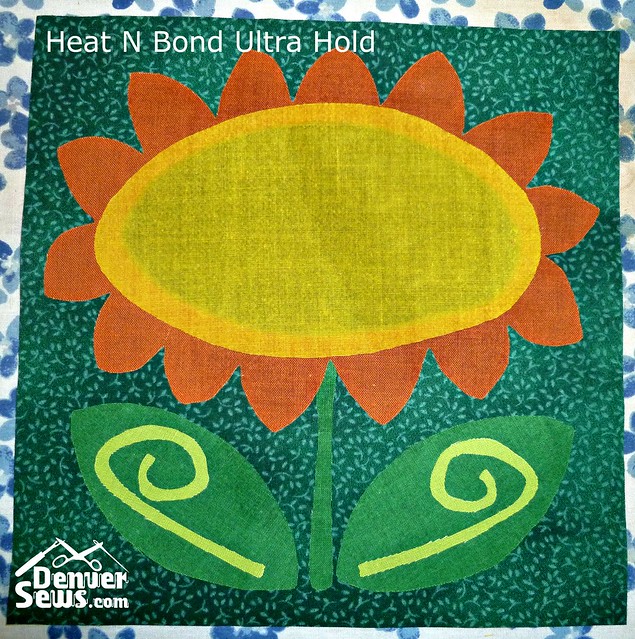
(1) The “heavy duty” types of fusible webs are really just overkill for appliques. I tried Heat N Bond Ultra Hold because I happened to have it. It fuses nicely, sticks to the regular mat nicely, and releases from the mat nicely. But it contains much too much adhesive, especially for lighter weight fabrics. The adhesive permeated the fabric and changed its color along with making the whole thing too stiff. I should have known this, of course. Here is what I ended up with:
(2) The lightweight fusible webs that I tried (Lite Steam A Seam and Soft Fuse Premium) are beautiful products for a nice just-enough adhesion, but they just don’t work with the scanning mat. In fact, this is how I ruined one mat – I fused the Lite Steam A Seam to the fabric, stuck the fabric web-side-down on the mat, cut the fabric, and tried to remove the fabric. The web remained firmly adhered to my mat. No amount of scrubbing with a baby wipe will get it off. Scraping with my finger nails might work and I’ll just keep at it. In the meantime, I’ve ordered a new mat.
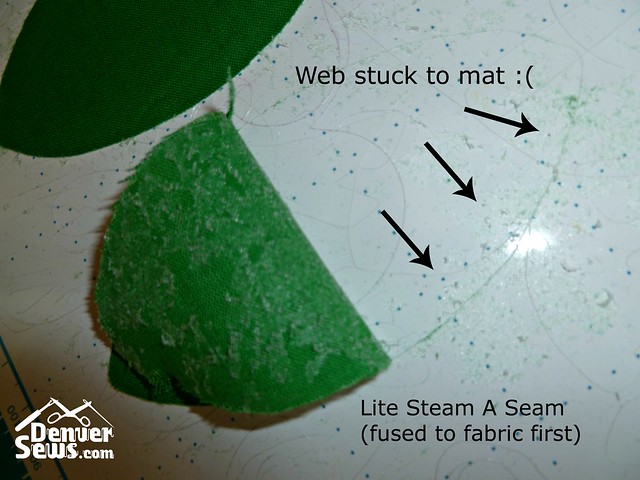
Admittedly, I probably didn’t fuse the Lite Steam A Seam properly. It is supposed to be sticky on one side and iron fused afterwards. I did repeat the test with the Soft Fuse Premium which is iron-fused on both sides and ended up with the same problem as the Lite Steam A Seam with the web sticking to my mat.
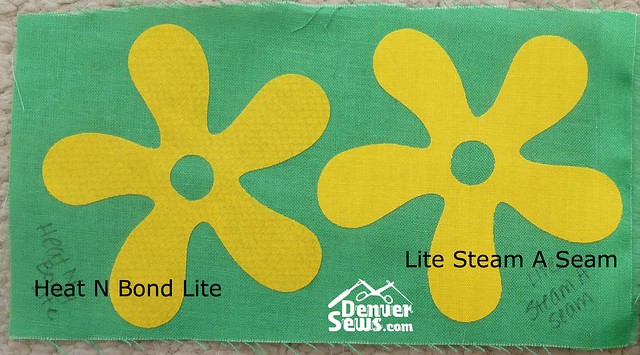
(3) Heat N Bond Lite works very nicely with the ScanNCut, but still has too much adhesive for my very lightweight fabrics. The adhesive is absorbed into the fabric, altering its appearance. Let that be a lesson to me: buy more substantial quilting fabrics in the future! Here is a comparison of Heat N Bond Lite vs Lite Steam A Seam:
(4) The temperature of your iron is important! For some of the fusibles, it was suggested to put your iron on a “Wool” setting. My iron doesn’t have “Wool” on it. So I looked up temperatures corresponding to settings and found that a Wool setting corresponds to 300 deg F (see here for complete list):
My husband has a non-contact infrared thermometer that you can point at something to get its temperature. I would recommend using one of these to see if your iron is at the proper temperature!
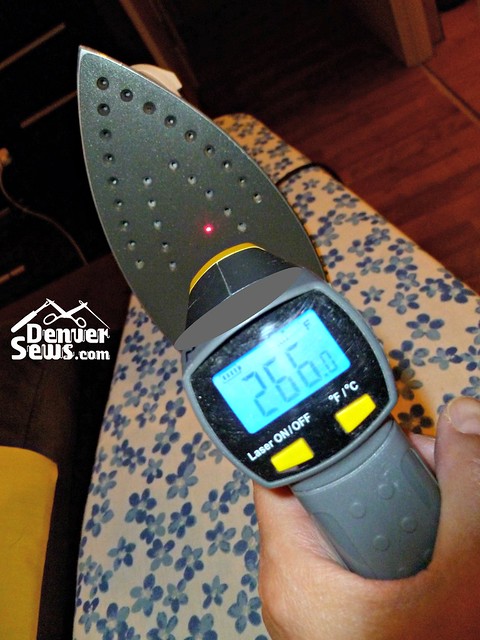
Clearly my iron wasn’t quite hot enough yet!
(5) Pellon Wonder Under seems to be the perfect fusible web for my lighter weight fabrics. It releases well from the mat after cutting and its adhesive doesn’t seem to wick through the fabric.

Settings
I have been using a cutting depth of 4, pressure 3, and speed 1. My cuts look generally fine, but sometimes they aren’t as clean as I would wish. This could be due to needing a new blade or due to my particular fabric/web combination. I just noticed on the Brother FAQ, that they suggest some different settings if your blade is “dragging”. I’m not really sure what “dragging” means, but I may try these suggestions next time: start with a depth of 6, cut speed 3 and pressure 0. They suggest working your way “up” cut depths if the initial settings are not to your liking. I’m not really sure what “up” means in this context, unfortunately.
Conclusions
The ScanNCut is still a relatively new machine and there is a *lot* of advice out there. You can check out YouTube, Facebook, amazon, Brother USA, Yahoo groups, blogs, etc. for the accumulated experience of many new users. As it has quite a few settings to play with, be ready to work with the machine a bit. It may not work right away the settings Brother suggests!
As for my appliques, I think that for non-cutting applications, the Lite Steam A Seam and the Soft Fuse Premium are beautiful products. For the ScanNCut, the HeatNBond products and the Pellon Wonder Under cut and release from the mat nicely. But the Pellon Wonder Under seems to have a little less adhesive than the HeatNBond products and thus is a little better for those lighter fabrics. For my next applique project with the ScanNCut, I think I’ll be using Pellon Wonder Under.

The Brother website has teaching videos and there are some Scan n Cut Facebook groups too.I was able to cut out 2 Scottie dogs today. I used very light Misty Fuse but placed it fabric side down. I found with the Misty Fuse it helped to allow it a few hours to fully bond with fabric.
LikeLike
Have just got my Brother Scan n cut today so played all day trying to cut craft foam. After ruining my first mat got it perfect but thankfully you can apparently use masking tape on the back of your mat to repair it which I did so can continue to use it. Phew as it cut right thru. Seems to be working ok now thankfully after being repaired. then went onto fabric for quilting. Applied Steam a seam lite on it as suggested, used my high Tack fabric mat and had a bit of trouble removing all the steam a seam but a baby wipe took it off fairly immediately after cutting it out. Still alot to learn any help appreciated.
LikeLike
I had to pull misty fuse off my mat with spatula and moisture wipe. Machine is new for me so will keep experimenting.
LikeLike
I had a horrible experience with Floriana Appliqué Wonder also. Lost my first mat. Giant Bummer! Now I put my fabric right side down on the mat. Works great. Julie Fei-Fan Balzer has a lot of information and she has a show on PBS Scrapbook Soup. Lots of You Tube videos, and a blog. She is a Brother scan n cut rep.
She saved my second mat!
LikeLike
The combination that works best for me for fusible fabric applique is Steam A Seam 2 and the LOW tack mat. I had horrible results with the Floriani Appli-Kay Wonder, and never did get it off my first standard mat! So I put the high-tack film on that mat to keep it in service. Works great for cutting marine vinyl now. Thanks for the review.
LikeLike
Thanks for the review! I don’t applique much anymore, but do see an occasional project I would love to make with lots of pieces where this machine would be useful. Will have to look into it.
LikeLike
Reblogged this on lynnenew.
LikeLike