
Does this fabric look familiar to you? A month ago I laid down a challenge to my fellow DSC bloggers:
Use a fabric that you’ve been hanging onto a long time. We probably all have fabrics in our stash that we love so much we’re afraid to cut into them… but they’re not doing us any good sitting in a closet. Be brave and cut into it! It doesn’t have to be silk or anything fancy, just something you’ve hung onto for awhile.
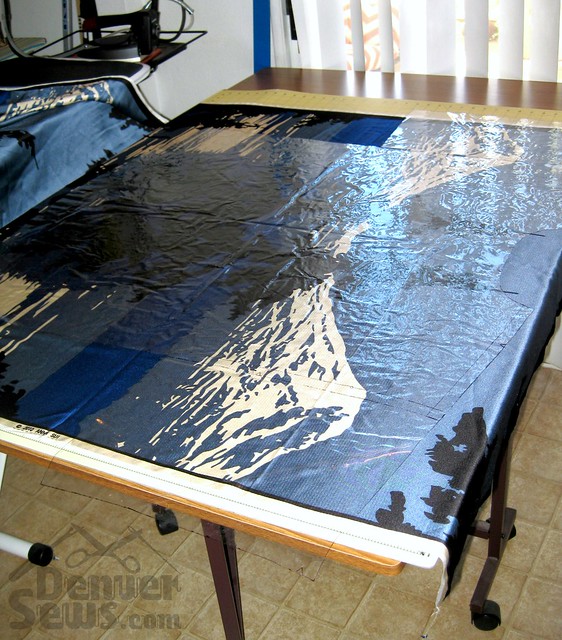
I promised I’d make something with these two silk panels I’ve had in my stash for awhile. I needed a big push to cut into a fabric with a fancy designer name in the selvedge.

Ooooooh… fancy.
I had intentions when I bought this to turn it into a kimono, I was just terrified I’d do something dumb and obscure the beautiful landscape so you wouldn’t be able to tell what it was. First I wasn’t sure what pattern to use for a kimono. There are tons of tutorials on the internet on how to “draft” your own (aka measure rectangles), but I wasn’t sure how flattering a true rectangular kimono would be. I really liked this version by Erica B so I decided to go with Simplicity 1318:

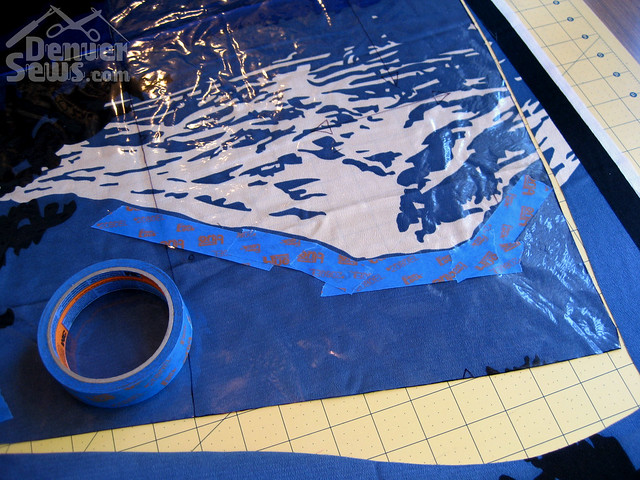
I like how the front is shaped to form a bit of a V at the neckline, and the waterfall hemline gave the the opportunity to make the back long enough to use the full panel without drowning me in the front. Unfortunately this pattern has a center back seam and set in sleeves. (Set in sleeves? On a kimono?!) So, I had to do a bit of piecing to merge the back and sleeves into one piece. While I was going though the trouble of tracing, I decided to trace/merge the pieces on a clear piece of vinyl. You can buy this at Joann’s on a both for about $2.99 a yard. EVERYONE asked me what the heck I was doing when they saw me tracing on vinyl. I think they were hoping I was making some weird see-though clothes. (“Hoping” might be the wrong term.) Well, this was what I was doing…
Okay, you can barely see the pattern piece in this photo, but that’s kind of the point. Making the pattern clear allowed me to get a really good idea of where the print placement would be before I cut. Like I said, I was terrified of ruining the landscape! The clear pieces also came in handy when cutting the two front pieces. After cutting one front I marked the location of a major feature with tape, then used the tape to line up the pattern piece with that feature on the other side so my pieces were mirror images of each other.
I suppose at this point you just want to see the damn thing…

As terrified as I was about working with this silk it handled beautifully. It pressed well and it went through my machine fine (no getting sucked down into the throatplate at all). I used my rolled hem foot to do a narrow rolled hem to try to retain the swingy-ness of the fabric as much as possible.

And the landscape? Preserved on the back! (Giving you my best Jesus pose here… don’t know how else to show it!)

I’m super happy with the outcome. Instead of having a beautiful fabric stashed in a box somewhere that I pull out occasionally to admire, I now I have beautiful silk garment that I’ll pull out of my closet occasionally to admire and then put back because OMG I don’t want to spill anything on it. Joking, I’ll wear it!
Here’s some tips for the fearful seamstress on how to gather the courage to sew up your precious silk pieces:
- Prep your hands. If yours are anything like mine, you need to clip and file your nails, trim your hangnails and perhaps pumice some callouses to get them to a point where you won’t be snagging silk.
- New sharps! Change the needle on your machine – I used a microtex 70/10 on this. Throw out the dull pins in your pincushion and put fresh ones in. Again, you want to avoid snags.
- Clean up your workspace and tools. Clear off all the clutter – more stuff is just more chances for accidents. Look at your iron soleplate. If you’ve got any sticky spots from past fusible interfacing debacles, clean your iron.
- Go simple. Choose a simple pattern, preferably a TNT pattern or make a muslin. (I made a muslin of this in polyester first – even though it’s only a simple kimono, I wanted to make sure I liked it!) Don’t choose something with a lot of details – let the fabric do the talking.
- Cut in a single layer. Trace any cut on the fold pieces into full pieces – silk is easier on a single layer to keep the grain from shifting.
- Test everything. In this garment I tested pressing, a straight stitch, interfacing the front bands and doing a rolled hem on scraps of the same silk to practice first. You don’t want any surprises! If you want to be able to wash your garment you should also test washing a small scrap. I just decided this baby would be dry clean only.
- Do it by the book. If you were reading this at any point and said something like “well, I only used this needle once and don’t have any more and I really don’t want to go to the store…” STOP! Do not pass go, do not collect $200. This is not the time for improvising! Just think how you’d be kicking yourself later if you thought it would “probably” be okay to cut some corners and then it didn’t work out.
- Jump! Did I scare you even more now? Sorry, but at some point you just need to say “c’est la vie” and go for it! I tend to catastrophize when I think about all the ways I could ruin something, but even if you mess up you’ll probably be able to save it, your friends won’t even notice the issues, and you’ll have something luscious to wear. Just remember, there will always be more lovely fabric in the world! And now you’ll have an excuse to buy more.
Oh, and if you have a stash busting creation you want to share for October, post it to our Flickr pool at https://www.flickr.com/groups/denversewschallenges/ ASAP – we’ll be doing a round up post at the end of the week. I can’t wait to see what everyone else has made!

I love the way your mind thinks and the way you express yourself…had to laugh outloud at some of your comments! Great job by the way
LikeLike
This turned out awesome!!!!
LikeLike
That is beautiful! You did a jam up job on that precious silk. The use of the vinyl is different, but smart. I just hope I remember the technique for later matching.
LikeLike
LOVE IT! Very inspiring!
LikeLiked by 1 person
Its gorgeous. I especially like that front is broken up a bit so you dont look like a walking tapestry. The v shaped front is very flattering. Great choice on the pattern.
LikeLike
Wow. That really came out beautiful. I hope you gets lots of wear out of it. It’s too nice to keep in the closet! I want to see it up close tho.
LikeLike
Stunning! What a great use of vinyl and thanks for all the silk sewing hints. Hope to see you wear it one of these days!
LikeLike
That turned out so well! I love the vinyl idea — I’ll be stealing it for working with tricky patterns 🙂
LikeLike
I love the way you were able to show off the design of the fabric through a combination of choosing a suitable style garment and placing it on the fabric design to best advantage. Great job of using a difficult fabric.
LikeLike
Oh my goodness, Jamie – this garment turned out absolutely stunning! When I saw the original photo of you holding up the Anna Sui panel I couldn’t imagine what you could possibly make from it. The landscape design is so large I thought it would just end up looking like an abstract print. Once again you’ve impressed me with your uncanny ability to figure out how to make a garment sing. Your post is very informative and I love your words of encouragement! Excellent job!!!
LikeLike
Wonderful!!! Looks great and I am so proud of you for making this piece from your lovely, scary fabric. I can’t wait to see it on you in person!
LikeLike