
Choosing the wrong fabric for a pattern can ruin a garment for even the most experienced seamstress. I’ve been wanting to make the Antionette Pants by StyleArc since the pattern was released, but I haven’t been able to find any pictures of a finished pair online to see what fabric others have used and front pleats SCARE ME. There’s a fine line between slouchy cool and having enough room to be smuggling something down the front of your pants. Seriously, that is a dangerous area to accidentally have too much volume!
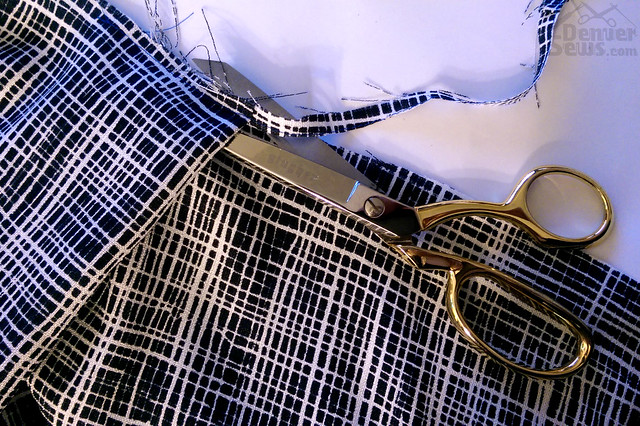
I pulled a couple options for the pants out of my fabric stash and decided to make some test pleats to get a feel for the drape of the fabrics. My first option was a sketchy plaid polyester that has a little bit of body. I thought this was the fabric I would probably use. My second option was a maroon sandwashed polyester that was more of a blouse weight. I was worried that this fabric would be too thin for pants, but I did like the feel and the color.
I made the test pleats by lying the pattern piece along a cut edge of the fabric, marking the pleats with pins, folding the pleats, and then stitching them down about 1/4″ from the edge. I flipped the pattern piece and repeated to get a feel for what the entire front of the pants would look like. Here’s a comparison of my test pleats:

Now I see that the navy fabric I wanted to use would look like poofy MC Hammer pants. Definitely going with the maroon one. Disaster averted! The great thing about stitching the pleats along the edge of the fabric piece like this is that you can just trim off the 1/4″ of stitching and that’s all the fabric you’ve wasted. The same thing works if you have a pattern with gathers you want to test different fabrics with.
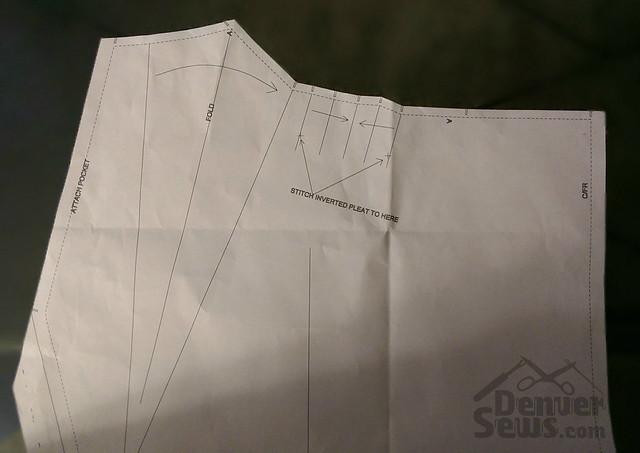
Now about the pattern itself… When I first looked at this pattern piece I was confused. The line drawing of the pattern shows a pleat overlapped by another pleat, but the pattern piece looks like an inverted box pleat on the left and a knife pleat to the left that don’t overlap. What? After reading through the directions several times, I figured out that you’re supposed to match the points marked “A”. The knife pleat is marked wrong on the pattern.
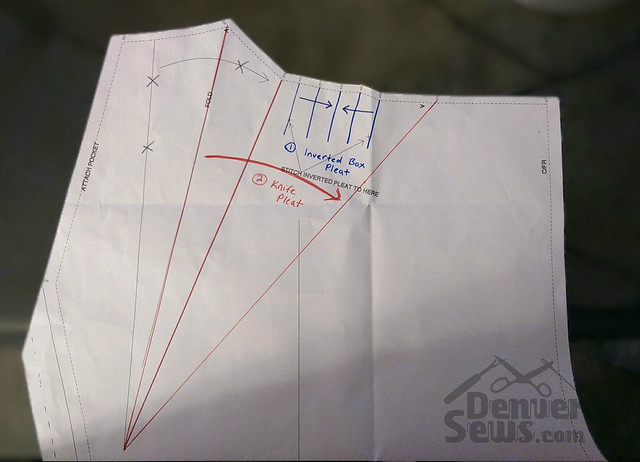
Below is what it SHOULD look like. First you make the inverted box pleat I marked in blue, then fold the knife pleat marked in red over the top of it. The pleat should be taken to the notch marked near the ‘A’. I measured the finished distance against the facing for this piece to verify that I had it right. Essentially the notches along the top are right and the lines and big arrow are wrong, so follow the notches. If you’re thinking, “Wait, the red pleat is not symmetric!”, don’t worry, it will be symmetric once the blue pleats are folded up.
 Now to sew them up!

[…] has diagrams for the tricky bits – like the front pleats (not sure if these were added after JamieDFC’s review on Denver Sew). What still is a bit of a problem is front facing peaking out due to the weight & bulk of the […]
LikeLike
[…] me with StyleArc. The first one was about the pleat labeling on the pattern, and I covered it in my last post. The second one was about the order of the instructions… First they have you sew the small […]
LikeLike
This is so intriguing! I can’t wait to see the finished pant. I’m keeping the blog so that if I order the pattern, I’ll remember what you said about it.
LikeLike
Good tip on the 1/4″ gathering & pleating. I’ve been just bunching and holding the fabric up to my body to try to figure out if it’s the right weight and body for those treatments. This will work so much better and not waste fabric. Thanks!
LikeLike
I can’t wait to see these!
LikeLike