
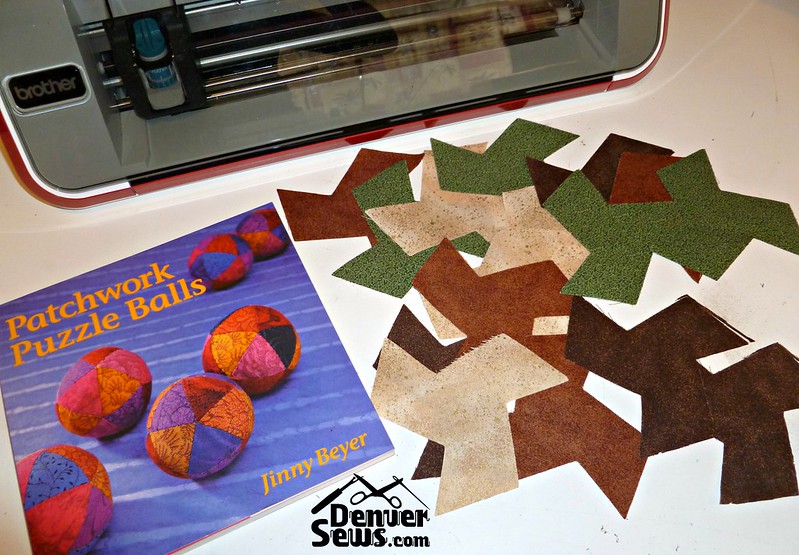
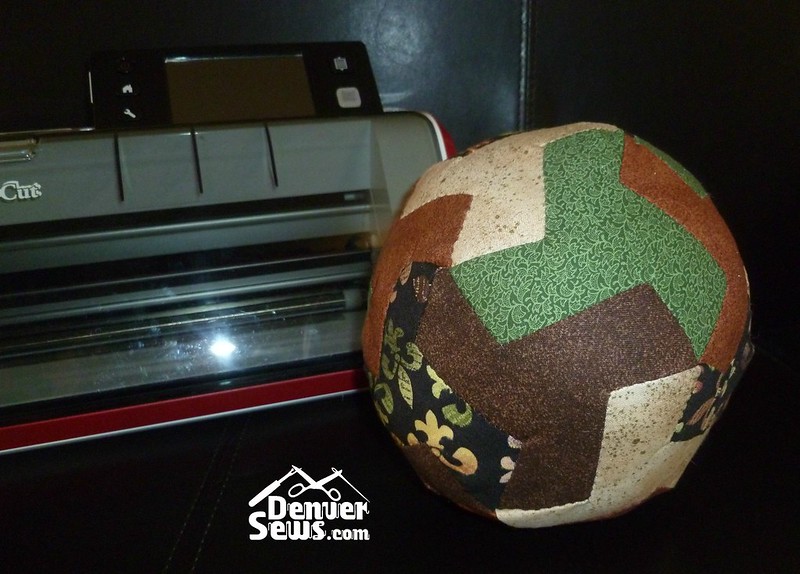
As a follow-up to the ScanNCut class I just took, I thought I’d try to make something that is otherwise difficult to make by hand – a Patchwork Puzzle Ball. In Patchwork Puzzle Balls by Jinny Beyer (published 2005), there are numerous patterns for making stuffed balls using basic shapes such as triangles, squares, pentagons, hexagons, octagons, and diamonds. I made these before I had a ScanNCut and so I used plastic templates and hand-cut each piece. With the ScanNCut, I thought I would try and make one of the more complicated puzzle balls.
Quilt Blocks from Arbitrary Scanned Shapes
In ScanNCut Class 2, we learned that we can cut basic patchwork shapes with a 1/4″ seam allowance and have the machine draw the seam lines. I wondered if the same could be done with arbitrary shapes scanned in.
Sadly, the answer seems a resounding NO. For now, I can only scan in the cut line. However, it appears that you can use the online ScanNCut Canvas website to (1) create a shape and (2) add an offset line (either inset or outset by 1/4″). Each line is a separate object and can individually be set as a “draw line” or a “cut line” via the “View->Show Properties” menu item. Sometimes it is a little difficult to select the inset line because it may be drawn beneath the outer line object. You can select the outer line and choose the “Edit->Order->Send to back” menu item to bring the inner line object forward. Here is a video from Coconut Robot that might help explain the process.
Starching and Cutting
I starched my fabric with Mary Ellen’s Best Press (spray and iron with no heat x 3). I starched it from the wrong side. I smoothed the fabric onto the cutting mat with the fabric support sheet using a brayer. I set the cut depth to 4 for my standard blade. Speed was set at 5 and pressure 3.
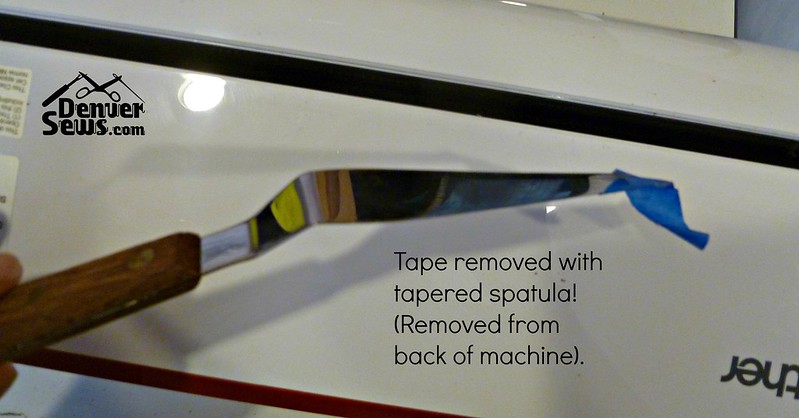
The cutting initially went very well, but the mat became increasingly less sticky with more use. Eventually, the fabric was starting to detach itself from the mat while cutting and I tried to resort to taping down the fabric with painter’s tape. That was a mistake!
Removing Tape Stuck Inside Machine
As the machine went back and forth cutting my taped-down fabric, one small piece disappeared into the machine. After I stopped cutting and removed the mat, I could see the tape lodged inside the machine. Fortunately it was easily removed with a tapered cake decorating spatula! You want to use an angled one like this, not a straight one. Phew! That was a bullet dodged.


Cleaning the Fabric Support Sheet
The fabric support sheet was slowly losing its stickiness with use. Having nothing to lose, I used a fragrance-free baby wipe to clean the support sheet, just like we do with cutting mats. It cleaned up very nicely and after drying, seemed to have regained its original stickiness. I tested this by doing a quick cut on a small piece of fabric and it cut very nicely without the fabric detaching from the mat.
Hallelujah!
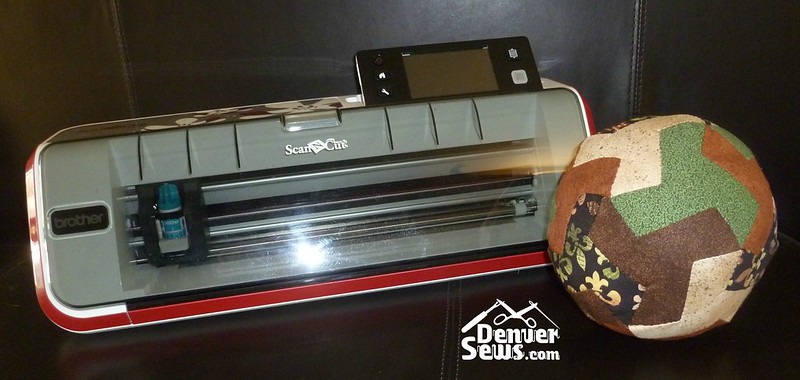
It’s been a long time since I did any hand sewing. Puzzle Balls are all hand-sewn as they are relatively small and are 3 dimensional. As I have time, I will work on putting together this ball and when it is finished, I will post a photo!
ADDENDUM (10/08/2014): By simply reading the ScanNCut manual, I learned that you can access to the scanning glass from the bottom of the ScanNCut. You just remove a plastic piece, clean the glass, and replace the piece. I’m sure that would have been a much easier way to retrieve my lost tape!

Your ball is nice and colorful. You have so many talents and a lot of machines too!
LikeLike
I love how you take such great notes on your process for every project. I have no idea how you hand sew that together though… my mind is blown.
LikeLike
Well of course this is a natural progression from quilting. You just sew the pieces together and make a ball. Of course I’m making it all sound so simple, and I couldn’t even make one quilt block come out right. What do you do with it?
LikeLike
Play with it, of course! And add it to my collection of other fabric balls that I’ve made.
LikeLiked by 1 person
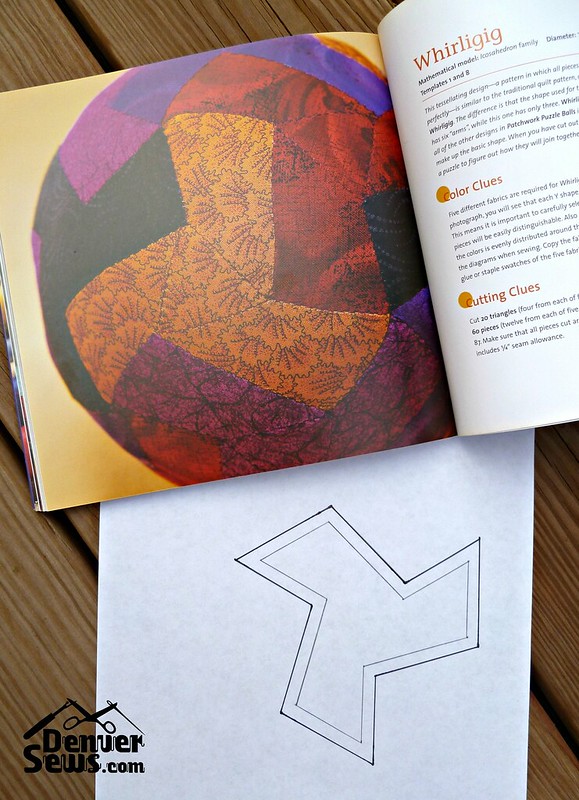
I love the whirligig shape. It creates a very interesting and attractive design.
What’s a brayer?
LikeLike
A brayer is a smooth 4″ roller used by printers! Works great for smoothing things down on the cutting mat.
LikeLike