I had a plan for the the PatternReview.com “One Pattern Many Looks” contest to make up a bunch of Grainline Archer button-up shirts. I’ve made this pattern before and really like it, and I figured that since I wear blouses more than any other type of garment it would be a good thing to have several of. Now, Kitty tried to warn me that making up multiple button-up shirts in the span of a few weeks was a bit ambitious, but I was too stubborn to listen. And to make things worse, I chose this drapey silk-feel polyester that is perhaps the shiftiest fabric I’ve ever worked with. Seriously… I cut the button band exactly along the selvedge and by the time I lifted the pattern piece it was a crazy wiggly worm of a strip of fabric. Eeeesh. The reverse of the fabric has a ribbed look to it so I think perhaps the weave pulls it in a wavy line, because I swear I cut it straight!
I guess I’ll start with the good: I love how professional this pattern is. There are separate pieces for all of the interfacing pieces, the top button band is a separate piece which I think looks nicer than a built in button band, the collar is drafting perfection, and I love that it has sleeve plackets and cuffs. That maybe sounds like a lot of stuff to deal with, but with the Jen’s incredibly detailed sew-along I swear you can’t go wrong. My first attempt at sewing a button-up before this was a Simplicity pattern that turned out so horribly I didn’t attempt anything with a collar or buttons again for years. My first Archer went together perfectly without any issues.
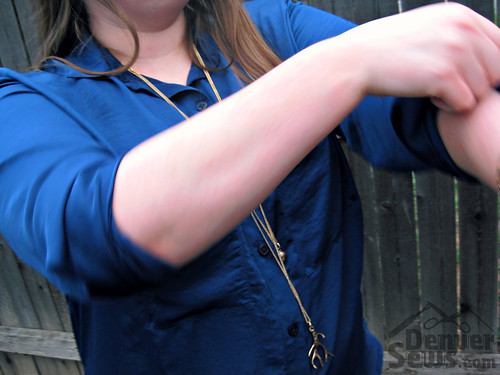
Well, maybe one issue. Would you believe I shortened the sleeves 3 inches, and they are still too long? I didn’t shorten the body at all and it is just right. I have a hard time imagining someone with my torso length but arms 3 inches longer! The cuffs are a little wide too so they don’t sit on my wrists, but I don’t mind because I usually wear my sleeves rolled up and the cuffs are the perfect size for the upper forearm. Next time I might taper the sleeve a bit more though because I’m not sure I like that much volume when it is down. (There are pleats at the cuff.)
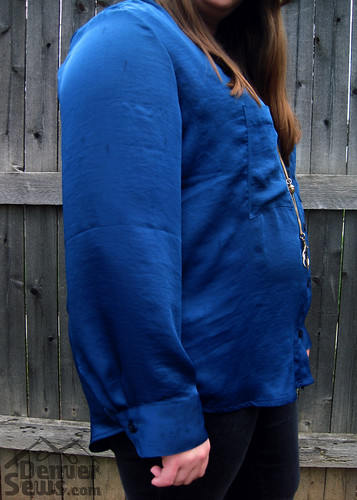
My other problem (which was entirely my fault) is that those patch pockets look horrible. I can’t figure out if it’s the shifty fabric or if I really pinned them on with a curved bottom, but I could have sworn I squared them with the button band when I was sewing. Ick. I was going to rip them off and redo them before taking pictures but… I don’t know, I got lazy. What do you think, do they need some interfacing to keep them from bagging, or is it just my bad sewing?
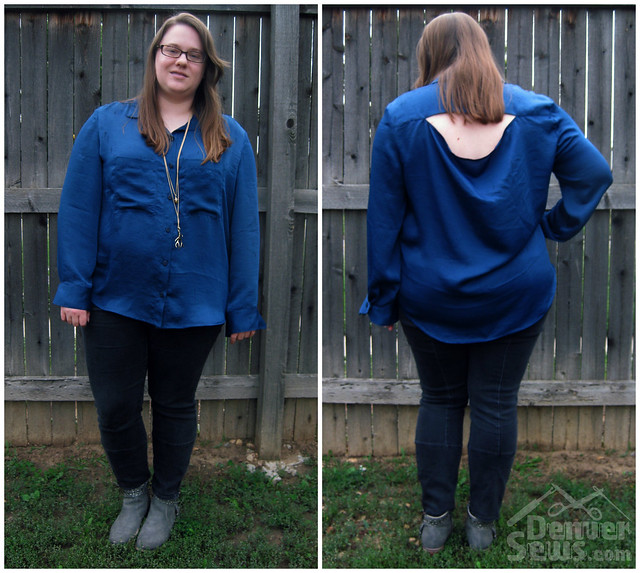
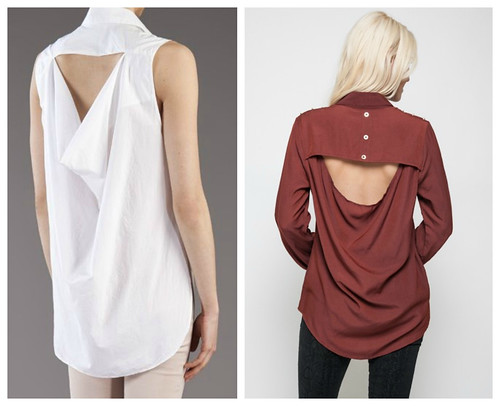
Oh hey, you’re probably wondering what is going on with the back? No, that wasn’t part of the pattern. I had some inspiration photos filed away of open back button-up shirts that I wanted to try knocking off. Since the back is supposed to have a box pleat, all I did was leave the pleat unsewn for a couple inches extra length, then I hemmed the top of the back and only attached it to the yoke for about four inches on each side. Surprisingly that extra couple inches of length hangs down quite a bit.
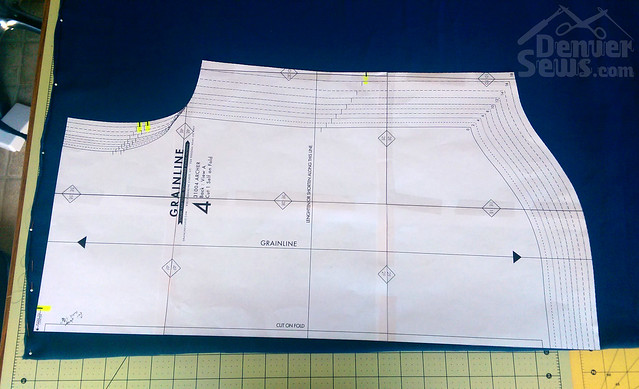
 If you wanted an even bigger drape, theoretically all you would have to do is angle the back pattern piece along the fold line like this:
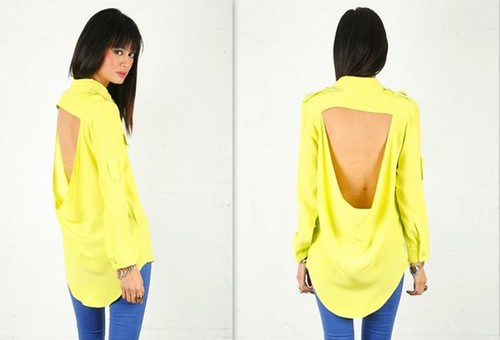
If you put it at a 45 degree angle you’d end up with something like the picture below. I’m not sure how you would wear a bra with that though…
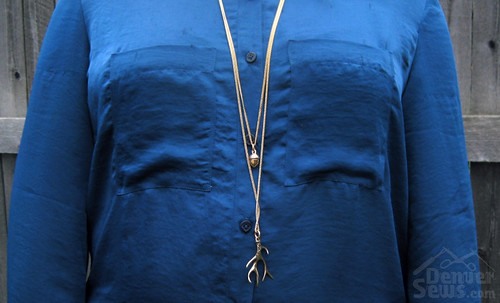
Here’s a closeup of the top stitching. Hey, if I just keep my hands over the bottom of the pockets everything looks fine!

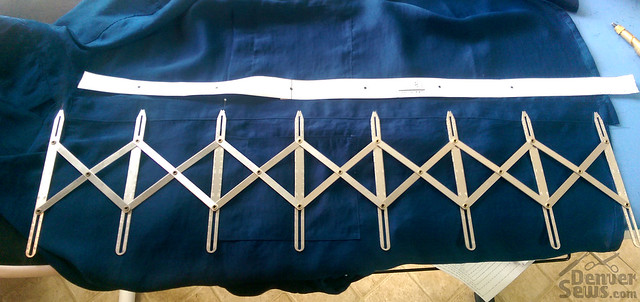
One more tidbit… I hate when button-ups gape at the chest because the buttons are space goofy, so here’s how I make sure that won’t happen. First, put the shirt on and put a pin at the widest part of your chest. The, er, nipple line if you will. Take it off and mark where you want the top button to be. In this case I used the collar stand. Then I use a Simflex gauge to expand between these two points and mark the rest of the buttons. Super easy. I laid the button hole markings that came with the pattern above and you can see that it’s almost the same.
So, the contest deadline is one week away and I have only one shirt with wonky pockets. Not sure I’m going to make it.

You’re my hero, throwing in mods from saved pics/ideas! The buttons down the back are super cute in the model pic, you should try some embellishments in the next one. “Biker” seems to be the style, maybe you can play with some chain or somehow mix dainty with edgy. I’ll just sew vicariously through you – I have lots of inspiration saved off or clipped out and scattered throughout my home, but I’m way too far too few too between to get any skill under my belt.
And speaking of belts – tool belts – you are hands-down our official Tool Lady. We’ll just call you a Tool for short ;o)
I thought you were working with real silk, the coarser kind w/ a texture. I wonder if that would slip less? One thing I’ve read and always forget until I’m cutting my last piece is never “cut 2” with the slippery or sheer stuff. Single layer. I have yet to sew a seam that doesn’t pucker and walk tho
Last thought, I had a silk button down shirt in high school and the front pockets did what yours do. Drapey material will drape, apparently.
Thanks for the post, I’m inspired to sew an interview top now!
LikeLike
Great work! It’s unfortunate the pockets didn’t work out but I know you’ll find a way to fix them!
LikeLiked by 1 person
Ya, I wonder if just getting rid of them would work. There was a comment on FB about using stablizer too. Ah, just rip ’em out.
Love the back tho.
LikeLike
Oh man those pockets are not doing the shirt any favors. Get rid of them. I dont know if stabilizing will help, but it also looks like they’re pulling the fabric of the body up. Ive seen spray starch suggested to stabalize shifty fabric as your sewing. Maybe that could help? The color is great on you and the back opening is cute too.
LikeLiked by 1 person
I’ve done the spray stabilizer thing before with chiffon, but the trick is you have to stabilize before you cut the fabric or it’s impossible to square the grain back up again. Hind sight is 20/20 I guess.
LikeLike
Jamie, it’s not you, it’s the fabric! Break up with that slinky material and you’ll have perfection! I really love so many things about your Archer; your color choice, your stitching, your super creative idea for the back. If you remove the front pockets will there be holes left in the shirt fabric? If not, I’d probably just take remove them but interfacing would probably work too. Your topstitching looks top-notch, I think you’ve done an excellent job with this not easy to sew shirt. Good luck on the contest!
LikeLike
But I like wearing slinky fabric, I don’t wanna break up. 😦 I guess I’m going to have to put more effort into the relationship.
I’m thinking there will be holes in the fabric… I’ll probably bring my seam ripper on Thursday and we’ll see.
LikeLike