This challenge made me realize I need to get a physical subscription to Threads! I converted all my subscriptions to digital some time ago (except Burda, duh) to try and cut down on paper clutter. But after waiting 20 minutes on my iPad for EACH issue to re-download, and then having them all mysteriously disappear the next day so I had to wait for them to download AGAIN… I’ve had it with the digital subscription. Anywho… the thing that caught my eye was this tiny tip on the bottom of a page in the October/November 2014 issue:
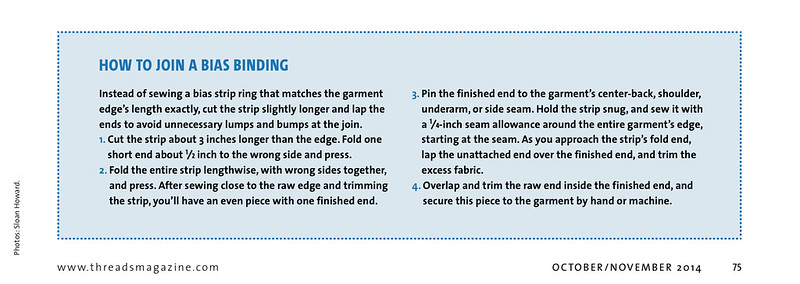
I’d never thought of doing bias binding this way before! Usually I follow the pattern instructions to sew a ring of binding that is exactly the right circumference to fit a neckline, then slowly put a ton of pins around the neckline to get the binding distributed evenly before sewing. The pinning part is tedious, and if you want to add binding to something where you don’t have a pattern piece I’m never sure how long to make it. The ingeniousness of this tip is that you can do it with no measuring or pinning!
I’m working on a top that needed bias binding at the neckline so I decided to try it. My fashion fabric was thick enough that I didn’t want to make the binding out of self-fabric, and I hate the stiff Wright’s stuff which is all you can buy pre-packaged, so I used this tutorial from Whipstitch to make a TON of continuous bias tape from some black poly satin. (The tutorial was great, the only thing I would add is to rip both cut ends of the fabric to get them on grain before doing the first step of sewing those ends together. Also, I found it a little tedious to draw the cut lines before sewing. Next time I would just offset the second seam by however wide I wanted the tape to be and cut with a ruler and rotary cutter after forming the tube.)
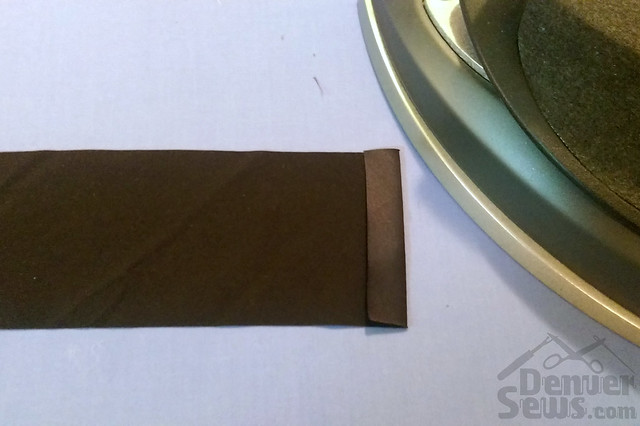
The Threads tip says to cut the bias strip 3″ longer than your neckline, but I imagine that’s just a minimum suggestion if you want to know how long of a strip to cut. If you already have some pre-made binding, no need to cut it down. The first step is to press over 1/2″ to the wrong side on one end:
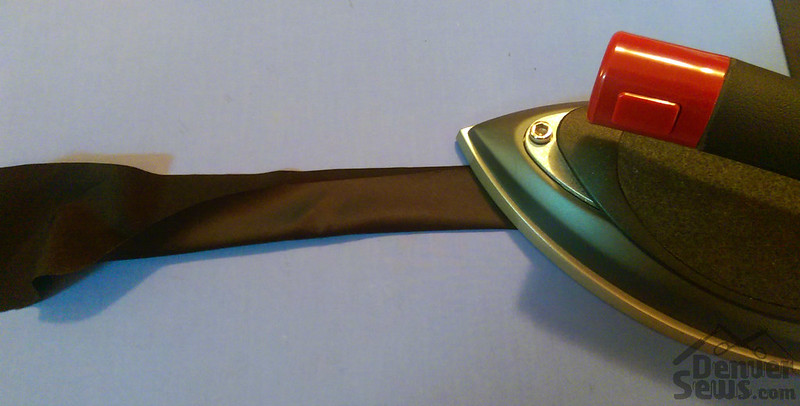
Then, press your bias strip in half:
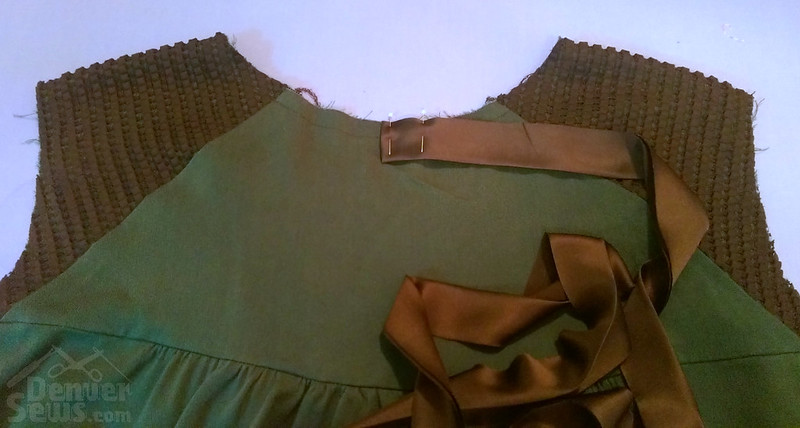
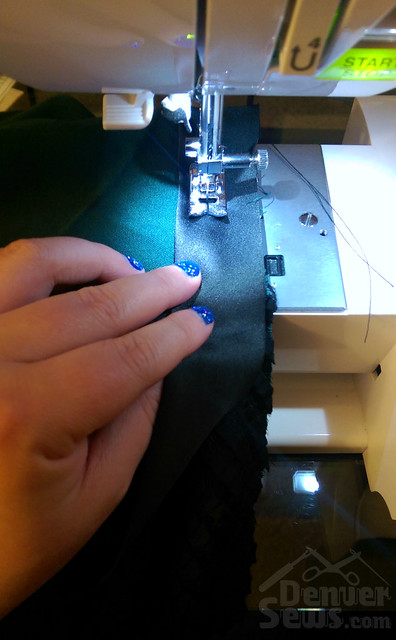
Before I went to the sewing machine, I put a couple pins in to hold the bias tape to the neckline at the start. You want the bias tape on the right side of the garment (the opposite of the wrong side). You should start in an inconspicuous place – on a neckline this is usually the center back. You also want the bias tape going to the right along the neckline (the opposite of left, I mean this time) so that when you take it to the machine it’s easy to handle. (Just follow the picture if that doesn’t make any sense.)
Take it to the machine and start sewing with whatever seam allowance the pattern called for. This part is easy – just use one hand to keep the bias tape even with your fabric edge as you sew, and try not the stretch it. Look ma, no pins!
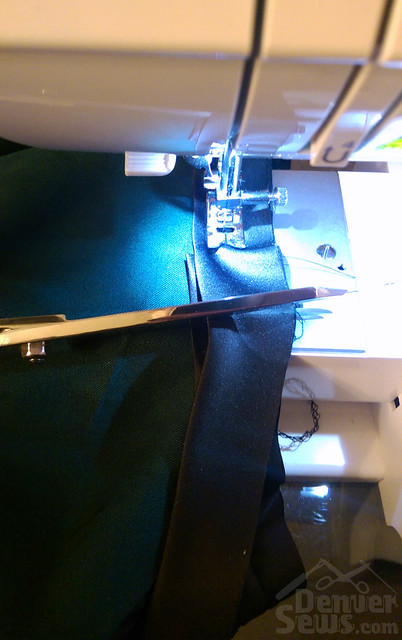
When you get close to completing the circle, chop off your bias tape a bit past the start so it overlaps. This will help you see the stitching where you started to make sure they line up.
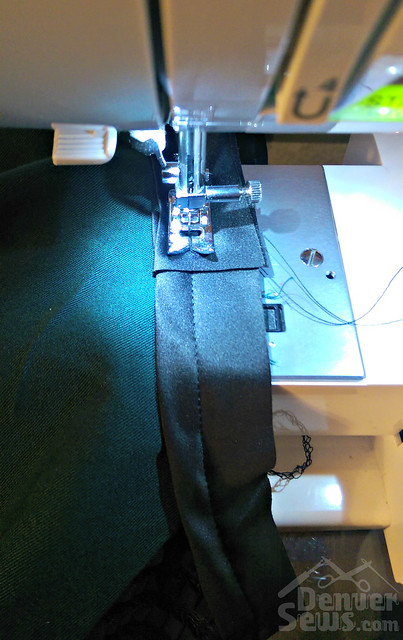
And then just finish the loop. You might be wondering if it’s okay that this end is raw. Yup, it’s fine, you’ll see…
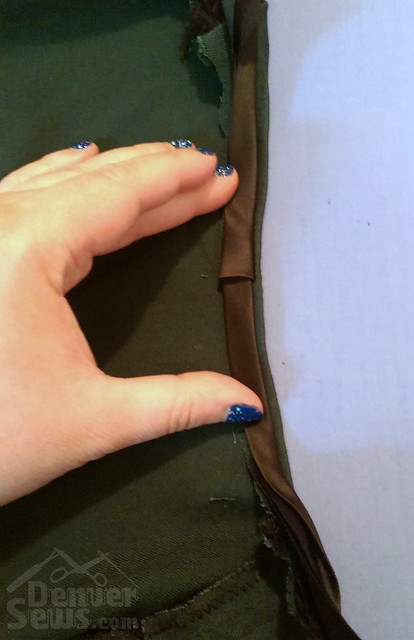
When you flip the bias tape over to the wrong side of the garment, the raw edge is under the edge that we pressed over at the beginning so there are no raw edges exposed. Now you can go topstitch the bias binding down as your pattern instructions would normally tell you.
This must be how quilters bind a quilt, I’ve just never thought to stray outside the pattern instructions and do it differently from the loop method. Now, be honest, is this something that is so dumb that everyone else already knows it?

[…] of bias binding, I finished cutting the 2 yard fabric tube from last week into one long bias strip, and this is what it looks like wrapped around a piece of cardboard. I […]
LikeLike
Jamie, again You’ve enlightened me! This article from Threads I have, but the Tutorial from Whip Stitch is Great! I will try this one soon. I have an out fit that requires lots of bias piping and I want to use this abundant application to make my CBT. This is wonderful, even though I’m late reading it 🙂
LikeLike
Great pictures, Jamie. This can be a very difficult technique but you made it looks so simple. Thanks
LikeLike
GD Jamie – this is a fabulous tutorial. I love the photos & your explanation is so straightforward. Great job! You should do a little tutorial on how to make the binding too.
I am disappointed to here about the digital version of Threads. I’ve been thinking about purchasing the DVD set. I hope it wouldn’t have the same issue.
LikeLike
The DVD shouldn’t have any issues, it’s just the monthly iPad version.
LikeLike