Every machine I’ve ever owned had stitches on it that I’d never used. The challenge this month was to try using some of those mystery stitches on something, anything.
I chose to use some of the seeming hundreds of decorative stitches on my Pfaff Performance 5.0 and my brand new Brother Dream Machine (Innovis XV8500D). I started with the Pfaff.
For both exercises, I cut some strips of coordinating fabric, applied fusible interfacing, and stitched them together to make “new” fabric. The interfacing was added to provide stability for the decorative stitching. I then added decorative stitching along some of the seams.
Pfaff Performance 5.0
On the Pfaff, I quickly learned that you need to use the correct presser foot – you need the one with the wide groove behind the needle. The groove allows the stitching to travel under the foot more easily. I did have some trouble with the Pfaff getting stuck, building a huge dense thread nest under the fabric. I sometimes wonder if that wider 9mm stitch width (and its corresponding slot in the needle plate) causes more problems than its worth. I’ve often had fabric get sucked into this slot at the leading edge of the fabric.
I also tried using the alphabet stitches. It worked pretty well, but the machine didn’t go forwards and backwards perfectly and you see the results here:
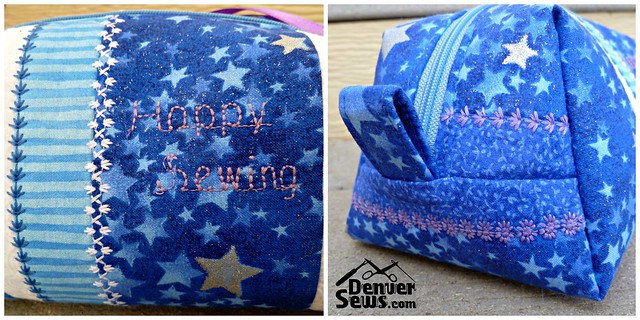
This could have been the result of too many seams on the back side of my “fabric”. I think it otherwise looked quite nice.
Brother Dream Machine
On the Brother, I used some decorative stitches that were wider than 7 mm. The machine thus pushes the fabric side-to-side. I think this feature has existed on Brother machines for a long time, at least since my Brother Pacesetter ULT2001 (soon to be going to a new home). The Dream Machine is *quiet* and if you’re using a narrower decorative stitch that doesn’t require side-to-side motion, it is ridiculously *fast*.
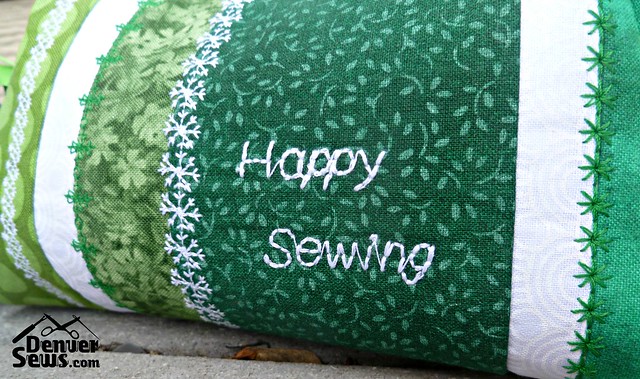
I also tried the alphabet stitching on the Dream Machine and it turned out just fine.
Comparison
I’m happy to report that both machines have their pros and cons. On both machines, I found it difficult to keep the fabric going in a straight line. I think this is because there was always a bulky seam on one side or another. The Dream Machine is quiet and fast, but you have fewer sizing options on the decorative stitches. Usually it was just L (large) or S (small). And the stitch sizes shown on the screen do not match what you would actually see on the fabric.
On the Pfaff, the decorative stitches can be resized incrementally in width and length independently. And the stitching is shown on the screen at its actual size. I really like this feature.
The Pfaff did struggle more with the decorative stitching and I would prefer to use them over flat fabric with no seams underneath, or at least seams that are less bulky.
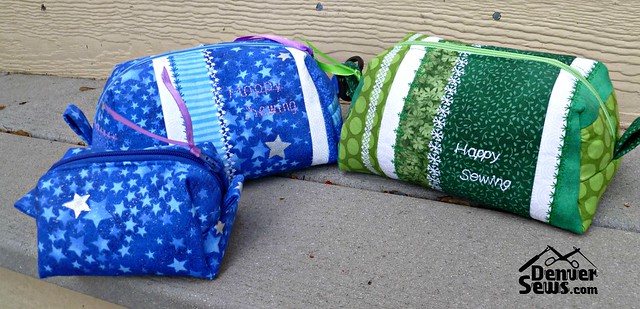
Overall I enjoyed making some cute Sugarloaf Pouches from U-Handbag with my “new” striped and decorated fabric. The “baby” sized pouch is perfect for holding flash drives and other small items. They’ll make great gifts.
Now let’s see what others have done with their rarely used stitches!

[…] challenge didn’t go well for me, I’ve continued to be inspired by Lynne’s “Use A Machine Stitch You’ve Never Used Before” challenge from November. I used some really cute stitches I’d never tried before to […]
LikeLike
I ordered these patterns after seeing these precious little bags. I never thought of making bags before I met you. Your artful application with the stitches are just great. You could sell them easy if you wanted to.
LikeLike
What kind if stabilizer do you use for just machine stitching?
LikeLiked by 1 person
I like how you stitched between contrasting fabrics, I never would have thought of that. I’m impressed your machine even lets you choose between large and small – all the decorative stitches I tested on my machine were one size only.
LikeLiked by 1 person
Mine only came in One size too.
LikeLike
As the lucky recipient of the pretty Mama bag and the adorable Baby bag, I can say that they turned out absolutely beautiful. I’m puzzled by the question of re-sizing. I have the impression that I can change the length and width of almost all stitch patterns on the Brother Dream Machine. I guess I’ll have to experiment with the decorative stitches; maybe they have less flexibility.
LikeLiked by 1 person
Hmm.. now you are making me wonder if I missed something. If you look on pages 183-184 in the manual (particularly the left side of pg 184), you’ll see that for at least some stitches, there is a L or S option to set the size. I remember looking for a different way to set the width and length of the stitch pattern independently, but not finding such a thing. I will look again!
LikeLiked by 1 person
Very cute projects Lynne! I also always have trouble with decorative stitching on top of seams, but your machines did a MUCH better job than my cheapie Brother does with this task. I love your fabric choices, a couple of those look kind of familiar!
LikeLiked by 1 person