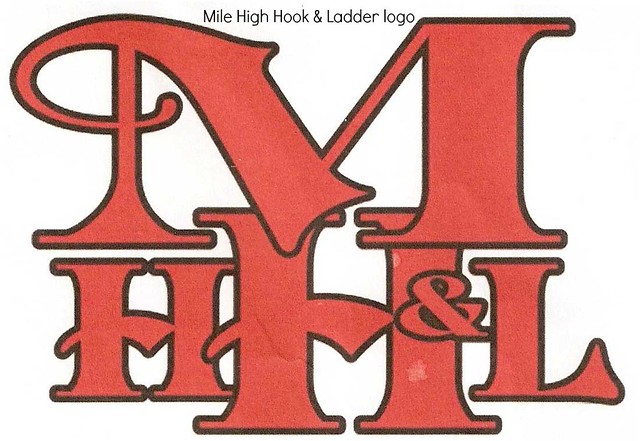
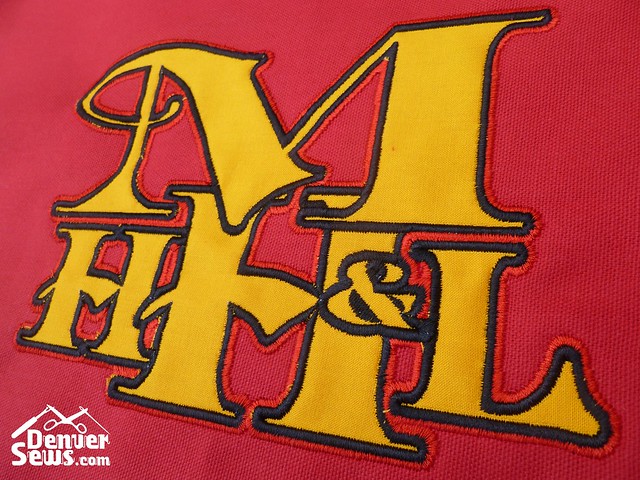
My husband and I belong to the Mile High Hook and Ladder club in Colorado. Their website is a little out of date, sadly, but you can find them on Facebook here. It’s for owners and lovers of antique fire trucks. They have a lovely 3-color logo that I thought would be perfect for a little exercise for my own personal amusement.
Like most logos, this one is typically stitched out so that the design fits within a 4″ x 4″ hoop. I wanted to see if I could enlarge the logo to about 6″ x 8″ and replace the primary fill stitches (red) with a fabric applique. I also wanted to try and bling it up with some rhinestones. This is a long post, so if you’re interested in only certain topics, here is a list:
- Digitizing the Logo for Applique
- Applique to Cut File for ScanNCut
- Applique Cut File to Rhinestone Cut File
- Applique Cutting (no HeatNBond)
- Applique Cutting with HeatNBond Ultrahold
- Rhinestone Template Cutting
- Machine Embroidery for Tote
- Rhinestones on T-shirt
The rhinestone work was inspired by what I learned at the latest Advanced ScanNCut class at Rocky Mountain Sew and Vac in Arvada, Colorado. Again this was taught by Carol who did a great job of walking us through all of the rhinestone possibilities with the ScanNCut. I call this Class 3. You can read about Class 2 here. Though we didn’t do any actual hands-on work with the ScanNCut, she got us to the point where we could go home, make a rhinestone design in ScanNCut Canvas (Brother’s web-based editing software) and give it try.
Digitizing the Logo for Applique My preferred digitizing software is Stitch Era Liberty or Design Era (same product). It is a solid piece of digitizing software from Argentina that was quite a bit less expensive than many better known products. With any digitizing software, there is a learning curve. I was extremely lucky to have participated in trainings with Daniel Fucci, the Sierra Technology Group’s representative in the United States. His instruction was indispensable. But keep in mind that all of the steps I describe here should be reproducible in any other full-featured machine embroidery digitizing software.
I scanned a copy of the logo found on an MHHL flyer (see above). I then imported the scanned logo as a background image in my digitizing software and scaled it to the desired output design size.
Though not shown in the scanned image, I’ve often seen the logo printed or stitched with a yellow emphasis border between the black lines and the background (white) of the logo. The yellow outline will end up being sewn as a zig-zag stitch. I’m going to call this the emphasis stitching. It also serves to delineate the area that will become the applique. The black outline acts to both cover the edges of the applique and further delineate the letters (see between the bottom of the M and the top of the 2nd H).
In Stitch Era Liberty, you can first create vector artwork. (You can also import vector artwork from other programs, but I didn’t do that). The vectors can then be converted to other stitched objects such as the outlines of areas to be filled or the path for a running or zig-zag stitch. I think this is the most flexible way to digitize a design as a single vector object can be converted to more than one embroidery object. (Here, “object” refers to a single item, like the closed outline of a polygon or a single contiguous path to be stitched with a running stitch.)
I traced the background image and created two sets of vectors: one for the yellow emphasis or applique cut line and one for covering the applique edges and delineating the letters.
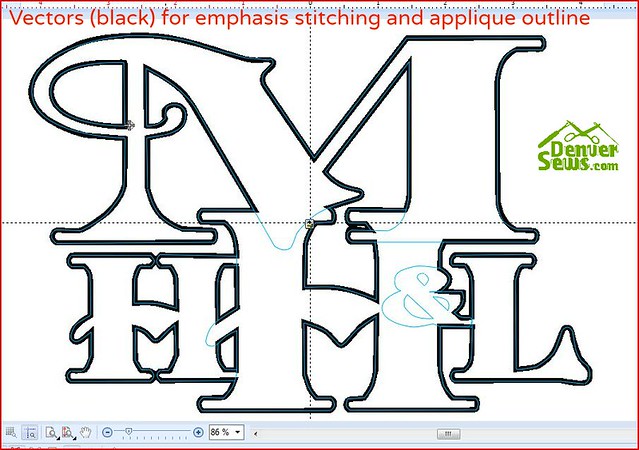
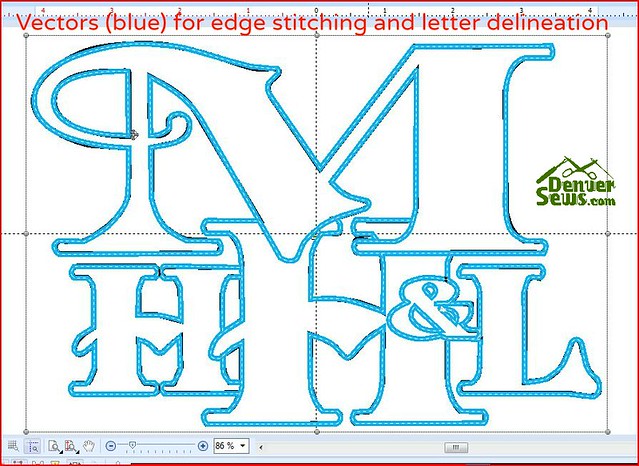
I realize that the illustrations don’t look like vectors, but they were created using the usual nodes and Bezier curves.
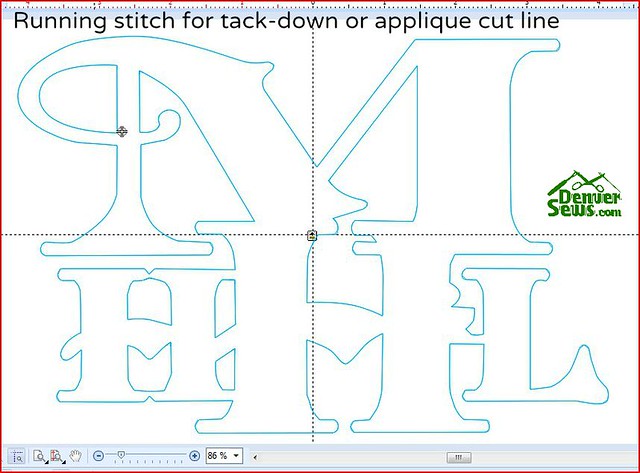
I then went ahead and created the embroidery objects from the vectors. The black vectors were used to generate the zig-zag emphasis stitching. I used the same vectors to create a running stitch in a different color. This running stitch could be sewn as a tack-down line. I was planning on not actually sewing the tack-down line and using temporary spray adhesive instead. This running stitch was necessary, however, for creating a ScanNCut cut file for the applique. This is described later.
Please note that it is extremely important to include trim stitches between the exterior outline of the applique and the running stitches that define the holes that needed to be cut out of the applique. If you do not include trim stitches, the ScanNCut file will not be generated correctly.
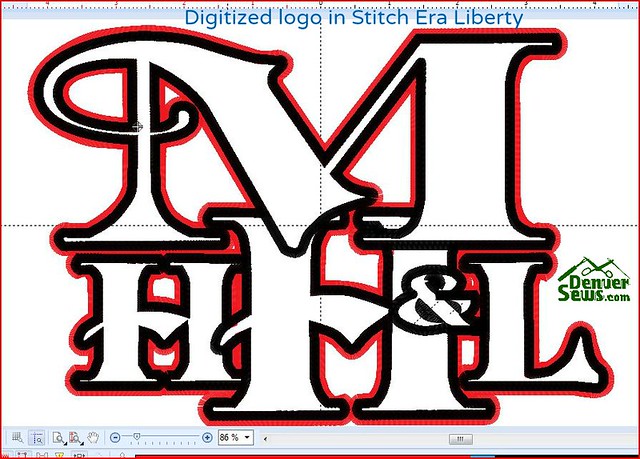
Note that the yellow emphasis stitching is shown as red in the design above.
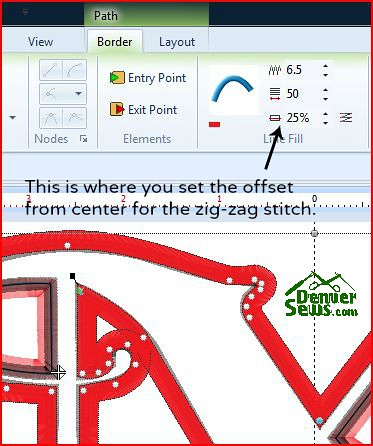
Stitch Era Liberty has a handy feature that lets you offset the zig-zag stitch relative to the vector path that the zig-zag stitch is following. Normally, the vector path is set as the center of the zig-zag stitch. The needle travels an equal distance to either side of the vector path. But you can set an offset so that the needle travels more to one side than the other. This is very important as I wanted the yellow zig-zag stitch to stick out from underneath the black zig-zag stitch which covers the edge of the applique. Hopefully your digitizing software has a similar capability.
I saved the design to both a PES format and a DST format for my Brother embroidery machine. Stitch Era Liberty has never successfully exported Trim commands in the PES format, so I find that I sometimes have to use the DST format instead when Trims are essential as in the next step.
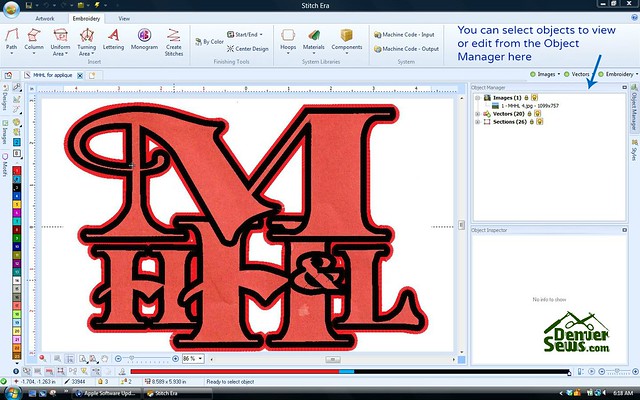
Here is a full screen shot so you can see what the SEL interface looks like.
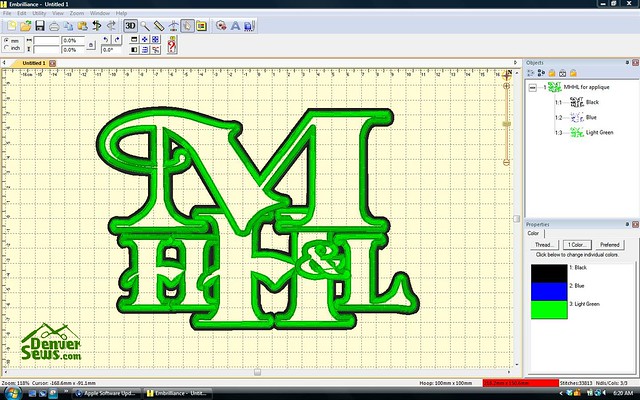
Applique to Cut File for ScanNCut I discovered that the program Embrilliance Essentials has a new feature that will create a ScanNCut cut file (.fcm format) from the part of your embroidery design that delineates the area to be cut! I believe there may be other programs that do the same thing, but I am not sure.
In Embrilliance Essentials, I loaded the DST version of my embroidery design (which preserves the Trim commands but contains no color information) and selected my running stitch or tack-down stitching. I set these stitches to be the “Applique Position” and then created an .fcm cut file with no offset.
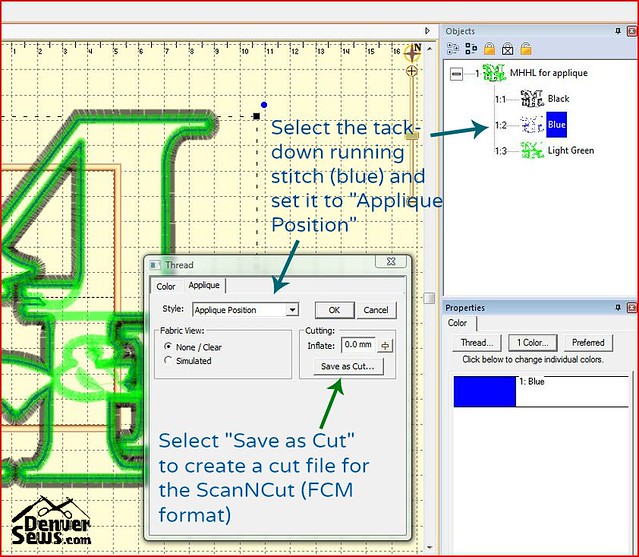
I loaded the resulting .fcm file in ScanNCut Canvas to verify that the holes were preserved. The .fcm file was then put on a USB flash drive and off it went to the ScanNCut.
This recent addition to Embrilliance Essentials is a fabulous tool for ScanNCut users who want to cut fabric for applique. All you need is a set of tack-down running stitches in your embroidery design and you should be good to go. And if you’re a Mac user, you’re supported as well. Amazing.
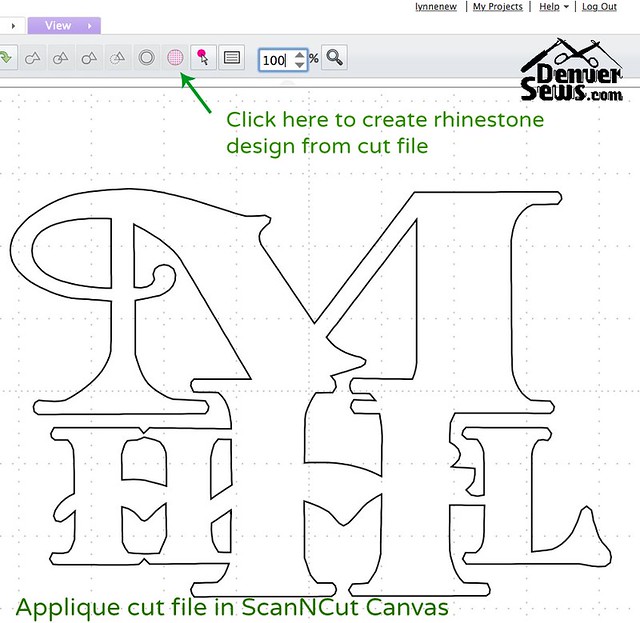
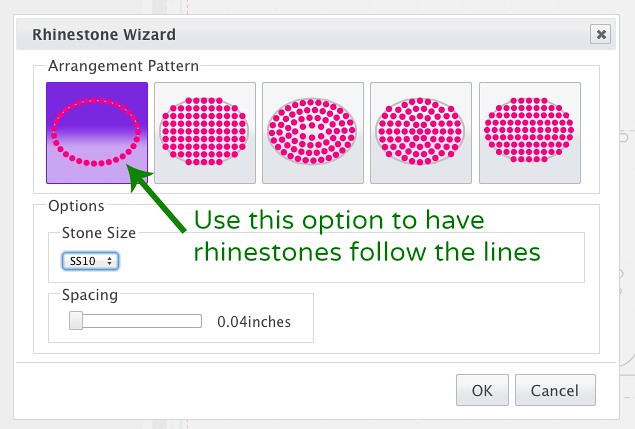
Applique Cut File to Rhinestone Cut File After taking the ScanNCut class over the weekend, I was excited to try and use rhinestones to outline the MHHL logo, basically in place of the black zig-zag stitch in the above. To create the rhinestone pattern, I re-used the .fcm file I created for the applique and had ScanNCut Canvas convert all of the lines to lines of rhinestones:
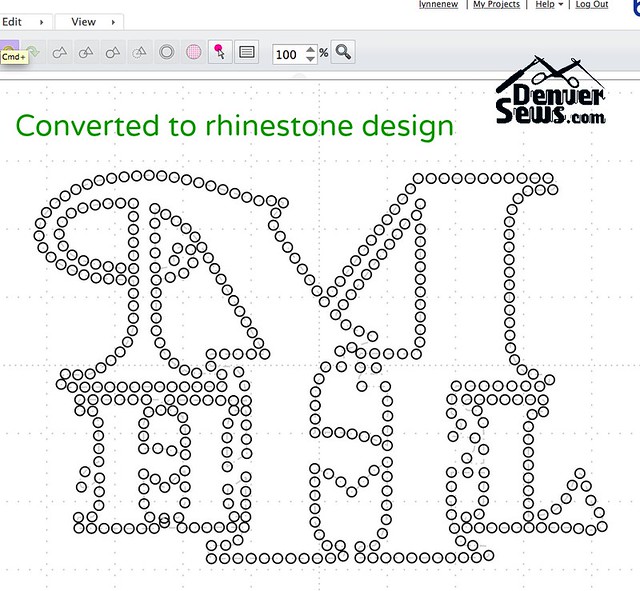
I had to manually add in individual rhinestones for the lines of the black stitching which were not on the edge of the applique.
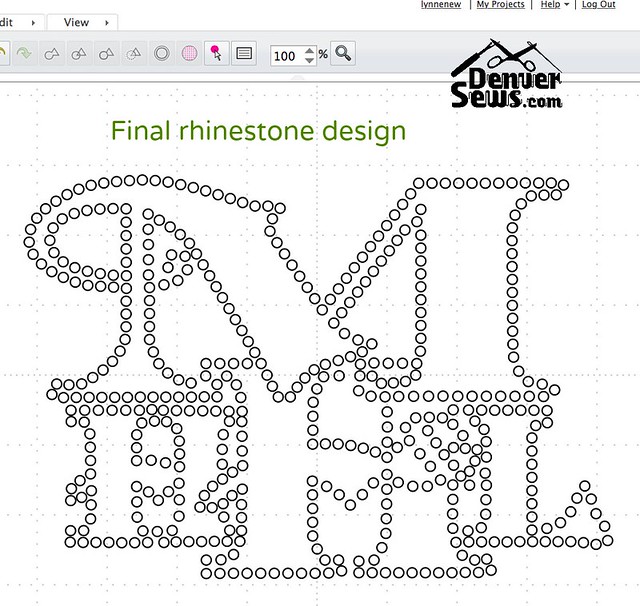
I also fixed up the spacing on the automatically generated rhinestone placements. These automatically-generated placements start out grouped. I had to select the group and right-click to Ungroup them. Once you do that you can move individual rhinestones around. Note that when you Ungroup a group of rhinestones, a cut line is generated for the original outline that the program was following. You have to remember to delete that cut line before cutting your rhinestone template.
I then selected the entire design and Grouped the whole thing. The software did not want to save the design as 400+ individual circles, but was happy after I grouped the whole thing together.
Applique Cutting (no HeatNBond) I loaded the .fcm file from the USB flash drive to the ScanNCut. I then mirrored the design as I would be cutting the fabric upside-down. This was the easy part. Getting the applique to cut nicely took a bit of work.
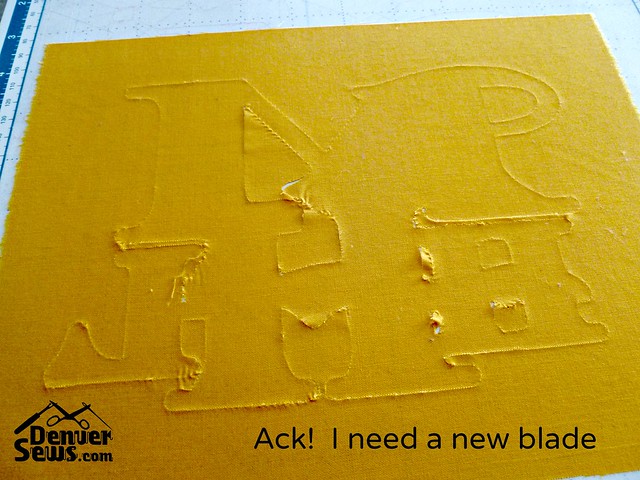
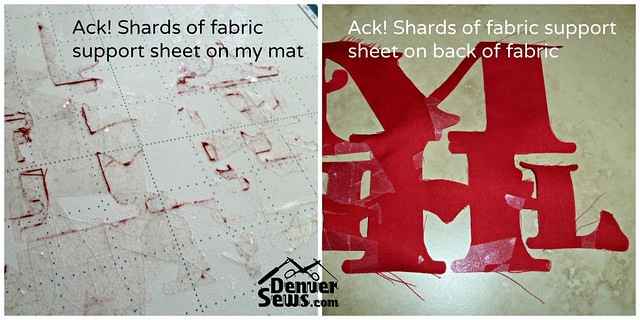
First, I starched and pressed the fabric three times with Best Press. I then used a brayer to afix the fabric to my well-used but clean fabric support sheet. The blade depth was set to 4 and the speed and pressure were both set to 3. For my first test cut, the cutting went poorly, indicating that I likely needed a new blade. The blade had been used many times on paper so it was high time I replaced it. My second test cut went much better with the new blade, but my fabric support sheet had had enough and started coming apart in little pieces, sticking to the back side of the applique. I needed to remove the old support sheet and replace it. This was a dog to clean up as the support sheet had been cut up into thousands of little pieces! Lesson learned: do not set your blade depth such that it cuts all the way through your fabric support sheet!
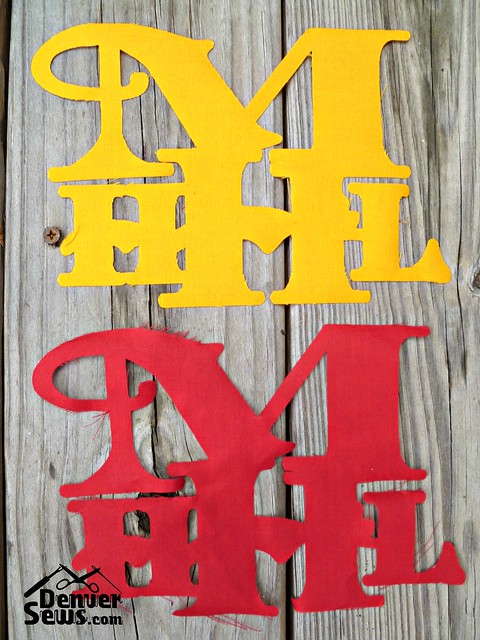
The third attempt with a new fabric support sheet was the charm. I set the DEPTH to 3.5 and left the SPEED at 3 and the PRESSURE at 3. The applique cut beautifully and the new support sheet was not cut all the way through. I anticipate I’ll get a lot more use out of this new support sheet.
Note that I used a better quality Robert Kaufman Kona solid cotton for my final applique (the gold fabric) and I felt like it cut more cleanly than my lesser quality fabric (red).
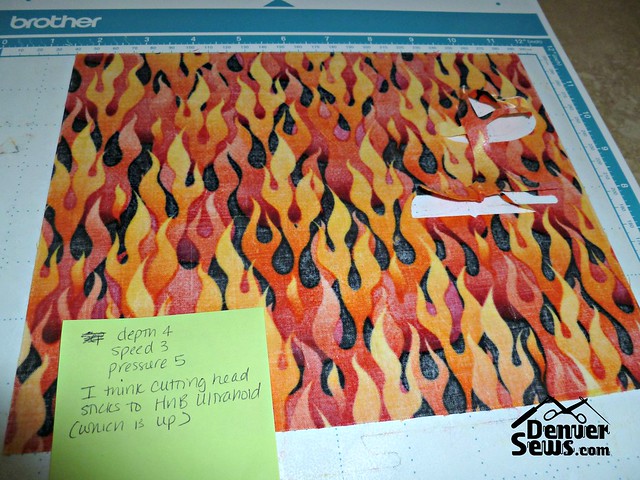
Applique Cutting with HeatNBond Ultrahold For my T-shirt with rhinestones, I wanted to use HeatNBond Ultrahold on my applique. I applied the HeatNBond Ultrahold to the wrong side of my flame fabric. In my first attempt, I placed the fabric right-side down on my mat with the fabric support sheet. I removed the paper backing and tried to cut the applique. It seemed that the cutting head was sticking to the HeatNBond and caused the fabric to remove itself from the mat. This was a no go.
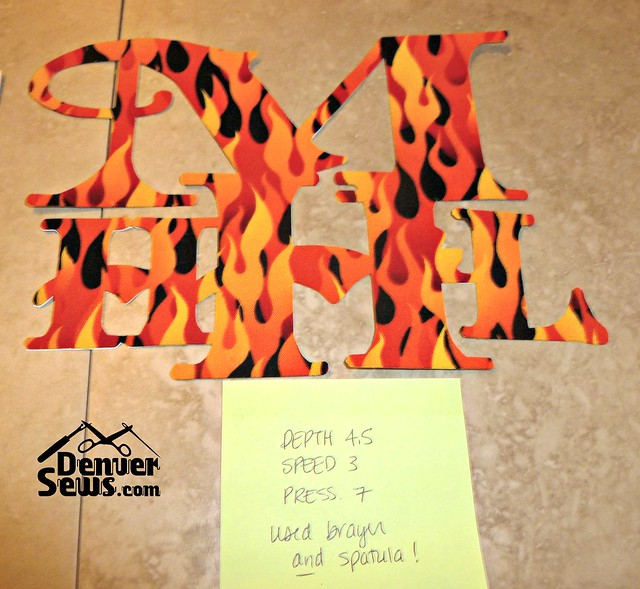
In my second attempt, I left the paper backing on. I set the blade DEPTH to 4.5, SPEED 3, PRESSURE 7. It cut like a charm! So my advice: leave that paper backing on!
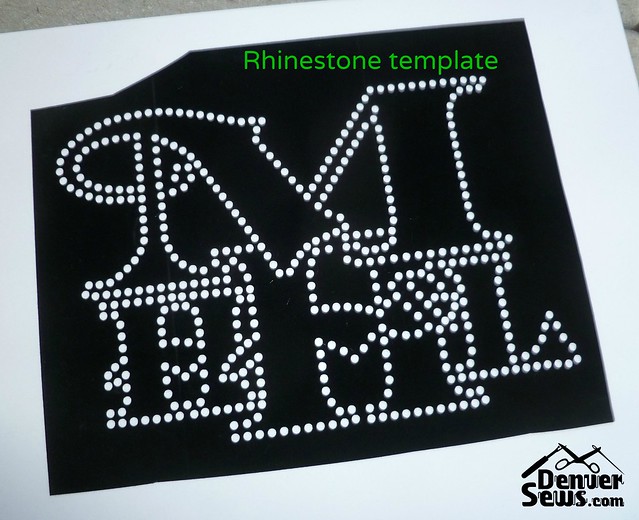
Rhinestone Template Cutting To cut the rhinestone template, I followed the instructions in the package, setting the blade depth to 6, the pressure to 0, and the speed to 3 (default). Also following the instructions, I did test cuts reducing the blade depth until it was no longer cutting through the backing paper. I ended up at depth 5.5. Turns out that even if the test cut doesn’t cut through the backing paper, the regular cutting might! I ended up with hundreds of little circles stuck to my standard mat. This took a long time to clean up. And I ended up having to punch out those same circles one at a time from my template. If the backing material hadn’t been cut, this process should have been much easier.
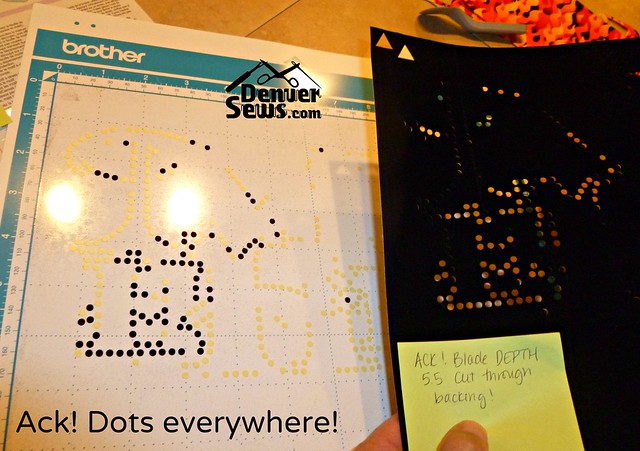
When I do it next time, I will start with a lower blade depth and work my way up to a point where the template material cuts, but the backing doesn’t. Nonetheless, I did end up with a working template for my rhinestone design.
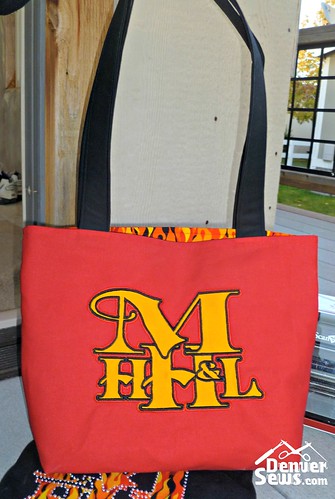
Machine Embroidery for Tote Using a sturdy piece of red canvas and a light/medium tear-away stabilizer, I embroidered the first yellow outline. I then sprayed the back of the applique with machine embroidery spray adhesive and then affixed it to the canvas, letting it sit comfortably centered within the yellow outline.
I then proceeded to stitch the black zig-zag stitch that covers the applique edges. Turns out that the adhesive didn’t really work that well on the smaller “arms” of the applique so I had to hold those down with a stiletto while the machine was working. It wasn’t perfect, but it was pretty good. Next time, I’ll have to consider either using more spray adhesive or possibly a different one. It would be nice to get those little “arms” stuck down better.
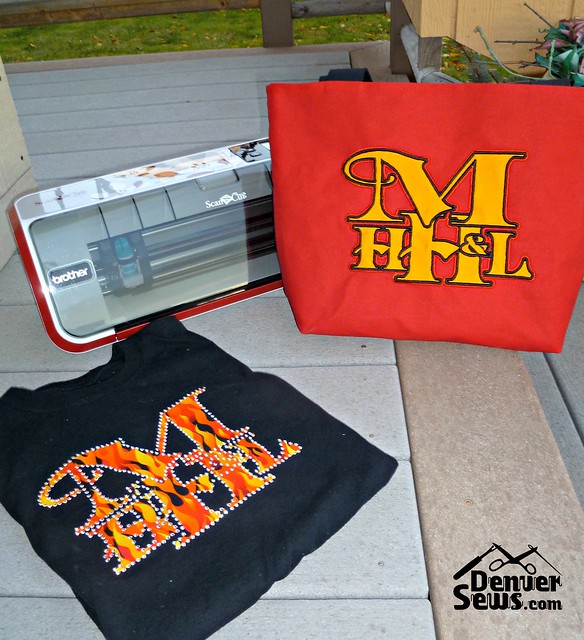
But given the spray adhesive problems, the final product turned out great! I created a tote bag using the basic technique described here and here is the result.
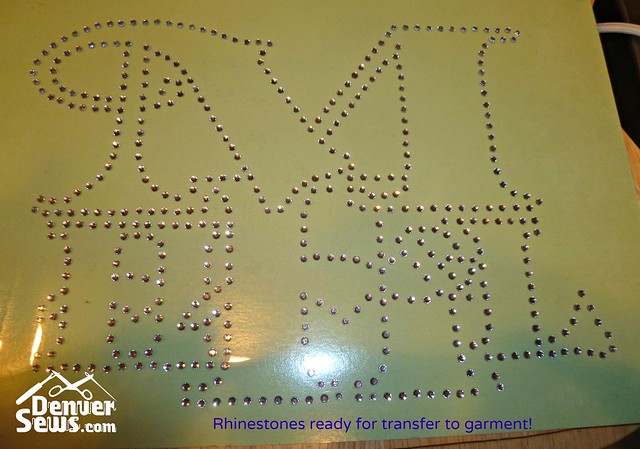
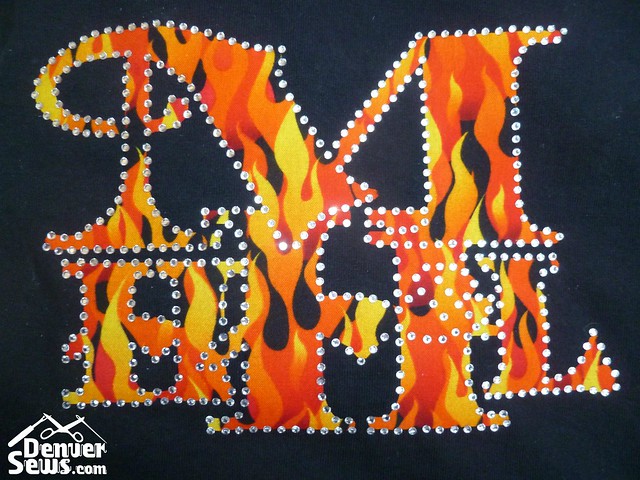
Rhinestones on T-shirt
First I applied the applique with HeatNBond Ultrahold to the front of the shirt and let it cool. Then I applied the rhinestones from the transfer sheet to the shirt. I used a pressing sheet between the transfer sheet and the iron, just in case. After letting everything cool and removing the transfer sheet, I checked to see if any rhinestones were loose. I used a Darice Rhinestone Hot Fix Applicator to afix the few loose ones. I like this tool because it comes with many tips. But note: I found that if I used a 3mm tip for my 3mm rhinestones, the stones would sometimes get lost in the tip and I’d have to pry them out with a small object. I would suggest using the next smaller sized tip to avoid this problem.
All done! This little experiment turned out to be a lot more work than I anticipated! But now that I understand the process, I can see that there may be other opportunities to turn applique designs into blinged-out adornments with the help of a ScanNCut. Use those applique cut files for both fabric cutting and rhinestone placement and see what kind of craziness you can create!

[…] my Brother ScanNCut (for appliques). It works beautifully for such purposes and I talked about it here. Lucky for me, Embrilliance recently released a reasonably priced digitizing package as well called […]
LikeLike
Thank you for your Awesome tutorial! I
LikeLike
When you’ve mastered the scan not cut machine and technique, would you do some cutting of pleat her or leather for me?
LikeLike
I don’t know if the ScanNCut will cut through pleather or leather! I suppose I could try, though.
LikeLike
You are great! There isn’t anything you won’t try until you succeed.. this blog is good, but I think I’ll have to go to school to use that cutter 🙂
LikeLike
Nice work! It’s bedazzling!
LikeLike
Dazzling! equally impressive: all the steps required from start to finish.
LikeLike