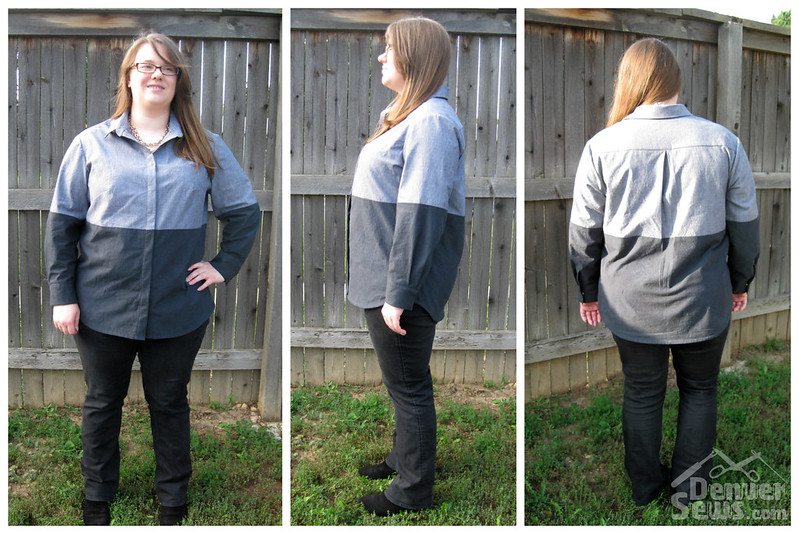
I usually am not the type of person who makes the same pattern multiple times, but I’ve been thinking that maybe my sewing projects would go a little smoother if I had a few tried and true patterns to work from. So, sorry to bore you, but I made another Archer. This is my 3rd one – I think three is a pattern duplicate record for me.
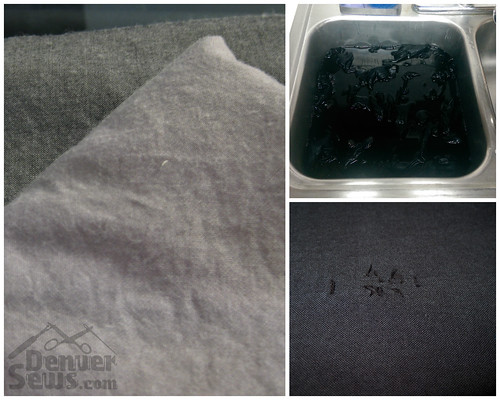
For this version I’ve been wanting to make a shirt color blocked from two different shades of chambray. I even bought two colors of soft and drapey tencel chambray from fabric.com for the project, but as you can see from the picture on the left it pilled HORRIBLY when I prewashed it. It’s a shame because it feels so nice, but I guess it will make a nice pair of pajamas now. Moving onto plan B… I dug up some “black” Robert Kaufman chambray (that was what the color was called, but it was black thread in one direction and white in the other, so more of a grey), and then picked up some black Dyelon dye from JoAnn’s and dyed a couple yards of it black. A couple yards was more than I needed, but the fabric had some flaws that stood out even more after dyed, so I was glad for the extra. By the way, this shade was called “Velvet Black”. Sounds lovely, but as you can see that is just PR speak for dull and faded black. I guess if you want true black you should head to Dharma Trading!
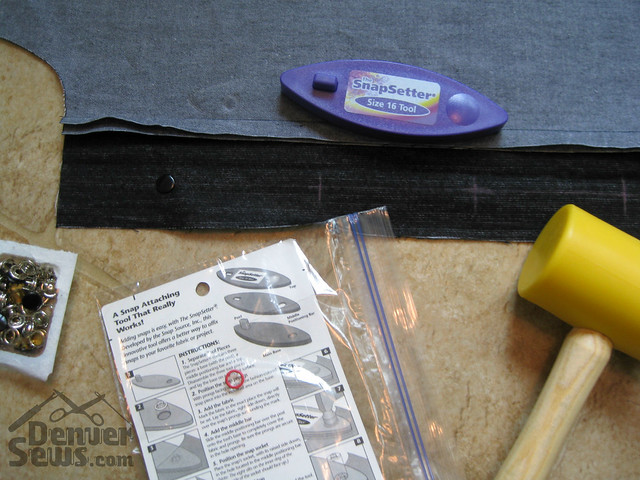
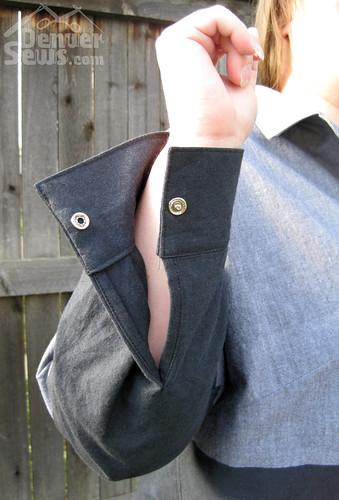
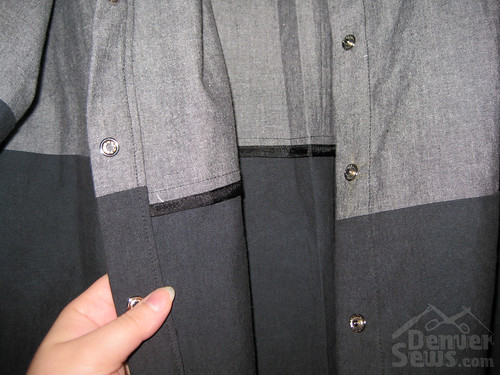
For whatever reason I wanted this version to have snaps, so I picked up some from Colorado Fabrics. I also wanted to keep the front of the shirt clean by hiding the snaps. I did this by setting the front part of the snap on the front button band before I sewed it up so the snap was hidden inside the button band. By the way, if you are putting snaps on anything, I HIGHLY recommend getting this SnapSetter brand tool over the Dritz pliers type you find at JoAnn’s. The pliers are very finicky, but this thing was pretty much fool proof. I’ve used it on a couple projects and have not had a snap misfire yet.
The downside of putting the snaps in before sewing up the button band was that I could not for the life of me get the topstitching close to the snaps straight. I tried THREE times, ripping it out each time and starting over, before I finally decided that maybe it was fine without any topstitching.

I did the same snap finish on the cuffs. The amazing part of sewing this pattern up a third time was how much faster it went. The last one took me about a week, this one I finished in two days. I didn’t realize how much sewing time I spend reading a pattern or thinking about how things go together – when I didn’t have to think, it breezed by. I also tried to be smarter about the order I sewed it up in. I basically tried to get as far as I could without walking to the iron. For example I sewed the right front button band, left front band, sleeve plackets and undercollar in the first go and then carried it all over to my ironing board.
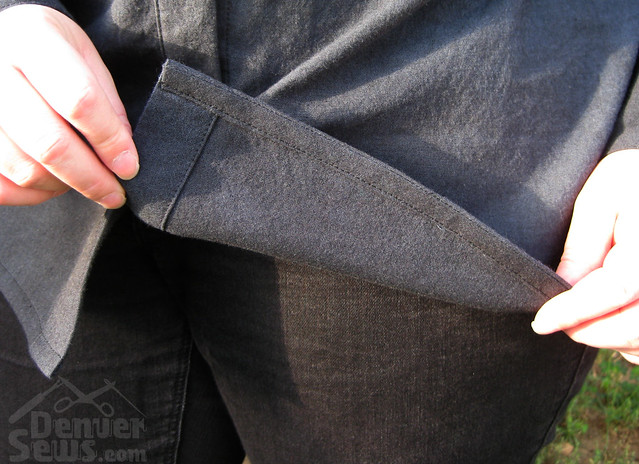
I thought I’d be looking at the seams between the colors a lot, so I took the time to finish it with Hug Snug seam binding. LOVE this stuff. It’s really thin so it doesn’t add much bulk to your seams, and it presses so well you never need to pin it. I got mine from Wawak, but you can also get it from Fabric.com.
On my last Archer the hem flipped out a tiny bit from trying to turn and stitch a curved hem. This time I tried using bias tape instead from this tutorial by Lucky Lucille, and my hem looks a lot smoother.
If you’re not bored already I’ll talk a bit about fitting… My first Archer I made in a size 16. The finished measurements looked perfect, but for whatever reason I felt restricted in the arms like I couldn’t bring my arms too far forward. The last one I tried in a size 18 but I felt like that was a bit too big. (Fine for the drapey fabric I made it in, but not for a stiffer shirting fabric.) I brought both shirts to the last Denver Sewing Collective Meetup and Denise (our local ASG president) was kind enough to wield some pins and help me fit them. (Thanks Denise!) What we came up with was that the armscye was too low (which we fixed by raising the shoulders up) and it was also a bit too tight across the back. Denise wisely suggested I make a muslin first… but I did not do that. Lately I’ve been wanting to make “wearable muslins”, I think because I’ve got too many muslins lying around where by the time I got through a couple rounds of fitting I was so sick of the pattern that I never actually made it in a fashion fabric. Now I figure if I get something out of it that at least fits better than RTW, then I’m happy. Good news first… I can move my arms!
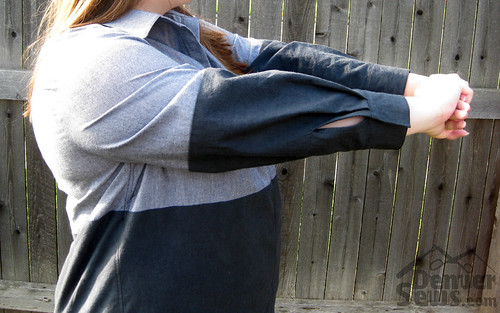
The bad news is that bringing the shoulders up on the outside was apparently more slope than my shoulders actually have, and now I have some poofiness around the neck where it stands off my shoulders when buttoned up all the way. In reality I’ll never wear it buttoned up like this, so I don’t really care. Next time I think I’ll put less slope on the shoulder line. Incremental improvements… I get to TNT status one of these days!

In other news, the ugly pockets on the last Archer have been redeemed! I also brought this Archer to the DSC Meetup and asked for advice. Marnie asked me if I ever intended to use the pockets… No. Then she suggested using some fusible tape to fuse them shut, since the problem was with the drapey fabric hanging down and causing them to bag. OMG… such a simple solution, but I never would have thought of that on my own! 5 minutes and 6 inches of EZ Steam a Seam Lite later, the pockets look fine.
Second place in the suggestion pool went to Melissa for suggesting I disguise them with pocket protectors. HA.

Wow, what lovely work! I too am impressed by the color blocking.
LikeLike
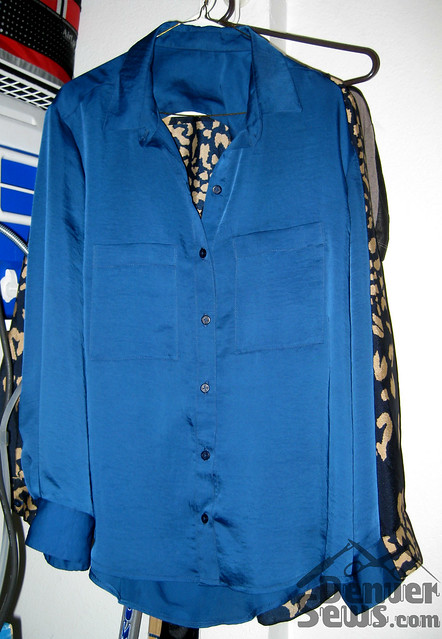
Ya, the details are awesome. You’re going to have an entire closet full of Archer tops. The blue blouse looks amazing with the fix.
LikeLike
Wow you really kock it out of the park with those interior details and matching up the colorblocking line on the sleeves. Geesh, thats awsome.
On another topic: Hmm… second place for suggestions. Second place is really the first of the losers. haha.
LikeLike
Wow, you’ve have a completely perfect line of color blocking across the sleeves and body of your Archer, how’d you manage that? This shirt looks great on you!
I really appreciate that you shared the info on the products you used. I didn’t know about Hug Snug or the snap tool. But I’ll be ordering them. The last time I used those plier snap setters I swore I’d never attempt set-in snaps again. Now I’ll be able to add them back to my repertoire. Thanks!
LikeLike
On matching up the color blocking lines: I figured the intersection of the side seams and armholes would be the best reference point, so I just measured X inches from that point on each piece and drew my lines there. When sewing I put a pin through the lines when matching up those pieces and sewed over it. Surprisingly I had zero issues with the color blocking.
LikeLike
Wow that’s really great! Love the hug snug and the hidden snaps and the bottom hem – all looks most excellently executed! Nice job. And a great fix for your droopy pockets. What nice outcomes!
LikeLike