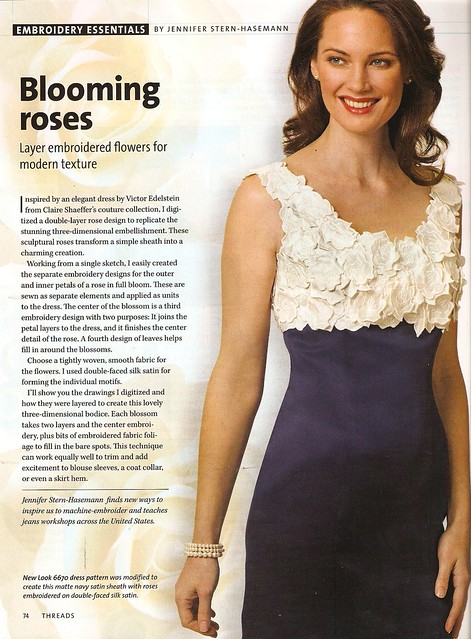
A Denver Sewing Collective member, Sylvia, asked me weeks ago to digitize a rose design that was referenced in Threads Number 161 July 2012. The article is by Jennifer Stern-Hasemann. The project is to cover a bodice with a bouquet of sewn roses and it is quite lovely:
By the way, patternreview.com has a number of video classes by Jennifer Stern-Hasemann. I took a machine embroidery class of hers many years ago and found it quite useful. There’s nothing better to get you over that initial hump of machine embroidery than taking a class and being forced to use that embroidery attachment.
Anyway, the objective is to sew a whole bunch of roses and afix them to a bodice. The dress Jennifer chose to use is New Look 6670.
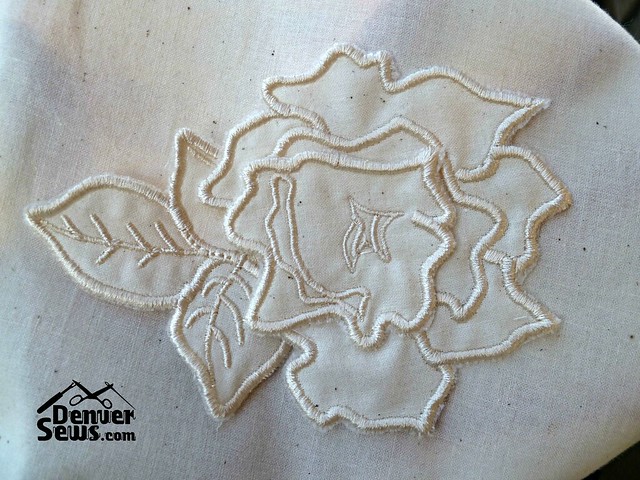
Each rose consists of an outer petal layer, inner petal layer, and center motif used to stitch the whole thing together onto the bodice. There is an additional leaf pattern that is used as filler.
I used Jennifer’s rose drawing as the basis for my digitizing. There are innumerable line drawings of roses on-line and these could be used as well or you could draw your own.
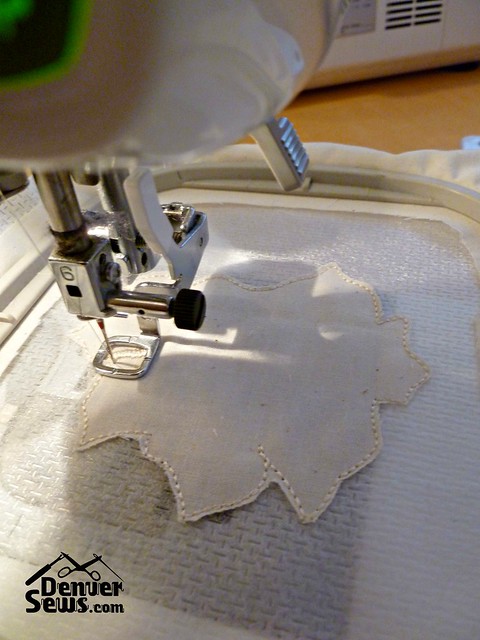
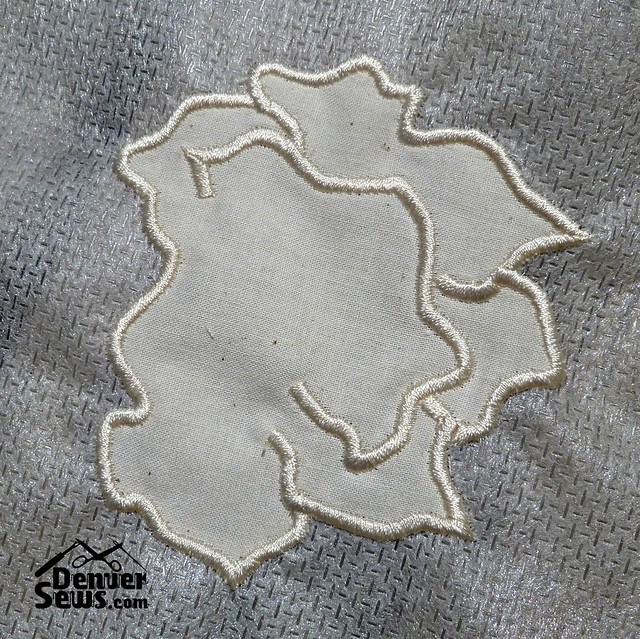
The technique is like applique. The design needs to be digitized such that the fabric is first stitched down to the stabilizer. You trim the fabric from the stabilizer. And then you finish the edge stitching and any interior decorative stitching.
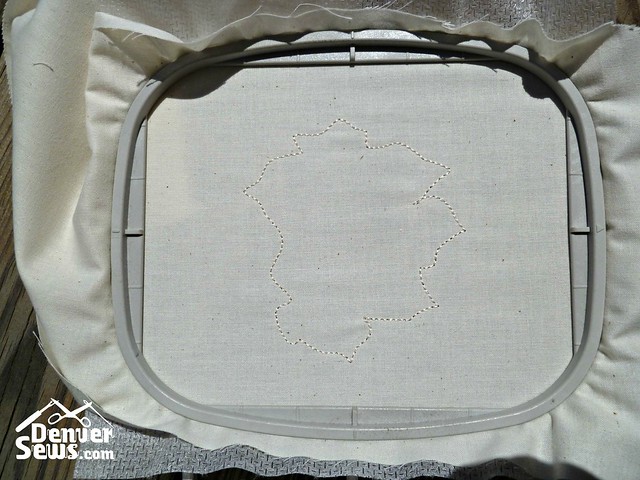
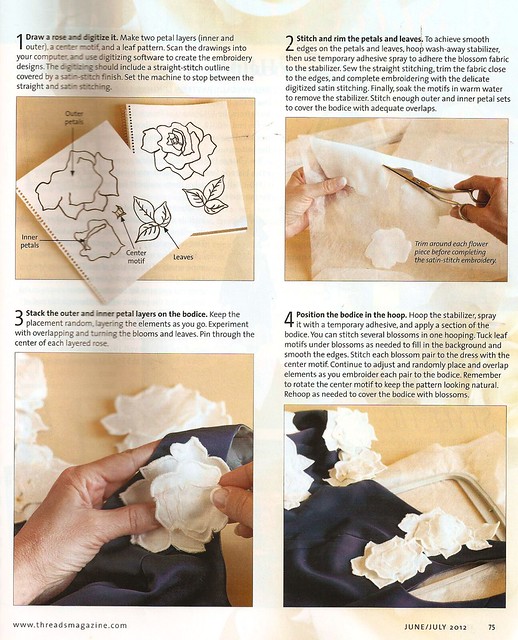
Instructions for this project are in the magazine but I will repeat them here briefly. (1) Use water soluble mesh stabilizer. (2) For the flower, use a tightly woven, smooth fabric. (3) Either hoop the fabric with the stabilizer or use temporary spray adhesive to stick the fabric to the hooped stabilizer, leaving the fabric unhooped. (4) Stitch the outline. (5) Trim the fabric close to the outline. (6) Stitch the rest of the design. (7) Remove from hoop and trim the stabilizer. (8) Follow stabilizer directions to dissolve the mesh. (9) Repeat for inner petals and leaves.
For my test, I used unbleached muslin and a light weight mesh cut-away stabilizer.
Jennifer then suggests hooping more water soluble mesh stabilizer (or perhaps a tear away) and using temporary spray adhesive to hold the bodice to the stabilizer. Depending on your embroidery machine, it may be easier to reposition the bodice each time you stitch down a rose, centering the rose in the hoop. Or if you have one of those fancier machines with a video camera, you might be able to keep the bodice in place on the stabilizer and move the embroidery design around on the machine to match the position of each rose.
Here are the instructions from the magazine:
Digitizing
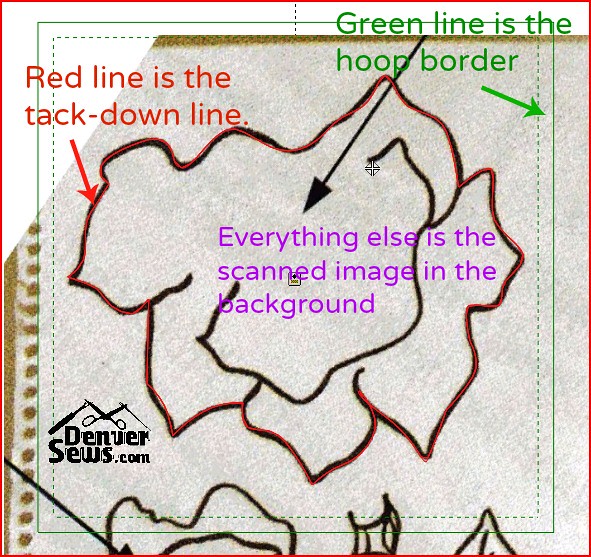
Digitizing the 4 parts of the rose is not particularly difficult. Only two separate sewing steps are required: (1) the tack down line (followed by a stop or a color change to force a stop) and (2) the edge satin stitch and any other interior decorative stitching.
Because the shape of the rose is not a simple one, you must manually digitize that tack down line. With most software, you can have a raster image in the background of your digitizing workspace. Using that as a guide, you can enter in a path that follows the outer edge of your image. The path can be converted to straight stitching and this will become your tack down step.
Because the second step contains more stitching than just the edge stitching, I manually entered the outside path again, including the inner stitching. The path was then converted to a satin stitch with a 40 mm stitch width along the outer edge.
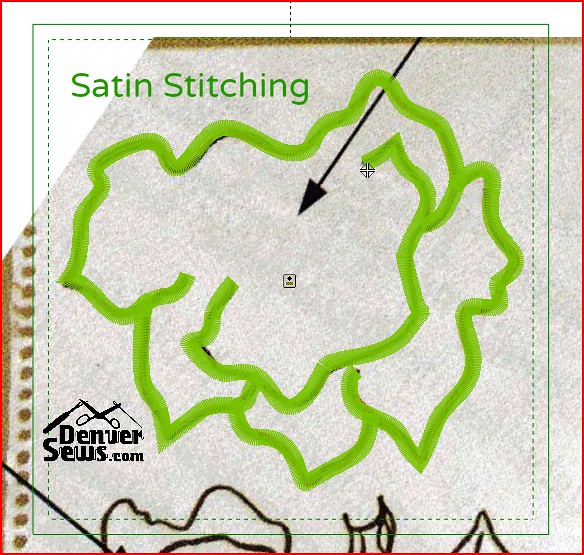
There are many ways to accomplish the same thing. This is just one of the ways.
General Notes
There are many different digitizing software packages, some of which are sold by machine dealers and some which are sold independently. Each has pros and cons. Most cost $1000+ but there is a cheaper option called Embird that many love. Personally, I use Stitch Era Liberty.
As a note, you are not required to use the Brother PE-Design digitizing software just because you purchased a Brother embroidery machine. Most, if not all, software packages will convert your design into a multitude of different formats for different machines. Download a trial version first or get a hands-on demo of the software you are considering buying. The most important thing is to find software that is easy to use for the things you are considering doing.
Learning to digitize can be rather fun. There is one book on the mainstream market called “Digitizing Made Easy” by John Deer. I read this book before I purchased software as it gave me some idea of how to digitize and what I needed to look for in my software. Subsequently I was very lucky to participate in hands-on classes from Daniel Fucci, the Stitch Era representative in the United States. He’s a very funny guy and a talented instructor. Between these two, I feel I can tackle most simple projects.
Final Product
I delivered 4 PES files to Sylvia for her Brother machine, each designed to fit within a 4″ x 4″ hoop. Last I heard, she sounded ready to start mass producing roses! Hopefully when she finishes her dress, she’ll show the world her final product!
(If you would like a copy of the 4 embroidery designs I created for Sylvia, leave me a note in the comments below with your email address and the format you need.)

[…] that Jennifer Stern had drawn for her machine embroidered embellishment. I wrote about that process here. You never know what becomes of these requests, so I was astonished when she told me she had […]
LikeLike
Lady, this embroidery application for me, has been very challenging. I found out the hard way that even the bobbin thread has to be special. My machine had to be repaired for a big thread jam inside! I’ve learned a lot and still there’s more. I’m determined to complete this dress. It’s costly already for me(Machine repair$$$). I will count the roses and the total fabric it takes to complete them. I will show the finished product at one of our meetings. My Full body selfies are not too good.
LikeLike
Lynn, I can’t thank you enough for my roses and these instructions. I have started making roses in white satin with specks of glitter throughout with glossy white embroidery thread. I had a time learning to use my embroider since I’d not used it since 2008. I didn’t know the tiny pattern was to be added to the stack for adhering to the dress! I looked at the pattern New Look 6670 at Joann’s, but i decided to use another pattern made similar. I have not decided on the dress color yet, but it will be silk. I have several colors of silk on-hand. Your instructions for connecting the roses to the bodice is what I really needed. Thank you again! Buying a digitizing software is not on my list of purchases. I’m dreaming of the Elissimo or the Destiny by Babylock.
LikeLiked by 2 people
You are welcome Sylvia. I think the rose would look lovely in any number of situations, even as a stand-alone adornment. Can’t wait to see them made in white satin with glitter!
LikeLike
My rose don’t look like your picture. So, I’m not sure I’m doing it right. I have no clue how you placed the tiny piece via embroidery in the center. I really could use your help.
LikeLiked by 1 person
So incredibly beautiful! Having embroidery like this on a garment takes the piece to a whole different level. Wouldn’t that treatment be beautiful on a wedding gown or bridesmaid dresses?
LikeLike
This is really fantastic. I can’t wait to see the finished product.
LikeLike
Wow . That is going to be amazing. Wonder what color the roses are going to be?
LikeLike
beautiful rose. I love the dress too! Will look so good finally.
LikeLike
This is so cool. I can’t imagine how long it will take to make enough to cover a bodice, but I’m sure it will be worth it!
LikeLike
Good work, Lynne. That bodice is lovely!
LikeLike