For the letter N, the 14th post in my  series, I used New Look pattern 6598. I don’t think I’ve ever sewn a New Look pattern that ended up fitting me, probably because I used to sew the size that matched my measurements. I’ve now learned to sew one size smaller when using commercial patterns. In fact 6598 wasn’t a pattern I wanted to purchase or sew. Because of my fear of sewing buttonholes and zippers I usually choose knit pullover tops. And 6598 is a blouse – with buttonholes! So how did I wind up using New Look 6598 for my N project?
Well, several years ago I took a sewing class on altering commercial patterns. We didn’t actually sew up a sample, we just made the necessary alterations on the pattern, which had to be a commercial blouse pattern with front and back darts. Since I had never made a blouse, and didn’t have a pattern for one in my stash, I bought New Look 6598 at a thrift store for 50 cents. I was disappointed that the class was focused on altering something I wasn’t interested in sewing but I hoped I would learn fitting techniques I could use on dress bodices. But now that I need an “N” project to blog about (and in an attempt to conquer my buttonhole phobia), I’m putting put my New Look pattern alterations to the test.
In the class, to create my custom fit, I had to make several adjustments to my pattern. The instructor showed me how to raise the shoulders, removing the downward slope on the outside edges in order to better fit my square shoulders. And then she instructed me to raise the bottoms of the armholes the same amount to compensate for the raised shoulders. I also folded the pattern along the waistline lengthen or shorten mark to better fit my short torso. I remember the teacher saying that commercial pattern armholes are always too deep, and she recommended that home sewers raise commercial pattern armholes 1/2″ regardless of body type. Which was true for New Look 6598 at least, I raised the bottom of the armhole over an inch – 1/2″ to compensate for the raised shoulder and another 1/2″ because “all commercial armholes are cut too deep”. And the altered armholes fit just right!
I’m sure the teacher also said “Remember to redraft the armhole facings to match the redrawn armhole.” Oops! I forgot to do that! Although I had plenty of leftover fashion fabric, I was almost out of interfacing. I hate armhole facings anyway so I just finished the inside of the armholes with bias tape instead. This is simple to do, just open one side of your double-fold bias tape, put the bias tape RST around the armhole (with the opened fold crease of the bias tape on the 5/8″ seamline of the armhole) and sew along that fold mark. Then trim the seam allowance of the fabric and turn the bias tape to the inside of the armhole. Sew the unattached folded edge of the bias tape down on the inside of the armhole.
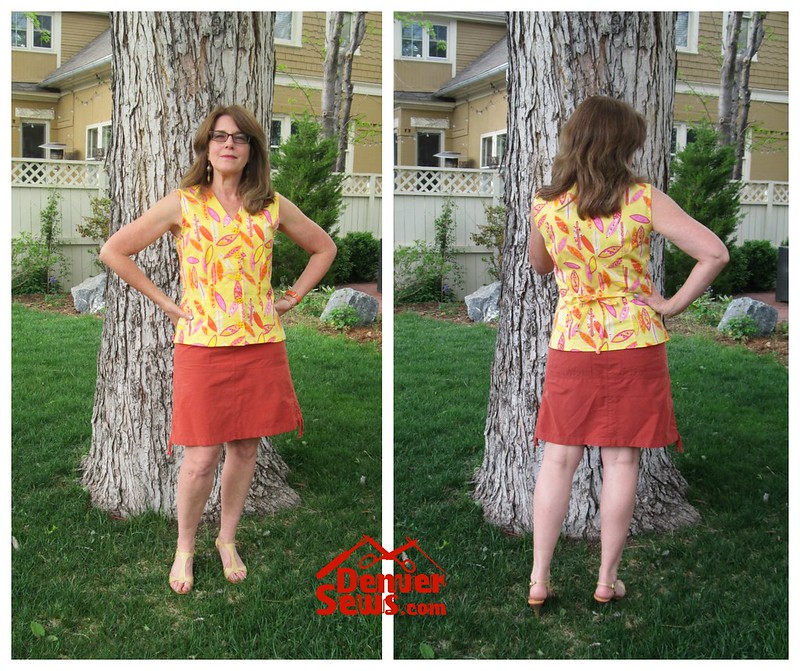
I made this blouse to go with an orange skirt I recently thrifted. I never wear yellow but the orange in the print matched the skirt so I decided to step outside my comfort zone. I originally thrifted this fabric to use to sew clothing for a friend’s daughter in 2008. This lovely young girl loves bright, hot colors and I thought she would enjoy the surfboard motif. I never got around to using it though and I figured 6 years was long enough in the stash. The buttons are vintage, I bought those at an Austin, Texas sewing studio (also years ago). The total cost of this blouse was under $5.00. And triple score on stashbusting: fabric, pattern, and buttons!

I like the tip about always moving up the bottom of the armhole by 1/2″. How do you redraft sleeve caps if you do this?
LikeLike
Lynne I can’t remember! If I ever find my materials and notes from this class I’ll let you know. Hopefully the teacher addressed this.
LikeLike
I love absolutely everything about this – the colors (WOW!), the pattern, your comments – it’s spectacular.
LikeLike
Thanks for your positive comments!
LikeLike