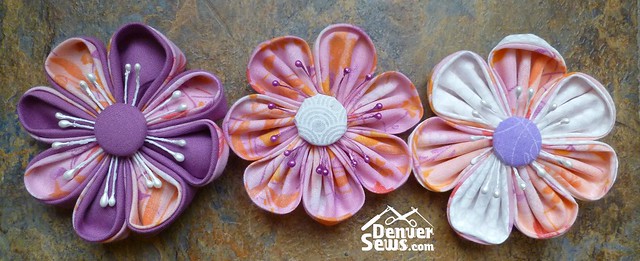
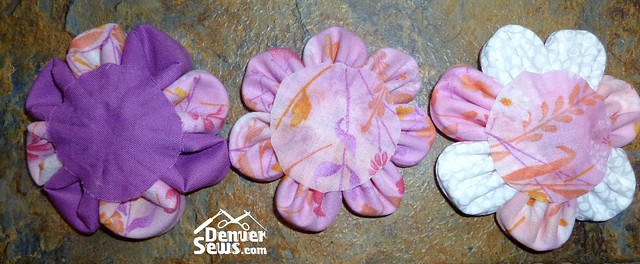
I love flowers and origami and fabric (of course) so it is natural for me to be drawn to flowers made from fabric using origami techniques. I learned how to make Kanzashi flowers perhaps a more than a year ago just following tutorials such as this one. The flower on the left above was created using what I call the traditional method of fabric folding. It was a little more time consuming than I expected at the time and I soon lost interest.
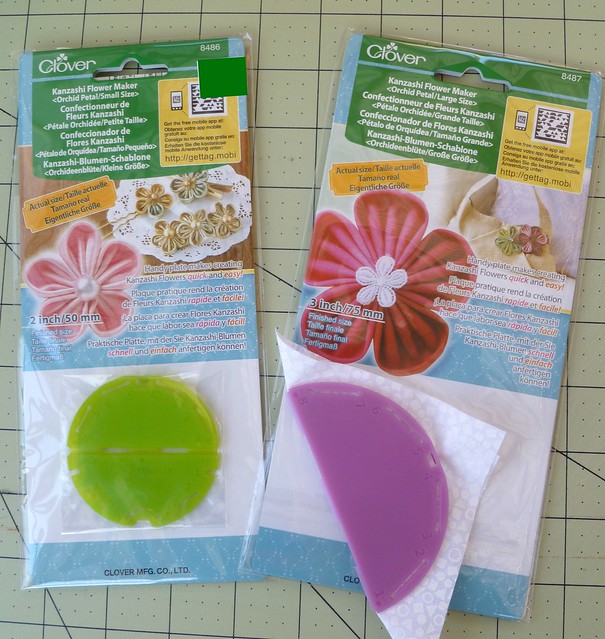
On my latest trip to Hobby Lobby, I purchased these Kanzashi flower making tools from Clover to see if they could restore my interest in making flowers.
They are extremely easy to use. You just take a square-ish piece of fabric and lay it on top of the round plastic tool, right-side facing towards the tool. You fold the fabric into the tool and the tool will latch closed (if the fabric is not too thick). Trim the fabric around the edge. Now following the numbered needle openings, you sew through the tool and the fabric. If you’re doing it correctly, the thread will fall into the channels between the needle openings. Open up the tool and pull the thread tight, forming a single petal of your flower.
Chain together 5 or more petals together to form your final flower. Stitch your last petal through your 1st petal to better secure the whole thing and knot the end. The instructions provided with the tool are very clear. The two flowers on the right were made with the tool.
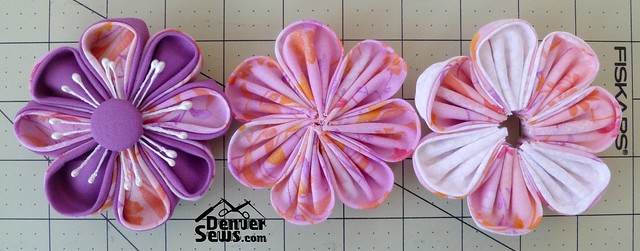
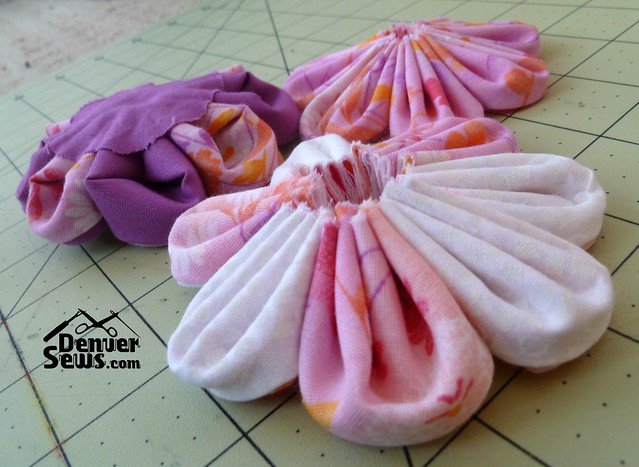
These flower petals are actually very different than those created using the traditional technique. You can see that they Clover variation has several ridges within the petal and the traditionally made petals are smooth. If you flip the petals over, you can see that the Clover petals are a little more wedge-shaped than the traditionally made petals, likely because there is just less fabric bulk.
I like to give the flower some stability by gluing a round piece of fabric on the back side. And you need to finish the front, of course, with perhaps a button. I added some stamens, too, which I like very much.
Double-Fabric Flowers
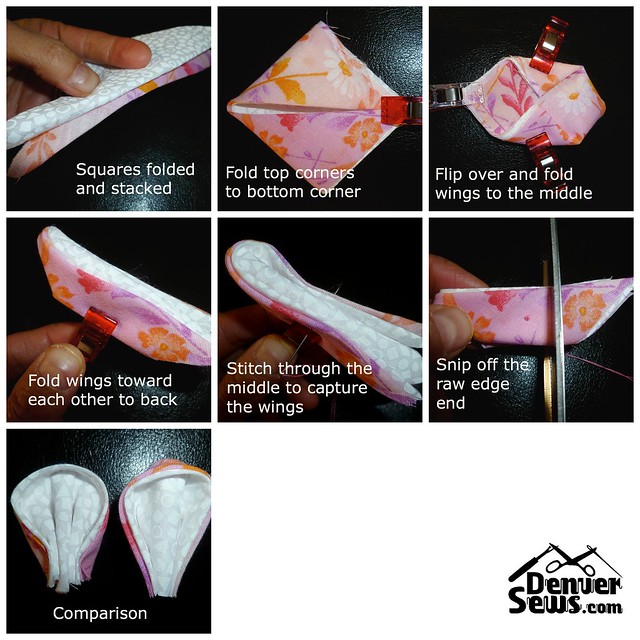
If you want to make two-colored flowers, you need to do the following with your Clover tool. You need to take your two pieces of fabric and gently fold them in half, with right-sides out. Stack them and place them inside the folded edge of the Clover tool. Cut and stitch as before. You will need to keep track of which fabric was on top and which side of the tool was up when you added the fabric to the tool. In my example, I messed up my sequence, but didn’t bother to fix it.

In the traditional method, you need to make your first fold (square to triangle) separately for each fabric, then stack and fold as usual. It’s a little easier to keep track of which fabric is on top of the petal using this method.
Either way you choose to do it, fabric flowers can be a nice embellishment for any number of things. Both methods take little time to complete. There are other petal types you can make both with fabric folding and with other Clover tools. The rounded petal, however, is always my favorite.
FREEBIE Offer! On May 1, 2014, I will choose one person from the list of commenters on this post and offer him/her a choice of any of the three Kanzashi flowers I made for this post. After a successful retrieval of that person’s mailing address, I will place said flower in the mail and off it will go! Contributors to this blog will sadly be ineligible to participate.
Update: A winner has been selected! It is TinaLou. I have sent you an email, Tina, and will send you your selected flower.

They are so lovely! I’ve made several different types of fabric flowers but now I want to learn to make these! 🙂
LikeLike
Lovely; I especially like your addition of the stamens too. I read through the tutorial; the Clover kit is THE way to go. These would be great dressing up a summer handbag!
LikeLike
Interesting. The original, time-consuming, one has separate stamens while the others give the semblance of stamens due to the folding. The fabric choice is crucial to making flowers, don’t you think? I agree with katboulder that any of these would be great as a brooch, especially on a straw hat.
LikeLike
Lovely! I’d include a firm stabilizer plus a safety pin to the circle on the back and use it as a brooch or pin it to a straw hat. This is so pretty for Easter and springtime!
LikeLike