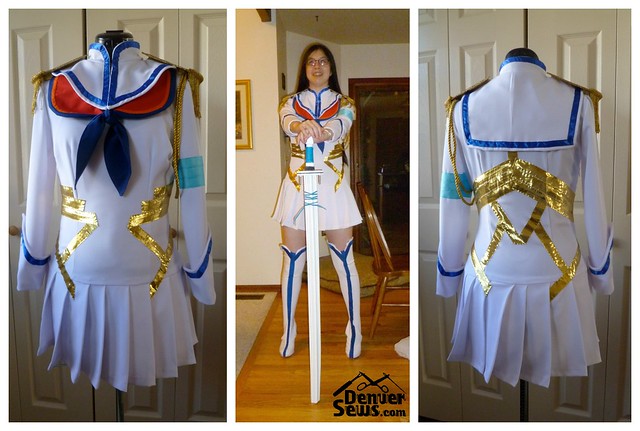
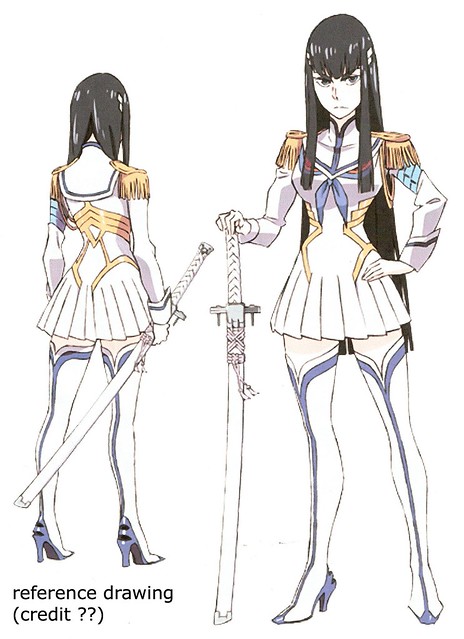
This is the third cosplay outfit I’ve made for my daughter. I only had 2 weeks to pull it off. Thankfully my husband took a keen interest in helping with this one and we were able to complete it the night before she was to wear it! It is Satsuki from Kill La Kill. Don’t ask me what this is as I have no idea. You’d have to ask my daughter. She did tell me, however, that the outfit is supposed to be alive! This is the drawing she gave me that we worked from (sadly I don’t know who to credit for it):
My husband signed up to make the sword, epaulets, hair clips, and leggings. I made the dress, yoke, and eyes.
Dress
The starting point for the dress was McCalls 6355:
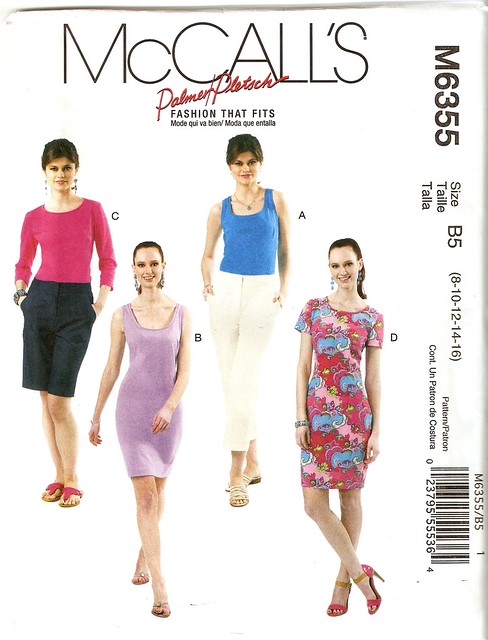
I made a muslin of view C (top with long sleeves and higher neckline) with a small bust adjustment and had my daughter try it on for fit. I should have moved the bust dart up about an inch, but didn’t think to do so. The sleeves were a little tight across the upper arm (she couldn’t lift her arms) so I ended up widening that part of the sleeves. I also added the side zipper which is an option. The fabric for the dress was a bright white polyester gabardine from Hancock Fabrics.
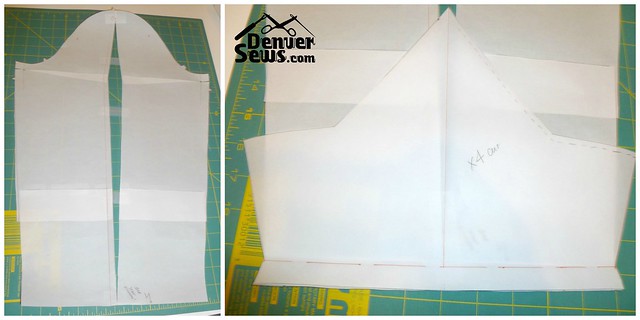
For the skirt, I made a very long rectangular section of pleats, much like this:
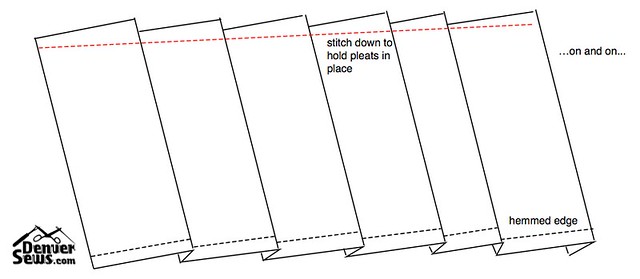
I then stitched the pleats onto the bottom hem of the top, careful to try and hide the seam where I would need to close the skirt in the back.
I also had to add special cuffs to the sleeves. Here is the pattern I drafted. You can see where I widened the sleeve towards the top.
I stitched down a blue ribbon along the top of each cuff before sewing the cuff to the end of the sleeves. I also added light blue ribbons to the mid-upper left arm before sewing the sleeves to the bodice.
To complete the dress, I had to add the gold ribbon. I did this after I had completed the yoke (so I knew where yoke would fall on the dress). I ended up hand-stitching the gold ribbons onto the dress and it was probably easiest and fastest to do it this way. I went through 18 feet of 7/8″ ribbon!
Yoke and Eyes
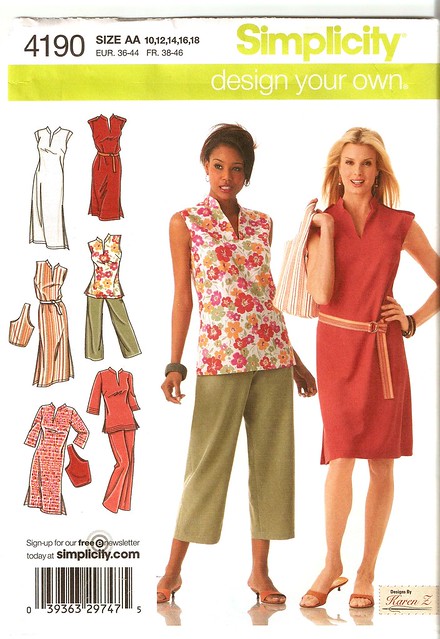
The starting point for the yoke was Simplicity 4190 that I already had in my stash. It has a mandarin collar which is what I needed.
I added about 3/4″ to the height of the original collar piece and used the bodice pieces to get the neckline and shoulder lines. Here are the pattern pieces I created for the yoke and collar.
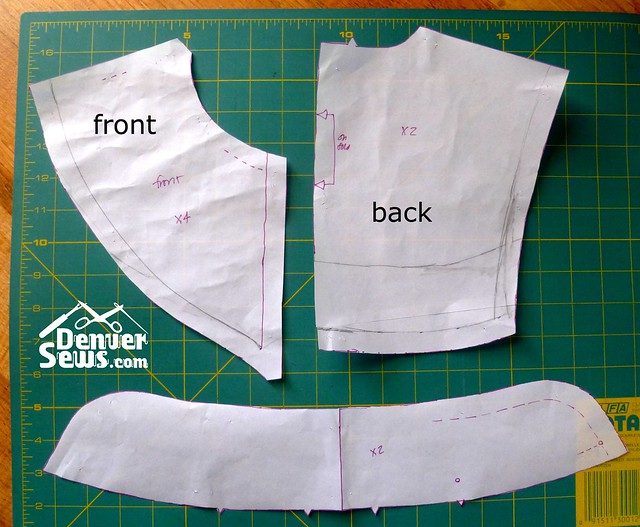
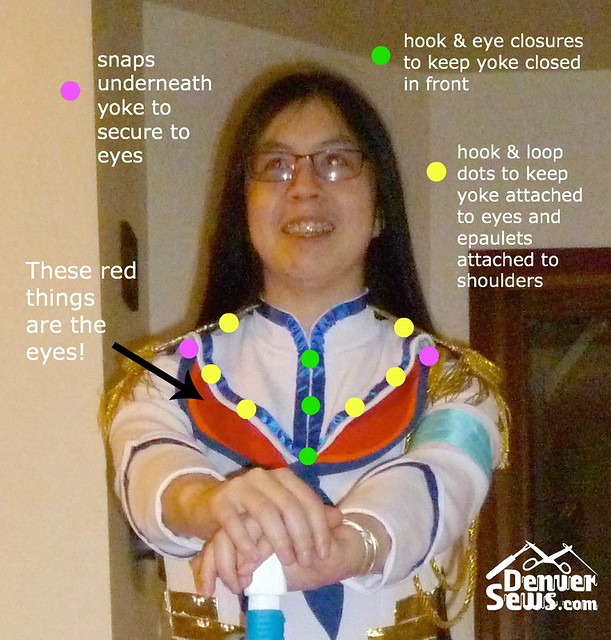
I made two of each piece. I sewed the yoke front and back to the collar. I repeated for the second set of pieces. I then took the two completed yokes and sewed them right sides together along the edge, leaving a hole for turning in the back. I turned the yoke and pressed it. I then sewed blue ribbon along the edges of the whole shebang. Turning the ribbon at the corners was not easy and it didn’t come out very neat.
In the end, the yoke didn’t lay flat and, if I did it again, I would need to modify the front yoke pattern. I also need to make it a little deeper in the front.
For the eyes, I created the following pattern pieces. Blue fabric is needed for the background and the tie. Orange is next followed by red on top. I used a “value” fabric I found at Hancock Fabrics for the blue and some quilting fabric I had for the orange and red.

The blue pieces were all doubled, sewn right sides together and inverted. The orange and red pieces were applied to the blue pieces before the aforementioned step. I applied the orange/red pieces by turning the edges under and top stitching.
Leggings
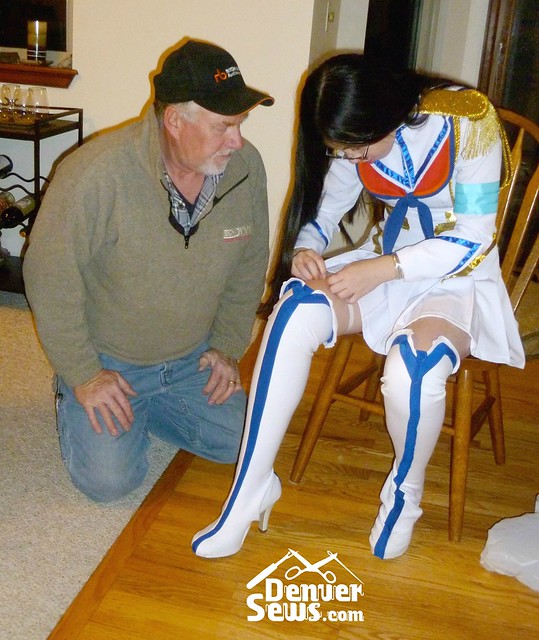
My husband designed and sewed (mostly) the leggings. He used swimsuit fabric in white and blue (for the stripes). He started by having my daughter wear the heels. He wrapped her shoe and foot with newspaper and duct tape. He then cut the mold off of her foot. He also had to split the toe to get the duct tape pattern to lay flat.
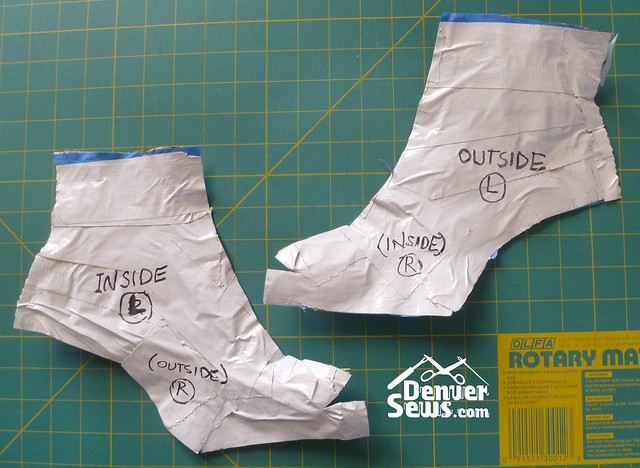
He started out making a pattern such that there would be only one piece of fabric per leg, wrapping from the back to the front of the leg, pinching the fabric behind the ankle. But it turned out to be much easier to split the pattern into two pieces.
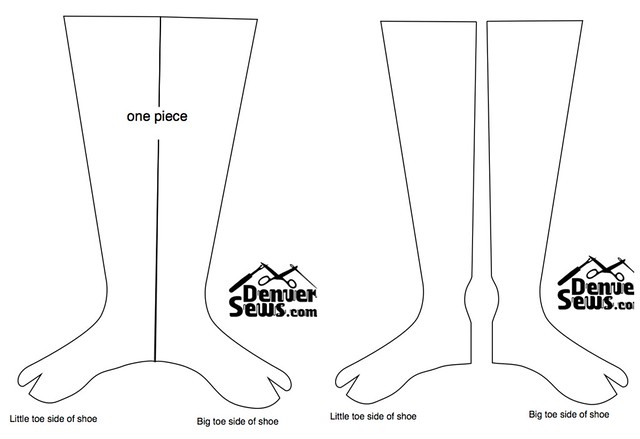
He made sure that the top of the leggings were wide enough for my daughter’s mid thigh.
He cut several long strips of blue swimsuit fabric. The blue strips were used for the length of the leggings and also along the tops. He started applying the strips and sewing the leggings together and I finished it.
The bottom of the leggings were taped to the sides of the shoes with double-sided carpet tape. He ended up having some extra fabric that he had to gather and tape down under the shoe with some duct tape.
The top of the leggings needed some help staying up and staying close to my daughter’s legs, so we used double-sided fashion tape to tape the tops to her legs.
Epaulets
My husband made the epaulets and the rope. He used some gold costume fabric, gold fringe, gold rope and some heavy cardstock (like a cereal box). He cut out the shape he wanted from the cardstock. He then created a rectangular pocket from the costume fabric (right sides together and then inverted) and slipped the cardstock into the pocket. He then top stitched the curved end of the epaulet (through fabric and cardstock) and trimmed closely to the stitching. He used hot glue to seal the end.
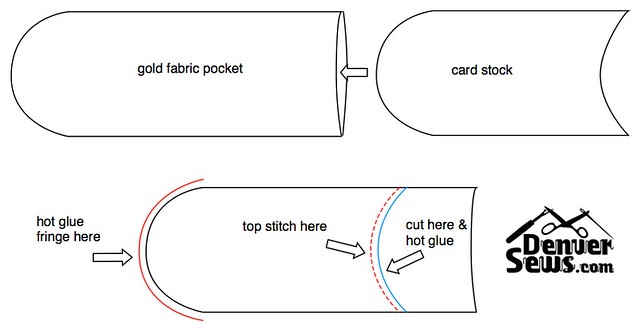
He used hot glue to attach the fringe to the rounded edge of the epaulet, letting the top edge of the fringe sit a little above the plane of the epaulet.
The rope was simply hot glued together into two loops and hot glued underneath one of the epaulets (the one worn on the left arm).
Sword Scabbard
My husband also made the sword scabbard for the costume. He used wood trim, wood, metal rods, some blue shoelaces and some leather cording. Three pieces of decorative wood trim were glued and tacked together to form the scabbard. It was topped with a leather-wrapped wooden handle, then detailed with shoe lacing to mimic the artist’s design. A threaded metal rod was inserted into the scabbard and up into the handle for strength. Two metal dowels were attached to complete the detailing. The whole thing was spray painted with white epoxy enamel before the shoe laces and leather cording were applied. I also believe a grinder, sander, drill press, and adhesives were used.
Hair Clips
Thankfully my husband noticed one last detail for the costume – two hair clips that look a bit like wings. He simply cut out the wings from some white cardstock and glued them to some hair clips.
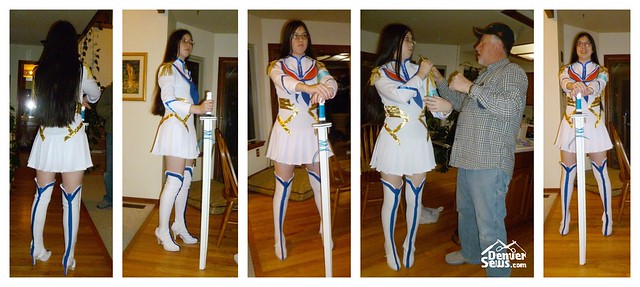
Putting it All Together
Getting the whole costume together in one piece took some additional last minute work. Here are some of the details:
Here is the final product
What an awesome collaboration with my husband! I’m so proud of the work he did with the scabbard and with all of the sewing and design on the leggings and epaulets. He saved me from some serious last minute panicking. The next cosplay event is in September, so I think we can take a breather now!

What a fun first choice! Just remember, if you’re going to a convention, check their rules on swords and such. Many don’t like actual metal, or will require you to enact certain safety precautions. I wish you luck and fun on your first build!!
LikeLike
Woah it’s amazing, where die you put the zipper?
LikeLike
Did you sew the skirt and the top together? I’m making this cosplay outfit myself right now and I’m not very experienced with cosplay. So I was wondering how did your daughter put the dress on? If you put any zippers, where are they? Thank you!
LikeLike
Yes, I did sew the skirt and the top together. I just made a long rectangular section of pleats and stitched it to the bottom hem of the dress. There is a zipper in the center back also. Good luck with your outfit!
LikeLike
This is amazing! I wanna cosplay as Satsuki for Halloween and this will be so helpful! Thank you!
LikeLike
I’m thinking of making a Satsuki cosplay in the coming months and finding this post has been amazingly helpful, thank you!
LikeLike
You are some pretty cool parents, love it
LikeLike
Awesome and inspiring! Thanks for sharing!!!
LikeLike
great job – my daughter loves Kill La Kill and we’re inspired by your efforts to try this too!
LikeLike
Thanks! It was definitely the most difficult cosplay we’ve tried making so far!
LikeLike
When are you going into the costume making business you are great! If I ever need one I’m coming to you lady. This outfit is beautiful.
LikeLike
FABULOUS!
LikeLike
Wow, Lynne, you and your husband make an unbeatable team of costumers! With each cosplay outfit I think “Lynne can’t possibly top this” and each time you do! Your daughter is incredibly lucky to have 2 such talented parents!
LikeLike
What a great family project!
LikeLike